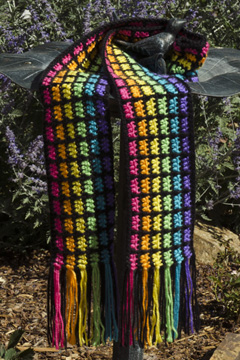
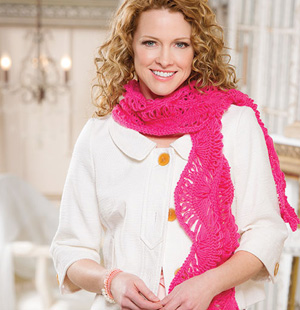
I’ve been busy designing lots of scarves this past 6 months and I’ve had a blast with them! I have one of the patterns ready for your crocheting pleasure. This scarf is called “Easy Rainbow Scarf” because it’s an “easy” pattern and because of the rainbow colors I used to crochet it! I just love rainbows, don’t you? Here’s a photo of the scarf:
Easy Rainbow Scarf
As you can see, the scarf is completely reversible, thanks to the special stitch worked in the black rows. This scarf, as shown, measures 4 ½” wide x 54” long, plus the fringe. However, the size is adjustable in width by working more or less rows and in length by working more or less repeats across the rows. So you can make your scarf whatever size you desire!
I used 6 colors (plus black) of Caron Simply Soft yarn to make this scarf, but you can use as few as 2 colors to make your scarf, if you wish. I used worsted weight yarn for this scarf, but feel free to use a heavier or lighter weight yarn instead to make your scarves. This is a great pattern for using up scraps of yarn, since only 25 yards of each color are required (for each colored strip in the scarf), plus 175 yards of black, to make the scarf the size shown. You can use whatever colors you like to coordinate with your outfits, coats or jackets.
This scarf is quick and easy to make. The skill level is “easy”, so if you haven’t been crocheting for very long or simply want an easy pattern to make, this scarf fits the bill!
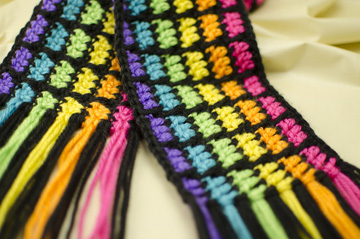
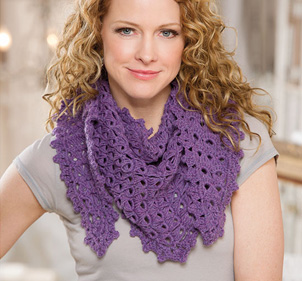
Easy Rainbow Scarf close up
If you’re new to working more than one crochet stitch in a pattern, have no fear! The pattern is easy to follow and includes full instructions for making the scarf with the fringe. It also includes close-up photos of the scarf and fringe, instructions and step-by-step photos for working in the back bump of the foundation chain, making a Long double crochet (Ldc), starting a row (joining) with a sc or a hdc and making the fringe. And there are no yarn tails to weave in, since the tails are included into the fringe!
If you already know how to make a chain, single crochet, half double crochet and double crochet, as well as how to read and follow a crochet pattern, you’re ready to make this scarf. If you’re eager to learn something new and enjoy making new, unique projects, it’s time to get started on this fun scarf today! And Christmas is coming, so this is the perfect time to get started on those Christmas gifts for the loved ones on your list!
This pattern is available right here at The Crochet Architect as an instant PDF download for $4.95. And, as always, I’m available to answer any questions you may have about any of our patterns while you’re making the items. If you find a mistake, please let me know right away so I can correct it. I strive to create fun, error-free patterns for your enjoyment!
Have you ever attended a conference that was so inspirational and fun that you wanted to go back every year? Well, I have. Let me tell you about the CGOA Conference that was held in Manchester, NH last month, from July 23 through July 27.
First of all, I taught 3 classes there (Shuttle Tatting, Symbol Crochet and my Faux Tatted Necklace). All 3 classes went great and my students were very eager to learn! A few of my students actually finished their projects in class or during the conference! And two of my shuttle tatting students really took off with their shuttle tatting! Here are photos of some students and/or their projects:
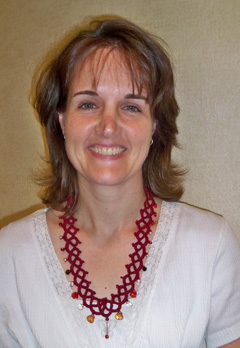
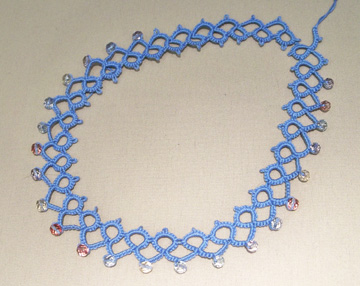
Jennifer Ryan with her Faux Tatted NecklaceJuanita’s tatted necklace
Jennifer Ryan is modeling her Faux Tatted Necklace that she finished during that 3 hour class. Isn’t her necklace beautiful? This necklace is actually crocheted to look like it’s tatted. Check out Jennifer’s website if you’d like to see some of her fabulous designs and photos of the yarn bombing at the conference! Jennifer headed up the yarn bombing and it was amazing! If you don’t know what a yarn bombing is, it’s a special display of crocheted pieces that are wrapped around stationary items, such as benches, poles, etc. The yarn bombing was wonderful, thanks to Jennifer’s hard work!
The light blue necklace was made by Juanita. This is a real tatted necklace, not a faux tatted crochet necklace. Juanita had it almost done on Sunday after taking my shuttle tatting class on Thursday. She really took to tatting like a duck takes to water! Juanita took my Faux Tatted Necklace class, too, and finished that necklace shortly after the class.
One of my tatting students wrote a short blog post about learning to tat. You can read Lindsey’s blog post and see pictures of her finished and/or in-progress tatting projects here.
I’m very proud of all my students. They all learned the subject of the class, whether it was shuttle tatting, faux tatting or symbol crochet. They each worked at their own pace and understood what I was teaching them. I had a blast teaching and enjoyed meeting all of my students! They were fabulous!!!
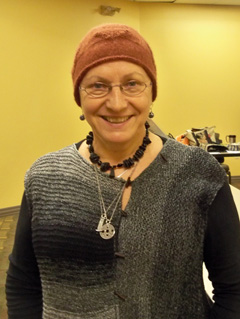
When I wasn’t teaching classes, I was taking classes. Since I learned to knit last summer, I decided to take 2 knitting classes this time. Both teachers were excellent. The first knitting class I took was “Russian-Style Continental Knitting” by Galina Khmeleva. Obviously, Galina is Russian! She had some fantastic stories and her laid back style of teaching was refreshing! I learned a few things in that class that will help me with my knitting, including an easier and faster way to cast on stitches with the long tail method (I was doing it the hard way before, but not anymore!). Here’s a picture of Galina:
Galina Khmeleva
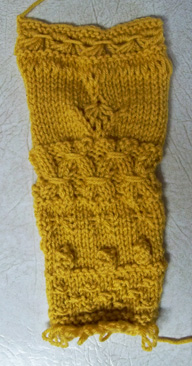
The 2nd knitting class I took was by Michelle Hunter. It was called “Spice Up Your Stitches”. Michelle is/was an elementary school teacher and it showed in her fabulous teaching method, which left no one behind and kept the whole class on task! She did a lot of demonstrating and encouraging, which was wonderful! I learned many different stitches and stitch patterns in that class. I’m even using one of them already to design a knit cowl with some gorgeous yarn! Here’s a photo of the swatch I made in Michelle’s class:
Knitting class swatch
I haven’t blocked it and I don’t intend to block it, since it’s just a swatch for learning purposes. As you can see, I learned many new knitting stitches and techniques in Michelle’s class, including bobbles.
Now, lest you think that’s all I did at the conference, I’ll tell you about the other things I did. I took the Wednesday morning event called “Get Your Geek On”. There were a bunch of us there discussing various “geeky” things about crochet, such as how we hold our hook, yarn, etc. It was fun!
On Wednesday afternoon, I was one of 3 presenters at the first CGOA Masters Day (it was half a day, but you get the idea). We talked about the CGOA Masters program in general, reviewed some swatches, talked about gauge, reviewing your own work, organizing Masters portfolios, as well as joining smoothly, finishing off and weaving in ends neatly. We had a great turnout with around 30 attendees. They were all eager to learn more and get their questions answered. I think it was a big hit!
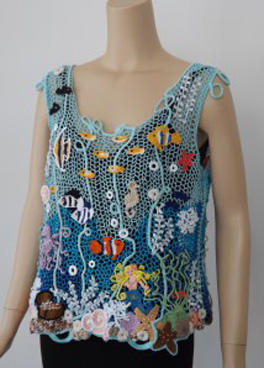
On Wednesday night, I was one of 3 judges in the CGOA Design Competition. The other 2 judges were Karen Manthey and Jenny King. There were 82 original, inspirational entries and it was sometimes hard for the 3 of us to agree on the first, second and third place winners in each of the 5 categories. To see a list of the winners and photos of their winning entries, check out this blog post on Doris Chan’s website. Doris Chan heads up the design competition. She works tirelessly and does an amazing job of organizing everything before, during and after the conference. Thank you so much, Doris, for all of your hard work! The grand prize winner was by Dot Drake again this year. Here’s a photo of her gorgeous top:
2014 Design Competition grand prize winning entry by Dot Drake
There were tons of fish, a mermaid, seashells, an octopus, a seahorse and lots more in this fabulous crocheted top. The photo doesn’t look quite as good as the actual piece up close and personal!
On Saturday morning, I attended the CGOA Board meeting, since I’m the secretary on the CGOA Board of Directors. It’s always nice when we can have our board meeting face-to-face instead of through conference calls! The CGOA Board members make decisions on how to improve CGOA and where we should be heading each year. It’s an honor to be on the Board and to help steer CGOA in positive directions! This past year, we’ve updated the CGOA website to add crochet videos and to update the look of the website with a new banner, which I had the privilege of creating for CGOA.
On Saturday night, we had our banquet and fashion show. I enjoy modeling in the fashion show and being part of the “behind-the-scenes” of the models backstage!
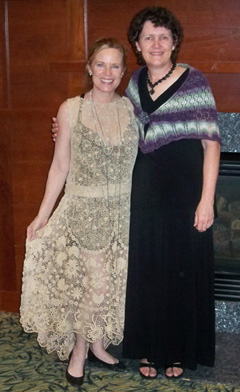
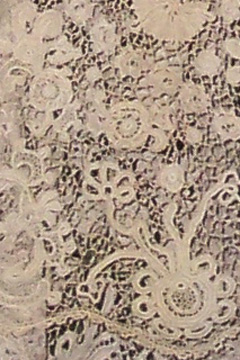
I met 2 wonderful ladies at the conference: Samantha and Kristin. I also met a lot of new people to me in my classes (both the classes I taught and the classes I took). I love meeting new people. That’s one of the nicest things about the conference. And we all speak the same language of crochet!!! Here’s a photo of Samantha wearing an amazing vintage crochet dress at the CGOA Banquet/Fashion Show and a close up photo of some of the stitching in this amazing dress:
Samantha & me after the CGOA banquetclose up of Samantha’s vintage dress
All in all, it was a fantastic conference. No, not everything went perfectly. When does it? But we all enjoyed ourselves and learned more about crochet by attending.
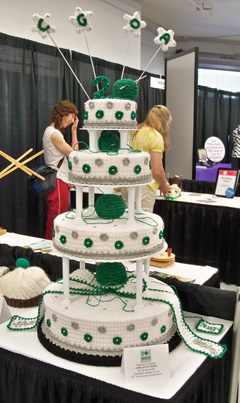
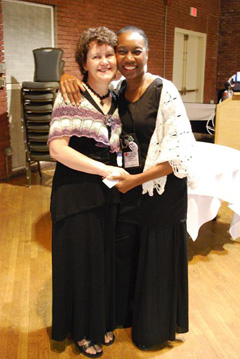
I would be remiss if I didn’t show you the beautiful tiered cake that one of my mentees, Carlotta Craig, crocheted for CGOA’s 20th Anniversary this year! Isn’t this fabulous? Here’s a photo of Carlotta and me, too. She is one very talented and humble lady!
Carlotta’s fabulous CGOA cakeCarlotta and me at CGOA banquet
Next year’s CGOA Conference (aka: Knit & Crochet Show) will be held in San Diego! I can hardly wait!!! My husband and I used to live there back in the 80’s, in our “BC” days (before children). We had a little sailboat and sailed around Mission Bay on some weekends. My brother and sister-in-law still live in the area and my mother-in-law lives just 2 hours north of San Diego. It’ll be great to see all of them again (who can resist staying longer to get together with relatives?)!
I hope you’ve enjoyed this glimpse into my week at the 2014 CGOA Conference. I hope you’ll be able to attend the conference soon. You won’t regret it!!! For more information about the Crochet Guild of America (CGOA), check out the CGOA website here.
The winner has been drawn for the free copy of Tammy Hildebrand’s new book, “Crochet for Baby All Year”. Congratulations to Karen H. for winning this book! I know you’re going to love it!
Thank you to everyone who entered this giveaway. Stay tuned for more book reviews, crochet news, new crochet patterns and tutorials coming soon.
I’ll be taking a break from blogging for a few weeks. I’m heading to the CGOA Conference in Manchester, NH next week. The conference is always so much fun! I’ll be teaching 3 classes (2 crochet and 1 shuttle tatting). I’m also going to take 2 knitting classes to learn more about knitting and improve my knitting skills. I had my first 2 knitting designs accepted for publication 2 months ago. You’ll be able to see them sometime next year when they’re published (designs are always kept “secret” until they’re published).
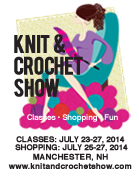
Knit and Crochet Show
To read all about the CGOA Conference (aka: The Knit and Crochet Show) and to see what goes on there, check out this link.
Who doesn’t LOVE babies? And if you’re a crocheter, I’m sure you love crocheting for babies as much as I do (or maybe even more)! My 3 sons are all grown up and I’m looking forward to having some grandchildren in the near future (hint, hint!). When my grandchildren start to arrive, you can bet that I’ll be crocheting baby hats, blankets, booties and outfits for them! But for now, I continue to crochet other things and once in a while I sneak in a baby project for a relative’s or friend’s new baby!
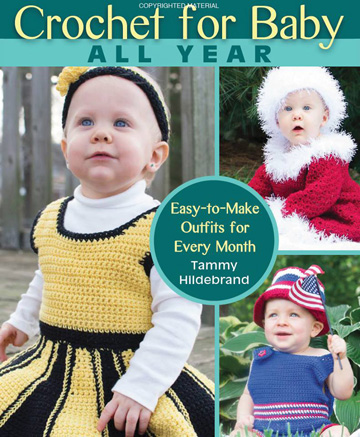
I’m pleased to review Tammy Hildebrand’s brand new book, “Crochet for Baby All Year” by Stackpole Books. It’s 120 pages long and retails for $21.95 in the US ($25.95 in Canada). You can see all the projects in the book here.
Crochet for Baby All Year front cover
This book is fabulous!!! It’s full of outfits for babies from birth up to 18 months. There are 20 designs in the book with 1-2 different outfits for boys and girls during every month of the year. The photos are adorable, as are the outfits and the babies in them! Tammy even used her granddaughter, Willow, as one of the models! How cool is that?
Here are a few of my favorite outfits and photos in the book:
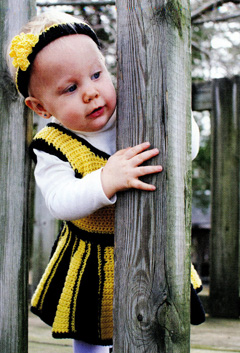
This is the “Varsity Cheerleader Dress & Headband” that is pictured on the front cover of the book. This is a different photo of that dress and I think it’s just “priceless”!!!
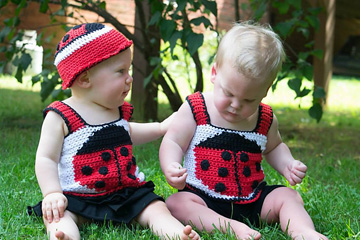
This is the “Scarlet Beetle Tank Top & Hat”. You can see that Tammy designed this set to be worn by a boy or girl. I think it’s adorable!!!
This is the “Stanley the Stegosaurus Costume”. What little baby boy wouldn’t love to wear this for Halloween or any time of the year? There’s a pink dinosaur costume named “Stella” for a baby girl, too.
As you can see, there are some absolutely adorable baby outfits in this book! I hope you’ll take a look at this book at your local craft store or online and consider adding it to your crochet library soon. We can never have too many crochet books, just like yarn, right?
To celebrate Tammy’s new baby book, I’m giving away a free copy to one lucky winner (in the US only, please). Just leave a comment on this blog post to enter the contest. You’ll need to be a registered user on this site in order to leave a comment. To do that, just go to the “Login” tab at the top of the page, then to “Register” in the drop down menu. Fill out the form and submit it. I don’t do anything with your registration. It’s just a layer of protection to help cut down on “spam” comments on my blog. If you’d like to follow my blog and receive an e-mail when a new blog post is published, then please subscribe to my blog.
I’ll pick the winner of Tammy’s baby book on July 17th and will post the winner’s name here.
Do you know what Wiggly Crochet is or is it one of those crochet techniques that you’ve never heard of before? Have you tried to do Wiggly Crochet, but haven’t been successful? I have a new tutorial for you on how to do Wiggly Crochet. I think you’re going to LOVE it, just like I do!!!
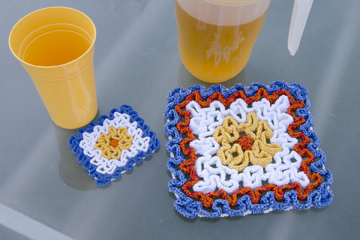
Here’s a sample of a few projects done in Wiggly Crochet:
Wiggly Flower Hot Pad & Coaster
Can you see how this hot pad is 3-dimensional? Not all crochet techniques do that, but Wiggly Crochet does!
I learned to do Wiggly Crochet over 10 years ago and I’ve enjoyed it tremendously ever since then. I’ve designed a bunch of Wiggly Crochet projects, too. And I have a friend to thank for introducing me to Wiggly Crochet. Thanks so much, Vicki!
To read about how I learned to do Wiggly Crochet and to learn how it’s done so you can enjoy it, too, check out my new Wiggly Crochet tutorial here.
Well, the month of June has come to an end. I hope you’ve enjoyed the Round Robin blog tour with Robyn Chachula, Ellen Gormley and Jenny King. I haven’t personally taken any classes from these 3 talented crochet designers and teachers, but I’ve met all of them at CGOA Conferences in the past. They’re all extremely nice and are fun to be around! I hope I get a chance to take a class from each of them in the future!
The giveaway contest has ended and the winner has been chosen at random. Since I’m not as technologically savvy as some other people I know, I do things the old-fashioned way when it comes to picking a winner for my contests. I type the name and e-mail address of each entrant, print it out, cut out the names, fold them, place them in a container (this time it was an old Cool Whip container) and have my husband pick one at random! It works for me and it’s fair for everyone.
So without further ado, the winner is….. Amy (felicitea)! Congratulations, Amy! I’ll be e-mailing you shortly to let you know how to claim the Annie’s class of your choice!
I hope everyone has a wonderful month of July. I’ll be flying to Manchester, NH to teach 3 classes at the CGOA Conference in July. One of the classes is shuttle tatting. The other 2 classes are symbol crochet and my faux tatted necklace. I’m also taking 2 knitting classes to learn more about knitting and to improve my knitting skills and knowledge. I still have a little more to learn about crochet, but not as much as I have to learn about knitting! I sold my first 2 knitting designs to a publisher this month, which I’m very excited about. They’ll come out next spring in a book (that’s all I can tell you about them at this time). I have 2 knitting designs that I’ll be self-publishing soon, too, as well as many new crochet designs that my husband and I photographed over the last 2 days.
Take care everyone and I hope you’re staying cool this summer!
The last guest blogger I have for you this month is Ellen Gormley. She’s one very talented designer, as are all of my guest bloggers this month! I had the pleasure of teaching Ellen how to do Bruges Lace at a past CGOA Conference and she’s really taken off with it! Go Ellen!!! I’ll let Ellen tell you all about her new Annie’s class! And don’t forget to read all the way to the bottom of this post for another chance to win the Annie’s class of your choice!
Hi, I’m Ellen Gormley, Editor of Crochet! magazine, and I was WRONG. I admit it. I can admit I was wrong, here among friends, right? I was wrong about the difficulty of crochet lace.
Ellen Gormley’s Learn to Crochet Lace class
Back in my first days of crochet, way before I made it my career, I would not have ventured into Broomstick Lace or Hairpin Lace. Why expand into more lace and tools when there is so much to be done without?
The truth is, I think as a new crocheter, I was intimidated by Crochet lace. All that loose yarn, and the big loops that could so easily become jumbled and unruly. Simply keeping count of traditional stitches and learning shaping seemed like a big enough task. I was wrong, it’s not that hard. The learning curve is SHORT. I’m talking like 20 minutes. In 20 minutes of practice with each skill, Hairpin, Broomstick, and Bruges Lace, you can gain tremendous comfort with the techniques.
Gentle Waves Hairpin Lace Scarf
Why should the knitters have all the fun getting to use more than one tool at a time? And Bruges Lace, you don’t even need anything special, just ONE crochet hook. So if you aren’t ready add more tools to your tool bag, start with the satisfaction of Bruges Lace first.
Once a crocheter has learned the basics of crochet (Check out my Learn to Crochetonline class!) and maybe learned how to crochet with beads, (Check out myCrocheting with Beads online class!) it might be fun to branch out into Crochet Lace!
Broomstick Lace Shawlette
In my BRAND NEW Annie’s online class I demystify the tricky juggling of a hairpin loom and the broomstick along with the winding path of Bruges lace all in one class! There are 2 projects for each technique and many lessons for you to see exactly how to get a handle on the tools and methods.
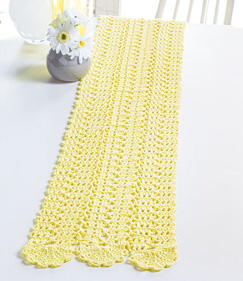
Sunbeam Bruges Lace Table Runner
As a designer, I learned these techniques because there weren’t many patterns for them, so I figured I could be more marketable with Bruges, Hairpin and Broomstick patterns. As a crocheter, the three techniques are just so much fun and rhythmic that I see a whole new world of possibilities.
I’m thrilled that Ellen has done a class on Bruges Lace, Broomstick Lace and Hairpin Lace. These are all fabulous crochet techniques and I hope you’ll enjoy learning them.
Here is your last chance to enter to win the Annie’s online class of your choice. Just leave a comment on this blog post to enter to win. I’ll pick one lucky winner at the end of the month. Good luck everyone and happy crocheting!
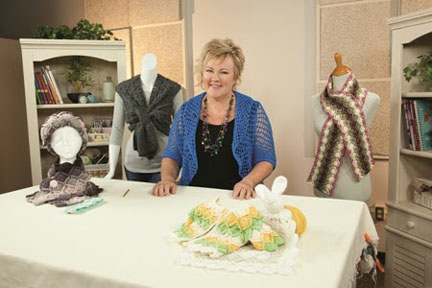
I have a guest blogger again this week. It’s Jenny King, who I met at a CGOA Conference sometime in the past 12 years (I can’t remember exactly which year it was)! Jenny has a fantastic crochet class on Annie’s and I’ll let her tell you all about it! Be sure to read all the way to the bottom to enter to win a free Annie’s class!
Jenny King in her Bavarian Crochet class
G’day my name is Jenny King and I am an Australian crochet addict!
Let me come visit and sit down with you and show you just how to do Bavarian crochet. Yes, at your place. In this Annies online class you will feel like I am there. I will do what the Mother and daughter from Bavaria had endeavoured to do in Australia and that is how to create the beauty of Bavarian crochet without need for translation. You will love it and you will become addicted.
I walk you through the process slowly and repeat myself so much that you may nearly get sick of hearing my Aussie accent telling you to pull through 2 and pull through 2. I am grinning ear to ear as I say this to you.
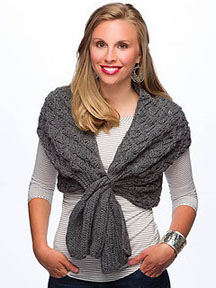
Bavarian Wrap
We start with a headband working in a simple strip to demystify the stitch and its 2 row repeat. Although this class is taught in USA crochet terms I couldn’t help but tell you how to do it in the terms used by the rest of the English speaking world so no-one gets left out. So if you live in the United Kingdom, South Africa, New Zealand or Australia you will be able work along with me as well.
I originally wanted to call it this the Mystery history stitch as the origins of this amazing stitch eluded me for over 15 years of thorough searching. I even took samples to USA to consult with the experts. Funnily enough all searches led me back to my own state of Queensland, Australia. You can hear all the history as I explain the stitches.
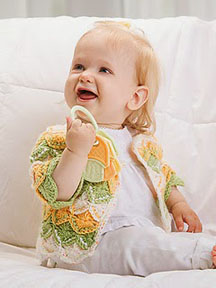
Baby Crop Cardigan
I have simplified this original Mother and Daughter design and instead of only working it in a square I have experimented to make all manner of shapes . Let me show you how to do this stitch in a long strip as a scarf, as a decorative edging on slippers, and finally extend your skills to create a top-down seamless baby jacket, and nearly everything else in between.
I should warn you though that Bavarian crochet is just delightful and you may become addicted. It can be worked in any color combination of your choice or you can experiment with the wonderful textured stitch if it is done in just one color as in the wrap vest in charcoal. That is just Yummy.
See you soon at your place. I can’t wait.
Jenny
So now you know something about Jenny’s Bavarian Crochet class. To learn more about Jenny’s class, just visit the Annie’s website here. To learn more about Jenny King, visit her website here.
Now, as promised, here is the information about my giveaway of a free class from Annie’s! To enter, just leave a comment on this blog post. I’ll pick the winner at random at the end of this month and will announce it right here (and I’ll send the winner an e-mail, too). There are so many great classes at Annie’s! To see all of the classes offered, check them out on the Annie’s website.
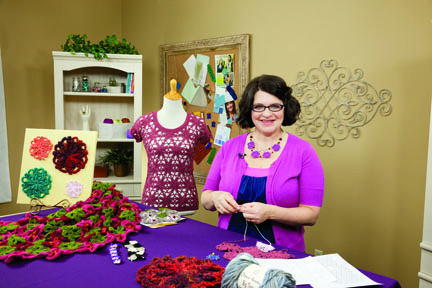
Today I’m featuring a guest blogger who has been in the crochet business for many years. Please welcome Robyn Chachula, who will be talking about one of my favorite things to crochet with thread: JEWELRY!
Robyn’s Jewelry class
I love jewelry. I love big bold funky statements to delicate classic beauties. I never feel truly dressed until I am wearing a matching necklace. My kids have other ideas. In steps crochet to my rescue. Instead of worrying about yet another “mysteriously” missing necklace my daughter borrowed or another being used as a teething ring by my son; I know I can fix all. With a few quick techniques, I know I can whip up overnight any ring, bracelet, or necklace for any outfit. So no more stress about ruined favorites, instead my little pumpkins are just giving me more opportunities to crochet!
Flower Motif Necklace
Before I started crocheting jewelry, I thought I would need a ton of equipment and tools to get a true professional look. Boy, I was mistaken. In class, I walk you through exactly what you need to make your perfect accessory. And most of them are probably sitting in your yarn bag or toolbox right now. We will talk about a few tools that you might want to get after you get completely hooked, but for the most part your main tool will just be your hook.
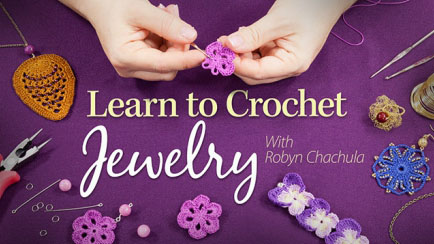
Learn to Crochet Jewelry class at Annie’s
The most important tool I try to stress is understanding crochet patterns. Whether you are looking at a modern stitch dictionary with all the directions completely listed or an antique crochet leaflet with just some diagrams; I want to make sure you are totally in control. In class we will de-mystify crochet diagrams and sharpen our skills at reading patterns. We go through learning patterns and diagrams so you can grab any stitch dictionary and be able to turn an edging you love into a bracelet or a motif into a ring.
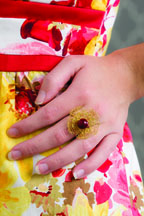
Golden Petals Ring
What do I want you to make jewelry out of? Anything. In class, we talk about all materials from basic crochet thread, to thin gauge wire, to leather and hemp; and even end with yarn. The materials do not make the jewelry, you do. So we talk about how to dress up or down the material you are working with. One basic way is using metal chains, jump rings, and beads to connect your crochet together. In just a few steps, I show you all you need to know to attach your beautiful crochet together into fantastic jewelry. One word of warning, is the jewelry techniques I show you in class are so simple it is very easy to slip into another hobby and love every minute of it.
The best part of creating and making jewelry is it always cheers up my day. Any day I get to crochet for a few minutes is great. To be able to then wear something I made the next day, even better. Hope you will join me in Learn to Crochet Creative Jewelry class. I truly can’t wait to see what you can create!
To find out more about Robyn’s “Learn to Crochet Jewelry” class, see all of the projects in the class and watch the introduction video, visit Annie’s website here.
To learn more about Robyn Chachula, visit her website here or her blog here. I think Robyn will be holding a contest to win her class this month, so visit her blog and enter to win! Her class looks absolutely fabulous to me!
I hope you’ve enjoyed my guest blogger, Robyn Chachula, today. I’ll have a guest blogger during each of the next 2 weeks, so check back to read what my other 2 guest bloggers have to say about crochet!
Leave a comment on this blog post to be entered to win my Annie’s class, “Crocheting With Thread” (or another Annie’s class of your choosing). During the next 2 weeks, you’ll have 2 more chances to enter to win the class (one chance per week). I’ll pick the lucky winner at the end of this month. So if you’d like to learn to crochet with thread, this is the class for you!
During the month of June, I’ll be participating in a “Round Robin” with 3 other crochet teachers from Annie’s online video classes. During the next 3 weeks, I’ll have a special “guest” blogger (once a week)! The teachers who are participating in this guest blogging tour, as well as their class/classes are:
Ellen Gormley: “Learn to Crochet”, “Crocheting With Beads” and her new class coming very soon, “Learn to Crochet Lace”
Jenny King: “Learn to Bavarian Crochet”
Robyn Chachula: “Learn to Crochet Jewelry”
Susan Lowman: “Crocheting With Thread” and “Beginner’s First Doily”
I’ve met these wonderful crochet designers/teachers (Ellen, Jenny and Robyn) at CGOA Conferences over the past 12 years. They’re very friendly and talented ladies! We all enjoy sharing our crochet knowledge with others through our crochet classes and patterns!
We’ll each be sharing some information about our classes, crochet techniques, inspiration and more during the next 3 weeks in June. Plus, each of us will be giving away a FREE class to a lucky winner at the end of the month, too! So when you read the “guest” blog post on my website from one of the other crochet teachers during the next 3 weeks, check out her website and enter to win!
You’ll also have a chance during the next 3 weeks to enter the giveaway on my website to win my crochet class, “Crocheting With Thread”. Just leave a comment in the comments section at the bottom of the “guest” blog post during that week’s post to enter. I’ll pick one lucky winner and will post the winner’s name on June 30th.
Please check back each week to read the guest blog post from one of the other 3 crochet teachers (or subscribe to my blog to receive an e-mail every time I post a blog entry so you don’t miss any blog posts). You’ll have many chances to win a free crochet class from Annie’s during the month of June!