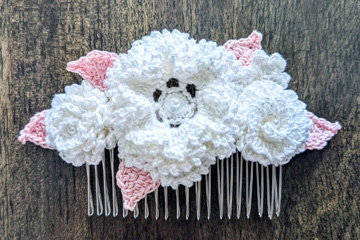
Crocheted Bridal Hair Comb

Bridal Hair Comb for DIL-to-be

My oldest son is getting married next month (woohoo!) and I wanted to help out with the wedding somehow. My soon-to-be daughter-in-law said she wants to wear a hair comb for the wedding and she texted me a photo of an expensive one to see. I asked if she’d like to have me crochet one for her and she said “yes”! So I did some online research and found more photos of hair combs that are really pretty for inspiration. She didn’t want one that was too big; just something pretty and functional. So I started looking for good flower patterns to use (instead of taking extra time to design my own flowers).

My future DIL picked out the crochet thread colors she’d like me to use from my stash of crochet threads. Since I didn’t have a lot of the iridescent white thread for the flowers, I tried out some of the flower patterns with the pink thread first to see how I liked them. Once she and I picked out which ones we liked best, I crocheted the top 4 flowers in white with size 10 crochet thread and a 1.5mm hook. Then I crocheted some pink leaves to go around the edges.
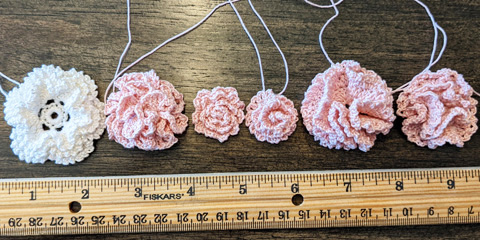
Possible flowers for hair comb

These are the flower patterns I used:

Large flower in center: 6-petal frilled rose with 3 layers from page 14 in the book, “The Go-To Book for Irish Crochet Motifs” by Kathryn White (book #871388), published by Annie’s. A digital edition of this book is available (as of this blog post) here.

Medium flower on left:

free pattern for Fluffy Carnation Crochet Flower from https://daisycottagedesigns.net/freeflowercrochetpattern/

Medium flower on right:

free pattern for Carnation from Yarnspirations https://www.yarnspirations.com/aunt-lydias-bridal-nosegay/ALC0101-025078M.html

Tiny flower on right:

free pattern from https://persialou.com/make-crochet-flower-hair-combs/ This is a great blog post about how she made a hair comb. She used hot glue to attach her flowers and leaves to the hair comb, but I sewed mine in place. Either way works!

I decided the iridescent flowers could use a little more bling, so I sewed a small iridescent white pearl bead to the center of each one (I don’t know what size I used because I just found some in my stash of beads!). Since the large flower in the center had a somewhat large hole in the middle, I used a little larger bead and added an iridescent sequin behind the bead to keep it in place. I used a package of iridescent sequins from my local Hobby Lobby. They worked out great!

Here is a quick, free pattern for the leaves that I made up off the top of my head:

Ch 8, sc in 2nd ch from hook, *hdc in next ch, 2 dc in next ch, dc in next ch, 2 dc in next ch, hdc in next ch, sc in last ch**, ch 2, sl st in top of last sc made to form a picot; working in free lps on other side of ch, sc in first ch (in same ch as last sc); rep from * to **; join with sl st in first sc. Finish off, leaving a long tail for sewing.


For the hair comb, I bought a package of 5 silver hair combs from Amazon. Here’s a link to the hair combs I purchased. Some of the teeth were a little bent when I got them in the mail, but they straightened out nicely with very little effort! And the metal is a really nice quality! They also come in black or gold, if you’d prefer another color/finish. These hair combs have 20 teeth. They also come in other sizes, with more or less teeth, which would make them narrower or wider. The one I used with 20 teeth is about 3” wide.

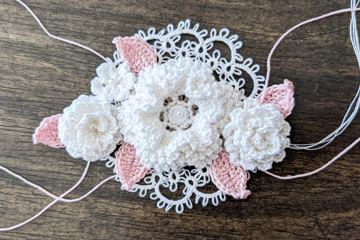
After I crocheted all the flowers and leaves, I arranged them a few times until my future DIL and I liked the arrangement. I also tried an arrangement with a tatted piece that I had made quite a while ago. It’s too frilly for my future DIL, but you might consider something like this for your hair comb.
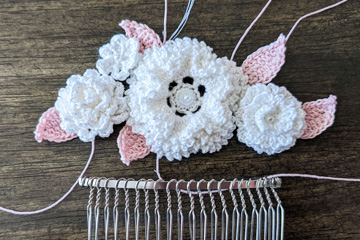
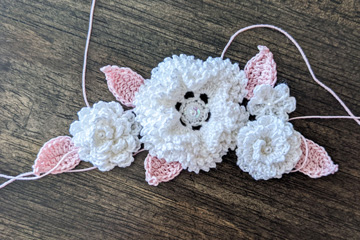
Trial flower arrangement

Another trial flower arrangement
Trial flower arrangement with tatted lace

Then I had to decide how I wanted to attach the flowers and leaves to the hair comb. I decided to buy an ebook of Irish Crochet patterns by Kathryn White from Annie’s (on sale), since there was a hair comb in that ebook (book #871106E). Here’s a link for that ebook.

While the hair comb in this book is lovely, it wasn’t what the bride wanted (I LOVE the doily in this book, so I’ll be crocheting that in the near future). However, I liked the way Kathryn attached the flowers and leaf sprays to her hair comb in the book, so that’s what I did. Basically, you wrap some extra crochet thread around the top of the hair comb between the teeth of the hair comb and secure the ends of the thread. That gives you a nice base of thread to attach the flowers and leaves to the hair comb. I actually sewed the leaves to the back of the flowers (not to the hair comb) after I sewed the flowers in place on the hair comb.

What do you think? Do you like this hair comb? What would you do differently?

I can’t wait to see my future DIL wearing this hair comb in her upcoming wedding to my son!

Happy crocheting,

Susan

Thermal Stitch Potholder Video

I’ve been wanting to film a video to teach the Thermal Stitch for quite a while and I finally have one for you. But first, a little background on how/where I learned this fabulous stitch.

I first learned the Thermal Stitch from Darla Fanton at the 2008 CGOA Conference in Manchester, NH. Darla is a great teacher and I learned a lot in that class. However, life got in the way and I never pursued doing anything with the Thermal Stitch.

Fast forward to around 2015 when a good crochet friend named Jackie showed me the thick potholder she had made from a free pattern on the internet. She shared the link to the free pattern (by Heather Tucker of Stitchery Project) and taught me the stitch (which I had somehow forgotten from Darla’s class). I was immediately hooked! I’ve been making Thermal Stitch Potholders ever since! They’re so easy to make once you learn where to insert your hook! It’s just simple rows of single crochet, which is pretty mindless (sometimes I need a mindless project!).

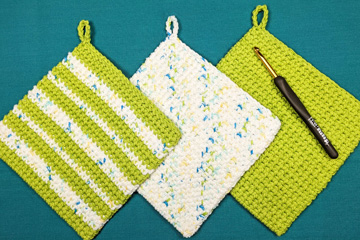
potholder
Thermal Stitch Potholder

One thing I changed in Heather’s pattern was the placement of the hanging loop. Heather makes her hanging loop at the bottom of the potholder. I decided I wanted to make my hanging loop at the top of the potholder. The reason for this is sometimes I want to make a hot pad without a hanging loop instead of a potholder. So I just don’t work the hanging loop at all. Since I changed Heather’s free pattern, I decided to type up my version of this potholder as a free pattern. You can download my free pattern here.

You can find Heather’s free potholder pattern (named “The Best Crocheted Potholder”) here.

The potholders are economical to make. When I see a sale on worsted weight cotton yarn, I stock up on it. This makes the potholders about $1 each, which I love!

These potholders make great gifts! I’ve given them to friends and family for Christmas and/or birthdays, as “thank you” gifts, and as wedding (or bridal shower) gifts, as well.

To learn the Thermal Stitch, watch my new YouTube video here.

I hope you enjoy crocheting these potholders as much as I do!

Happy Thermal Stitch crocheting,

Susan

Staying Safe, Entertained and Distracted During COVID-19

I hope this finds you and your loved ones doing well, both mentally and physically during the COVID-19 pandemic of 2020, no matter where you are in the world. I hope you’ve found some projects to crochet, knit, sew, etc to keep you busy, safe and mentally healthy during this trying time in all of our lives. Since my husband retired a year ago this month, our daily routine hasn’t changed that much. However, I know there are so many others whose lives have been turned upside down by this virus, the social distancing and the loss of their jobs (or the need to stay home from their usual work environment). The stress that can come during these times, even when we think we’re taking good care of ourselves, can be overwhelming at times. As for myself, I sometimes have waves of “fear of the unknown”, even without this current pandemic! When this happens, I often need to talk to someone (usually my husband) and pray that God will ease the fear in my heart and body. I pray that you’re taking good mental and physical care of yourselves and your loved ones during this challenging time in all of our lives.

Now for some crochet “eye-candy”!

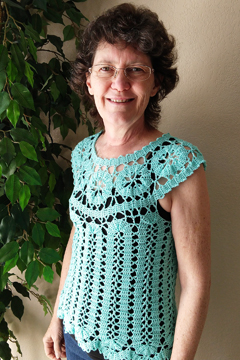
I’ve been staying busy with various crochet projects during the past 3-4 weeks of the COVID-19 social distancing. I’d like to share photos of 3 projects that I’ve crocheted during these 3-4 weeks. Since I’ll be teaching the techniques of Irish Crochet and Bruges Lace Crochet at the IOLI Convention in Mesa, AZ in July (as long as it doesn’t have to be cancelled due to the virus), I decided to crochet a Bruges Lace top. Here’s a photo of me wearing that top:

Bruges Lace Shell

As you can see, it fits me pretty well. Bruges Lace Crochet is a wonderful technique, made with narrow rows of crochet stitches (usually dc), called “tapes”. You can curve the tape around into various shapes, such as the circles in the yoke of this top and the long, narrow ovals in the body of the top. This pattern didn’t come with the lowest edge that you can see in this photo. When I was done with the pattern, I decided to add that round to lengthen the top slightly.

For this top, I used some yarn that was in my stash. I purchased this 100% acrylic yarn (it looks and feels more like cotton) at the 2015 CGOA Conference in San Diego, CA from the show floor vendor, Newton’s Yarn Country, located in Anaheim, CA. The pattern, called “Bruges Lace Shell”, can be found in the book, “Lacework for Adventurous Crocheters”, by Margaret Hubert. Amazon has the Kindle edition of this book for $11.99 here. This design is by Tatyana Mirer, who is a fabulous Bruges Lace Crochet designer! I won’t be teaching anyone to crochet a Bruges Lace garment in my IOLI class, but I’ll teach my students everything they need to know in the Bruges Lace Crochet technique to be able to crochet a Bruges Lace garment, if they so wish!

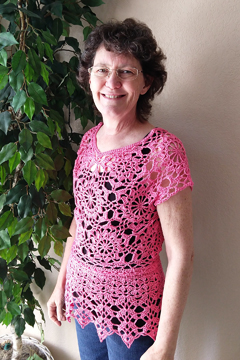
Here’s the 2nd garment I crocheted:

Andromeda Peplum Vest

This is a wonderful design! It’s called “Andromeda Peplum Vest”, and is designed by the very talented Doris Chan. You can find this pattern, along with many more, in her book, “Convertible Crochet”. Amazon has a Kindle edition of this book for only $7.99 here. I’ve had this book for 5 or more years and always meant to crochet this top, but never took the time to get started on it. Once I did, I found it a fun top to crochet! I used 9.2 oz/260 grams/6 balls of Patons Grace yarn, which is 100% cotton, for this garment. I had 9-10 skeins of this yarn leftover from editing crochet patterns for Rita Weiss and Jean Leinhauser many years ago and I’ve been wanting to make something with it for years! I’m very happy with how this top turned out!

Since I have a little “challenge” with gauge, I had to crochet the top part of this garment twice, once with the smaller G (4.0mm) hook and again with the larger #7 (4.5mm) hook. I tried the bodice on after crocheting all the motifs and it was somewhat snug, especially in the armholes. I knew I needed to make it larger or I wouldn’t be happy with it and possibly wouldn’t wear it, which would be a huge shame! I decided to rip out all the motifs and remake them (I was able to reuse most of the yarn because I could crochet the 5-sided motifs with the yarn from the 6-sided motifs without having to add more yarn, which would mean more ends to weave in!).

I learned something new with this pattern (besides getting and keeping gauge): what a “peplum” is! This top has 3 pieces: the top V-neck vest, the bottom “peplum” and the draw string that connects the two halves. I have a friend in CGOA who has made quite a few of these tops. Each one looks fabulous on her!

Here’s the 3rd project I made:

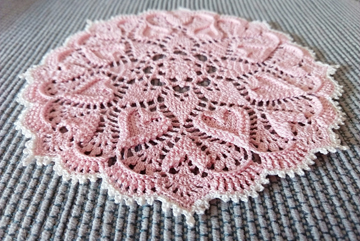
Sweetheart Soiree Doily

This is the “Sweetheart Soiree” doily, designed by Julia Hart of www.draiguna.com. This is a fabulous doily design with lots of texture, due to the use of post stitches. Julia doesn’t just use FPdc and BPdc in this doily. She uses 2-FPdc decreases, 3-FPdc decreases, 4-FPdc decreases, special FPdc decreases, 2-FPdc clusters, as well as 3-dc clusters and 4-dc clusters! With all of these special stitches, the doily has lots of visual interest and lots of beautiful texture! Don’t you agree?

I didn’t find enough light pink cotton crochet thread in size 10 in my stash for this doily, so I chose some size 20 pink thread instead: DMC Cebelia in #818 Baby Pink and what I think is Ecru (I don’t have the color number with this ball, so I’m just guessing at the color for it). I used a #10 (1.3mm) steel hook, also. I blocked the doily afterward to give it a nice, crisp look!

If you’d like to make one of these doilies for yourself or a loved one, you can find a pdf of the pattern for $1.00 on Ravelry here. Or you can find the pattern for free on Julia’s website here.

I enjoy designing my own patterns, but I also enjoy crocheting/knitting other designers’ patterns! I learn so much from making others’ designs, which helps me be a better designer, too!

As you can see, I’ve been keeping myself busy this past month during the COVID-19 pandemic. What have you been doing to keep yourself busy while staying at home?

Happy crocheting,

Susan

Another new Annie’s video!

Filet Crochet


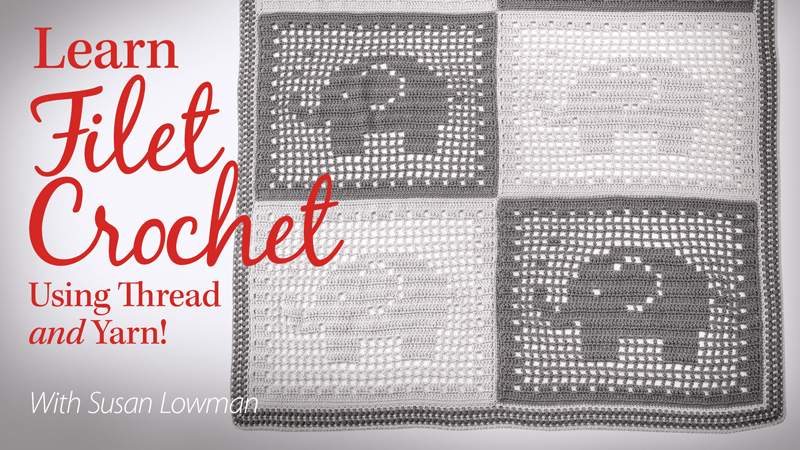
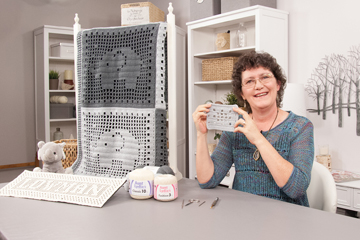
I have another announcement for you this month! It’s my newest Annie’s crochet video class: “Learn Filet Crochet Using Thread and Yarn!”.


Filet Crochet is such a great crochet technique! I’ve been doing Filet Crochet for several decades now! I’ve designed a bunch of Filet Crochet patterns and taught this technique at the CGOA Conference many times, as well as at the 2018 Interweave Yarn Fest. I LOVE Filet Crochet! You can crochet so many different kinds of things with it! You can combine it with other crochet techniques, as well.


Here are a few of the designs I’ve done over the years, some simple and others more complex:


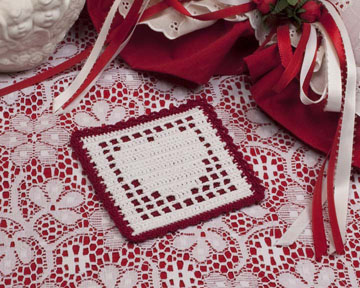
Filet Heart Coaster, published on TheCrochetArchitect website


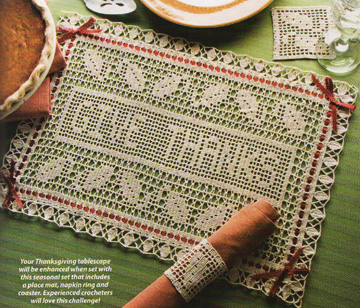
Give Thanks Placemat Set, published in Oct. 2008 Crochet World magazine


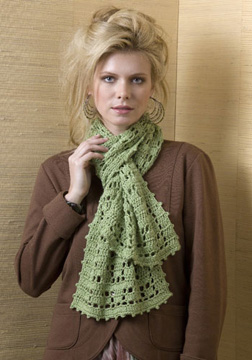
Europa Scarf, published by Caron Yarns


Filet Coaster from my Annie’s class, “Learn to Crochet With Thread”


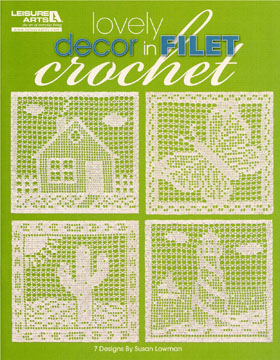
Lovely Decor in Filet Crochet book, published by Leisure Arts in 2010


If you’d like to see all of my published Filet Crochet designs in the past 20+ years, check out this Ravelry search. Most of these designs are done with crochet thread, but a few of them are done with yarn. If you’re interested in the Europa Scarf, which I designed in 2010 with Naturally Caron Spa yarn (a now discontinued yarn), you can download the free pattern here. You can also download several free Filet Crochet patterns on the Red Heart website.


No matter what you use for filet crochet, the technique is the same! It’s just the size of the yarn/thread and hook that makes the difference (and, of course, the pattern)!


This Filet Crochet video was filmed at the same time as my other new video, “Crochet ER: Fixing Damage & Mistakes”, which came out last month. You can read all about that video in my previous blog post here.


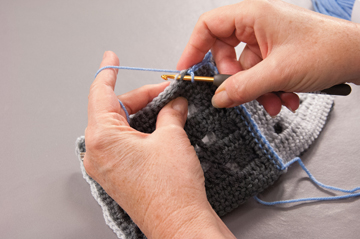
Here are a few photos from filming this new Filet Crochet video:


Filet Crochet set and swatch


Learn Filet Crochet set with projects


And here are the 2 class projects from my new Filet Crochet class that you’ll be able to make when you sign up for this class:


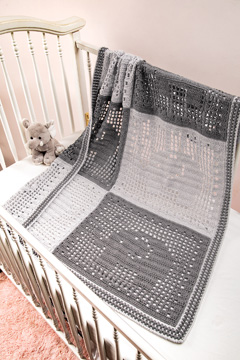
Filet Elephant Baby Blanket


Filet Name Banner


In this class, I teach how to work the closed mesh, open mesh and lacets that comprise Filet Crochet patterns. I also teach how to read and follow Filet Crochet charts, as well as how to calculate the number of chains in the starting chain for a Filet Crochet pattern that is only charted (not written). And I teach 2 ways to make your Filet Crochet mesh more square.


The first thing we work on in the class is a practice swatch. With this swatch, you will learn to work the open and closed Filet mesh, as well as lacets. You’ll also get practice following a Filet Crochet chart. Once you’ve mastered the swatch, you can move on to make either or both of the class projects: the Filet Elephant Baby Blanket and the Filet Name Banner.


The Filet Elephant Baby Blanket pattern includes written instructions and a Filet Crochet chart. In the video, I demonstrate how to make the elephant blocks, as well as how to join the blocks to create the blanket. There are 2 edging options, which are both demonstrated in the video, along with the special stitches used in each edging. Because this blanket is made with yarn, it’s a great way to learn to do Filet Crochet (without any intimidation that using crochet thread and small steel hooks might present!).


Seaming/joining blocks for Filet Elephant Baby Blanket


The Filet Name Banner pattern includes a chart for the whole alphabet, as well as the edging, so you can make any name or word you’d like for your Filet Banner. In the video, I demonstrate how to make your customized chart for the name or word you choose to crochet. Then I demonstrate how to crochet several of the rows, following your custom chart.


Making Filet chart for Filet Name Banner project


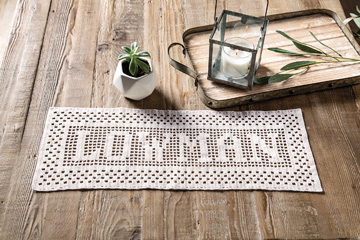
You can get creative with how you’ll use your Filet Name Banner. You may want to use it as is or mount it in some way. To give you an idea of how you may want to mount your banner, here’s a photo of another Filet Name Banner that I crocheted many years ago showing how I mounted the filet piece on some fabric and hung it on the wall with a painted wooden dowel:


Filet “Lowman” Banner


If you’re not comfortable using crochet thread and you’d like to learn to crochet with thread, you may want to check out my other crochet video class with Annie’s called “Learn to Crochet With Thread”. In this thread crochet class, my goal is to help you feel comfortable using crochet thread for your crochet projects. Who knows? You may come to love thread crochet as much as I do!


I hope you’ve enjoyed this look at my new Filet Crochet class for Annie’s! If you’d like to take a look at this video class, as well as watch the free class overview and introduction segments, check it out HERE (Note: This is an affiliate link, so if you click on this link and purchase the video through the link, I’ll receive a small commission to help compensate me for my hard work! It won’t cost you any extra to purchase the video through this link and I would appreciate your support!).


I hope you’ve enjoyed this look at my new Annie’s video class!


Happy Filet Crocheting,

Susan


Celtic Cable Crochet Book Review

Celtic Cable Crochet

Have you tried any textured crochet stitches before? You know, like a front post double crochet (FPdc), back post double crochet (BPdc) and similar stitches? I love the texture that can be created using these textural stitches! I’ve been using them for years. I used FPdc and BPdc in my Pediwick Scarf and Swanky Cowl designs.


Pediwick Scarf


Swanky Cowl


Just a few months ago, I came across a new book that uses a lot of textural stitches in it. It’s called “Celtic Cable Crochet” by Bonnie Barker, published by Interweave. I met Bonnie at a CGOA Conference many years ago. She’s a very talented designer and a super sweet person, too! Bonnie came out with her first book using textured stitches called “Contemporary Celtic Crochet” that was published in 2014 by Fons & Porter Books. To read my book review of that book, check out this blog post. Both of these books are fabulous for crocheters who love texture in their crochet projects!


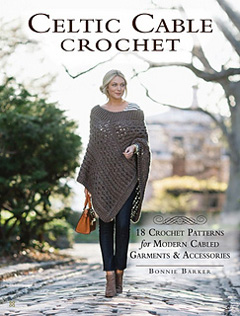
Anyway, here is Bonnie’s newest book, published in October, 2016:


Celtic Cable Crochet book front cover


As you can see by the cover, there are 18 projects in this book for garments and accessories. There are cardigans, sweaters, ponchos, cowls, wraps, scarves, wristers, boot cuffs, hats, bags and more in this book. Here are my favorites:


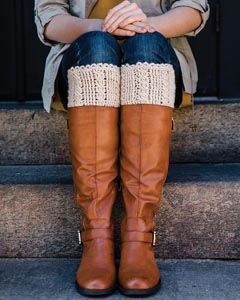
Cabled Boot Cuffs


These are the Cabled Boot Cuffs. They are made with DK weight yarn and come in 2 sizes: x-small/small and medium/large. They look like a lot of fun to make and wear! I haven’t crocheted or knit any boot cuffs, so I think this one may be put on my list of projects for 2017!


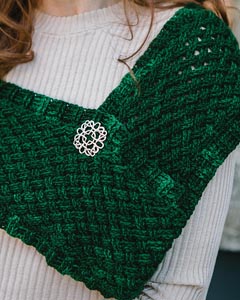
Emerald Celtic Weave Infinity Scarf


This is the Emerald Celtic Weave Infinity Scarf. This infinity scarf can be worn over your shoulders with a brooch or shawl pin. Or it can be doubled and worn as a cowl. I love cowls, don’t you? They’re so easy to wear and they never fall off like scarves!


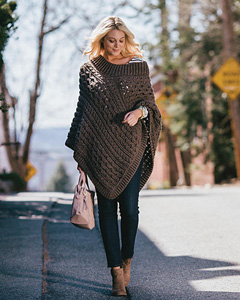
Lavena Poncho


This is the Lavena Poncho that is shown on the front cover of the book. It is made with worsted weight yarn. It looks so stylish to me! If you’re a poncho person, this one looks scrumptious!!!


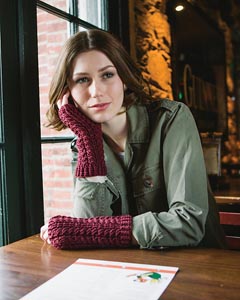
Satinees Wine Wristers


This is the Satinées Wine Wristers. They are made with superfine weight yarn. I love the color of this yarn and the texture of these mitts/wristers! They’d be a great addition to any outfit to keep your wrists warm in the winter! And mitts/wristers are quick projects to make!


Tic-Tac-Toe Messenger Bag


This is the Tic-Tac-Toe Messenger Bag. It is made with worsted weight yarn. The bag and strap are lined with fabric, which helps them keep their shape. If you’re not afraid of sewing machines, this bag would be quite stylish to wear!


This fabulous book has step-by-step instructions & photos for the textural stitches at the back of the book. Also, Bonnie has a Youtube channel with lots of videos for her designs and many of her textural stitches here. So, if you’ve never crocheted any textural stitches before, you’ll be quickly learning how to work them and will soon come to love textural stitches, as I and many crocheters already have!


I hope you’ve enjoyed this look at Celtic Cable Crochet. You can purchase this book on Amazon here or on the Interweave website here. To read about Bonnie and follow her designing career, check out her website here.


Happy crocheting,

Susan


Crocheting for My Grandchild!

crochet baby booties

As you can tell from the title of this blog post, I’m going to be a grandma! Yahoo!!! My husband and I are expecting our first grandchild, who is supposed to be a girl, at the beginning of June, which is quickly approaching! We are thrilled that we’re going to be grandparents! So in preparation for my first grandchild (granddaughter), I’ve been crocheting and knitting lots of things for her (that’s why I’ve taken some time away from designing lately)! Here are some of the things I’ve made:


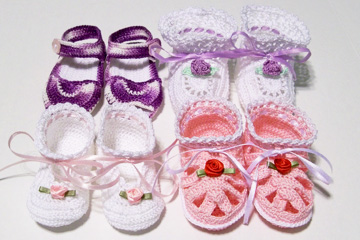
4 Pairs of Baby Booties and Sandals


I really enjoy crocheting baby booties and thread baby booties always look so adorable to me! So for the past few weeks, I’ve made these 4 pairs of baby booties and sandals. The patterns are all from a Leisure Arts book called “Booties by the Dozen”, by Kay Meadors. Here’s a photo of the front of that book:


Booties by the Dozen crochet book


Last year, after finding out that we’re going to be grandparents, I made a few other pairs of baby booties with yarn. Here’s a photo of those booties:


Baby Booties for my first grandchild


As you can tell, we didn’t know if it was going to be a boy or a girl at that time! According to the latest ultrasound from a few weeks ago, there is a 90-95% chance that it’s a girl!!! Since my only daughter is in heaven and I have 3 grown sons, a granddaughter is exactly what I was hoping to get (of course, it’s my son and daughter-in-law’s baby, but I’ll be one of her 2 grandmothers)!


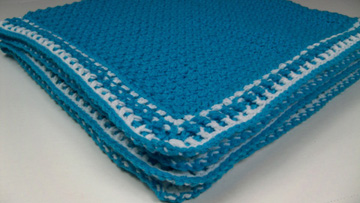
Here are 2 baby blankets that I’ve crocheted for her, too:


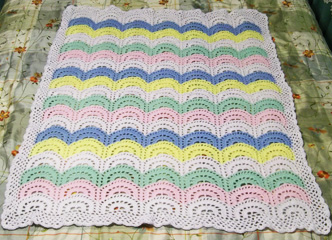
Baby Blanket by Mom and Me


Baby Blanket for my first granddaughter


The top blanket in pastels is the one that I finished for my mom after she passed away in February. It was a “labor of love” to finish it for her. You can read all about this blanket in my previous blog post here.


The bottom blanket is the turquoise blanket that I designed last year before I knew if it was going to be a boy or a girl. I think turquoise can be used for either one and it’s one of my daughter-in-law’s favorite colors! I used almost a full skein of Lion Brand Pound of Love yarn, which has 1,020 yards in it! The contrasting white sections in the edging didn’t take much yarn, though.


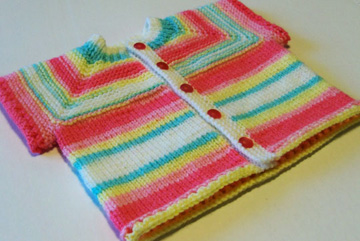
Here are a few sweaters that I’ve knit for the baby, too:


Knit Baby Sweater
Knit Baby Sweater


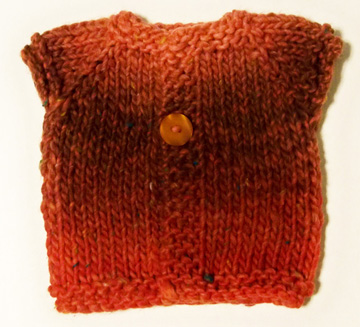
Baby's First Sweater
Baby’s First Sweater


The top sweater is knit with half of a skein of Lion Brand Ice Cream in color #206 Tutti Frutti. I really enjoyed knitting this sweater because of the colors of the yarn! And I have enough yarn left over for another sweater or possibly matching booties!


The bottom sweater is knit with half of a skein of Moda Dea Tweedle Dee that I had leftover from years ago (I don’t think this yarn is made any more, though). It’s a bulky yarn and this sweater knits up in just 2-3 hours (from the top down)! It’s a really quick project and I like the final sweater. My youngest son went to China in February and took this sweater, along with a couple of other baby items that I made, to my middle son and daughter-in-law for me. My daughter-in-law said that this sweater reminds her of ewoks from Star Wars! It doesn’t look like what the ewoks wore in the movie, but the colors do kind of look like ewok colors. If you’re a knitter and you’d like to knit one of these quick baby sweaters, you can find the free pattern on Ravelry here. It’s called “Wee Speedy”.


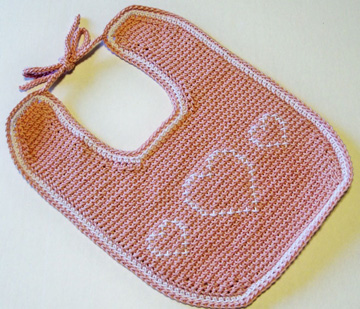
And here’s a bib that I crocheted for her from a pattern than I designed years ago:


Tunisian Baby Bib
Tunisian Baby Bib


This is a Tunisian baby bib. If you’ve never tried Tunisian crochet before, you should check it out! It’s a lot of fun! I find it rhythmic to do and the resulting texture lends itself very well to cross stitching on top of it!


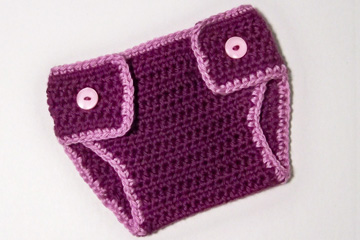
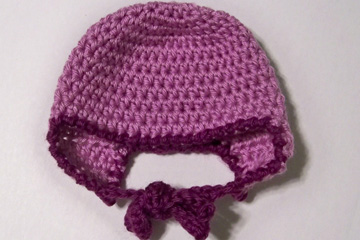
And last, but not least, here is a diaper cover and coordinating hat that I crocheted last year for her:


Crochet Diaper Cover


Crochet Baby Hat
Crochet Baby Hat


This diaper cover and baby hat were from the book, “Baby Brights” by Kathleen McCafferty. You can see that book on Amazon here. I have no idea how well this diaper cover will work, but my son and daughter-in-law are planning to use cloth diapers, so I may be making more of these, if they work out well for them.


I hope you’ve enjoyed this look at the things I’ve made (so far) for my granddaughter. Of course, I’ll share photos of her after she arrives (which will be in China because my son and daughter-in-law are living there and attending a Chinese university to learn Chinese/Mandarin). I’m planning to fly over there for the birth of my first grandchild, God willing! So until then, you’ll probably find me knitting and/or crocheting more things for our little “bundle of joy”!!! Yippee!!!!!


Happy crocheting,

Susan


More Skinny Scarves!

Since my last blog post, I’ve used up 2 more single skeins of yarn by designing 2 more “Skinny Scarves”! These are really fun to design and crochet! And they take almost no time at all!


I thought you might like to see my 2 newest skinny scarves, so here they are:


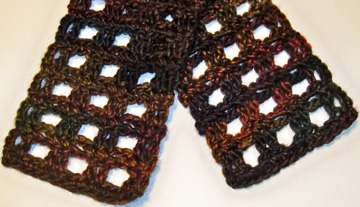
Windows Skinny Scarf


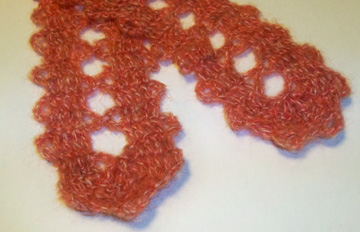
Bruges Lace Skinny Scarf


You’ll probably recognize the yarn that I used in the Windows Skinny Scarf. It’s the yarn that I showed you in my last blog post: Plymouth Yarn Stained Glazz. It’s a worsted weight yarn made of 51% wool and 49% acrylic fibers with only 99 yards in this skein, so I had to be careful what stitch pattern I used to make it long enough. This stitch pattern worked perfectly! I really like the colors in this yarn. I think it will coordinate with lots of outfits in my wardrobe.


The yarn that I used in the Bruges Lace Skinny Scarf is Berroco Cirrus. It’s 42% superkid mohair, 40% nylon and 18% merino wool extrafine. There are 114 yards in this skein of yarn. I really enjoyed working with this yarn (I like mohair yarn, but I realize that not everyone does)! It’s very soft!


These skinny scarves are lots of fun to make and I’m going to enjoy wearing them! They’re both about 4″ wide, so they’re the perfect width to wear as more of an accent than a functional scarf to keep you warm! But that was my intention for them: looks over function!


I’ll be shifting my focus for a little while away from designing. I’ll tell you why in my next blog post (in about a week).


Happy crocheting,

Susan


Crochet a Shawl for Less Than $5!

crochet shawl

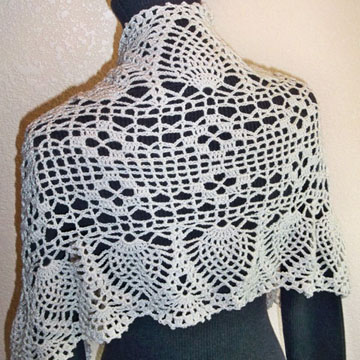
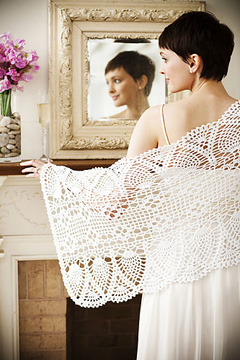
Are you looking for a crochet project that won’t break your bank? I have just the thing for you. Here’s my “Keepsake Lace Shawl” that was originally published in the May/June 2010 issue of Crochet Today magazine. The pattern is available for FREE through the Coats & Clark archives here:


Keepsake Lace Shawl
Keepsake Lace Shawl


In the past 3 weeks, I’ve crocheted 2 of these shawls with just one skein of yarn each from Michaels! The yarn is called “Loops & Threads Woolike”. It is a light fingering weight yarn with 678 yards in the skein, made with 85% acrylic and 15% nylon fibers. And the best part is it retails for just $2.99! Yes, you heard me right. You’ll get 678 yards for just $2.99 (plus tax)!!! Now that’s a great deal for yarn!


Here is one of the shawls I crocheted last week. It’s for my Mom for Mother’s Day:


Mom's Keepsake Lace Shawl front
Mom’s Keepsake Lace Shawl front


Mom's Keepsake Lace Shawl back
Mom’s Keepsake Lace Shawl back


To read more about this shawl, you can see my Ravlery project page here. If you’re looking for a relatively quick, inexpensive shawl to crochet, you might want to consider this shawl and yarn!


The original pattern is for a 60″ long shawl. This shawl is about 42″ long with 9 pattern repeats across. I started with a foundation chain of 251 chains so I wouldn’t run out of yarn (I knew I wouldn’t have enough yarn to make it the full length and I didn’t want to go buy more yarn). I think the length is very nice! This color of yarn is called “beige” and the other shawl I made was with the color “mauve” (which is much more like burgundy).


I really like this yarn AND the amount of yards you get for only $2.99 (or less with a 40% off coupon)! If you don’t have a Michaels store near you, you can always order this yarn through their website here!


I hope you’ve enjoyed this look at this crochet shawl pattern and this wonderful yarn!


Happy crocheting,

Susan
Perfect versus Good Enough

Have you ever been working on a crochet project and run into a mistake you made? All of us have (maybe not on every project we make, but on some of them). If the mistake is just a few stitches back, it’s an easy fix. But what if the mistake is many rows, rounds or inches back in your work? Now that’s more difficult and time-consuming to fix! Do you want to take the time to go back and fix that mistake, making the project take longer to finish or do you just want to finish up the project and ignore the mistake? I’ve been in this position many times and I don’t always make the same decision on what to do. I ask myself, “Does this project need to be perfect or is good enough sufficient?”


In my mind, the answer to this question lies in the time-frame that I (or you) have for the project and the intended use/recipient of the project. If this project is made for a family member or friend, I probably want it to be just about perfect. If the project is going to be photographed for a publication (such as in a crochet book or magazine), then I don’t want to have ANY mistakes in it. There is an unwritten Murphy’s Law that says, “If there is a mistake in a crochet project for photography, then that’s the exact spot where the photograph will be taken!” I’ve seen it happen before and it’s not a pretty picture (plus it can be confusing for those who are making that particular project because the project in the picture doesn’t look like what they’re making)!


What if the project is given to a charity and the person who will receive it won’t know who it came from? I guess it’s a matter of personal pride in your work or the ever-present “time constraint” that says “You don’t have the time to go back and fix that mistake; it’ll be good enough”. In my mind, the mistake isn’t as important in this situation and I can live with a mistake a lot easier than I can if the project is going to be photographed for publication. But it’s not always easy for me to leave the mistake alone because I’m a perfectionist (and a recovering perfectionist when it comes to housework, but that’s another story!).


How about errors in crochet patterns? Some designers come up with lots of patterns and quickly self-publish them or sell lots of designs to publishers for their books and/or magazines. They type up the pattern quickly and never proof-read their patterns. Then they move on to the next design and work on it at lightning speed! Well, I can’t work that way and I think that’s wrong (unless you’re the sole bread-winner in your household and need all that income). I think there should be more pride in what we do as designers and/or crocheters (or ask ourselves “Why am I a designer and/or a crocheter”?).


Being a perfectionist, as I am, has its good points and bad points. I don’t design as many projects as some other designers, but I design what I like and I hope others enjoy making my designs. I don’t want to have errors in my patterns, which often confuse those who purchase and make those designs, so I give my patterns my utmost attention to make sure they’re correct before I sell them.


Note: If you find a mistake in one of my patterns, please let me know so I can correct it and forward the corrected copy to everyone who has purchased that pattern. I strive for “perfect” patterns, but I’m only human and an error can creep in from time to time.


If you have a question about one of my patterns, please e-mail me and ask me your question(s). I love to help others understand crochet patterns and I learn a lot about how patterns can be interpreted differently. This, in turn, helps me write my patterns better! If you’ve purchased one or more of my crochet patterns and you like the way it’s written, please let me know (or write a review on this website). I like to know both the good and the bad!


So what do you do when you find a mistake in your crochet project? Do you go back and fix it? Do you leave it alone and say to yourself, “The Amish intentionally make a mistake in their handwork because only God is perfect”? Do you make the same mistake over and over to create a “design element” in the project? Do you hide the mistake by crocheting a flower and sewing it right onto the mistake?


How about when you find an error in a crochet pattern? Do you give up, ask a friend for help, or try to figure it out on your own? With the plethora of free crochet patterns available these days, there are lots of errors in crochet patterns, making it difficult and often frustrating to finish the project with enjoyment. It’s truly enjoyable to find and work with error-free patterns!


We’re all human and mistakes/errors happen. So how many mistakes/errors are “acceptable”? I think that answer is going to be different for different people.


I’d love to hear from you about how you deal with mistakes in your crochet projects and errors in crochet patterns! Let’s all learn and grow together!


Happy crocheting,

Susan
 

P.S. Voting is now open for The Crochet Awards! You can cast your votes here.
 

And Crochetville is holding their annual National Crochet Month Blog Tour again during the whole month of March (that’s just 2 days away now!). You can read all about the designers who are participating and the daily prizes here.
 

New Year’s Resolutions for Fiber Lovers!

Do you make New Year’s resolutions every year? What is your track record on keeping those resolutions? Like many people, mine isn’t so good! In the past, I’ve resolved to read one book per month, but since I’m not much of a reader, that doesn’t last very long at all! I’ve also resolved to exercise every day, but I’m lazy and I start skipping some days, so that one doesn’t last long, either (or gets modified to a more realistic resolution like exercising 3 times per week)! Why do we set such unrealistic expectations at the beginning of the New Year? I guess we want to improve ourselves in one way or another. That’s not a bad thing to do, especially when we realize where we’re lacking in our lives. Improving ourselves is a great goal and I think we should always strive for improvement! If we don’t strive for improvement, we stagnate and start smelling! Just kidding! But I think improvement in our lives is always a positive goal and I’m all for improvement in my life!


For our New Year’s resolutions in 2015, how about setting some more attainable goals, like learning a new craft or learning more stitches and/or techniques in a craft we already know? Now that’s a New Year’s resolution that would be easy for me to keep! How about you? And it would satisfy the goal of self-improvement, too!


So for my New Year’s resolutions for 2015, I resolve to learn more knitting and crochet techniques. I also resolve to finish more projects than I currently finish and to finish some of my UFO’s (for crocheters and knitters, UFO does NOT mean “unidentified flying object”, it means “UnFinished Objects”). If you’ll notice something about my goals, they aren’t terribly “specific” on how many new techniques I’ll learn or how many UFO’s I’ll finish up in 2015. So these goals are attainable (without being unrealistic)! I guess they’re more of a “guideline” than a goal, but that’s okay with me. At least I can strive for them!


I just did a search on Ravelry.com for UFO groups and there are lots of them! There’s even a group for procrastinating knitters (like putting off the seaming or knitting the 2nd sock)! I’m all in, since I’m a procrastinator, too! In fact, I have 2 books from the library on procrastinating, but I haven’t finished reading them yet! Dare I say that I’m procrastinating on reading them? Unfortunately, nobody has posted in that Ravelry procrastinators group for 2 years! I guess they’re all procrastinating about posting!!!


Don’t get me wrong: I finish lots of crochet and knitting projects every year (projects for publication and personal projects, too). I haven’t kept track, but I estimate I’ve finished 10-25 projects this year, ranging from small to large. Here are photos of a few of the published projects I’ve finished this year:


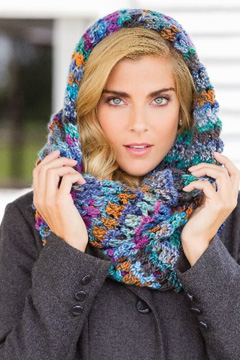
Nantucket Cowl from Dec 2014 Crochet World magazine

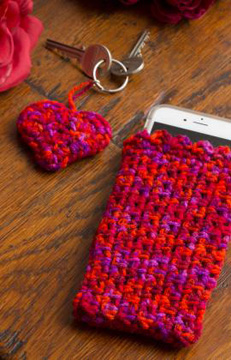
Easy Cell Phone Cosy & Heart-Shaped Key Fob from Red Heart UK website

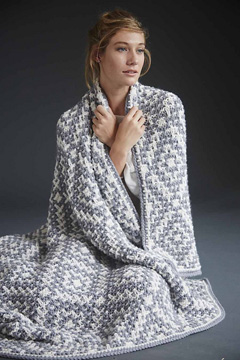
Mosaic Blanket (knit) from Vogue Knitting magazine Winter 2014/2015 issue


Each year, I start some new projects that I don’t finish (at least I finish more projects than I start, so it’s not ALL bad!). If I keep adding to my UFO’s pile, there will be too many to finish in my lifetime! So it’s time to get them out to decide which ones I should finish in 2015! I think I’ll organize them today or tomorrow and make some decisions on how/when to proceed with each one!


How about you? What resolutions are you making for 2015? Are you going to learn a new craft? Are you going to learn some new crochet or knitting techniques? Are you going to finish some projects before starting a new one? I’m definitely NOT going to say that I’ll finish ALL of my UFO’s before starting something new! I know myself and I’m very easily distracted by other things, like new projects! Plus I don’t like to set goals that I can’t keep, no matter how hard I try!


Whatever your resolutions (or lack of resolutions) for 2015, I wish you all a very Happy and Healthy New Year!


Happy crocheting (and knitting),

Susan