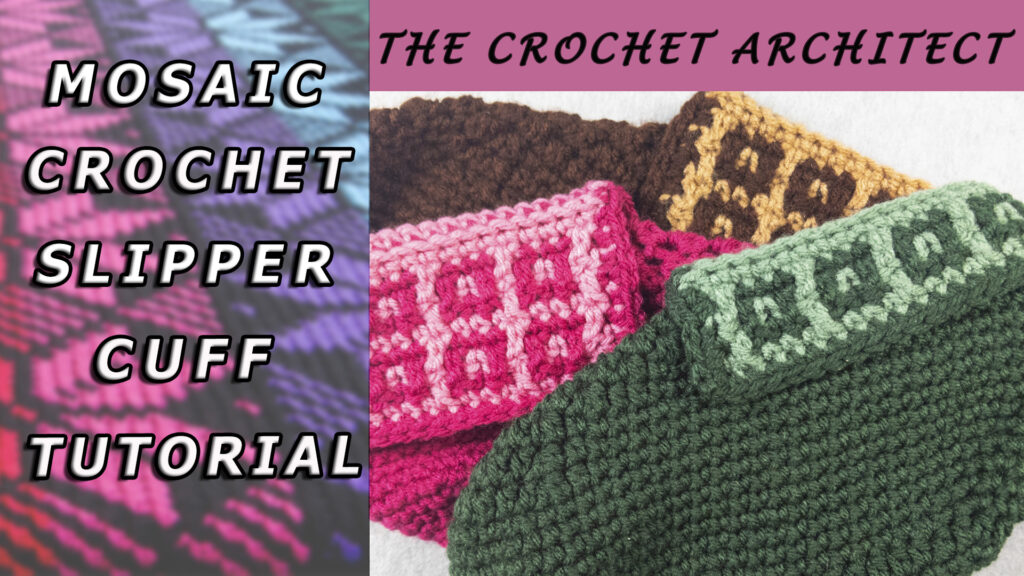
Mosaic Crochet Cuffs on Family Slippers Pattern

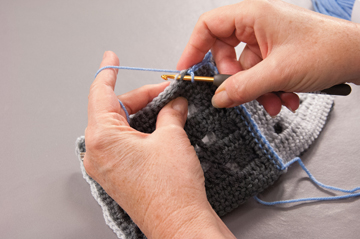
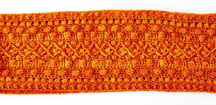
I’ve just finished and released my first video to support one of my self-published crochet patterns. This video is for my Family Slippers pattern. The cuff is made with the mosaic crochet technique, which is one of my favorite crochet techniques! In this video, I demonstrate how to crochet the 4 rows of the mosaic pattern on the cuff. Mosaic crochet is a lot of fun and it’s exciting to see the mosaic pattern take shape in front of your eyes!!!

I have lots of other crochet videos planned to help you be successful with your crochet projects from my patterns. If you have any questions about my patterns (or certain parts of my patterns) that you’d like to see covered in a video, please let me know. I’m open to more video suggestions and look forward to bringing you more quality videos to help you advance your crochet skills and knowledge!

If you’d like to watch this new video, you can find it on my YouTube channel here.

Happy crocheting (and video watching/learning) to all of you!

Susan

Another new Annie’s video!

Filet Crochet


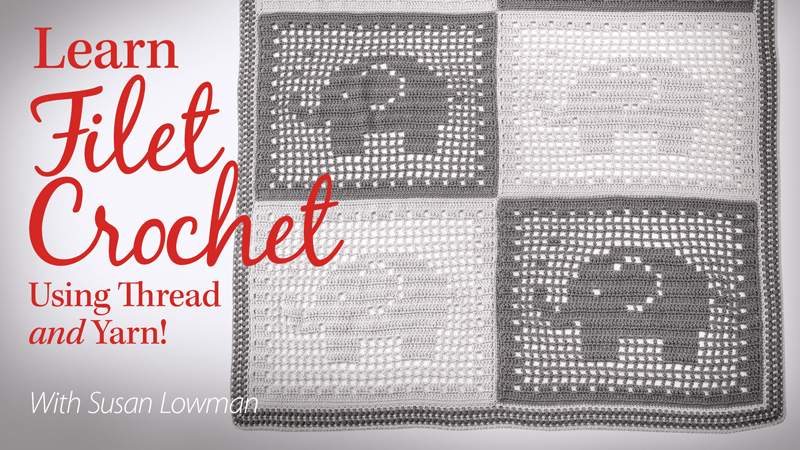
I have another announcement for you this month! It’s my newest Annie’s crochet video class: “Learn Filet Crochet Using Thread and Yarn!”.


Filet Crochet is such a great crochet technique! I’ve been doing Filet Crochet for several decades now! I’ve designed a bunch of Filet Crochet patterns and taught this technique at the CGOA Conference many times, as well as at the 2018 Interweave Yarn Fest. I LOVE Filet Crochet! You can crochet so many different kinds of things with it! You can combine it with other crochet techniques, as well.


Here are a few of the designs I’ve done over the years, some simple and others more complex:


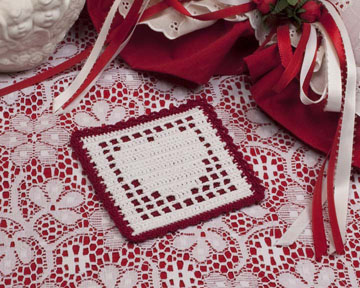
Filet Heart Coaster, published on TheCrochetArchitect website


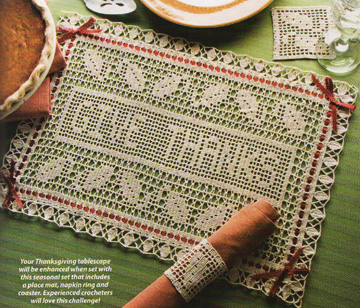
Give Thanks Placemat Set, published in Oct. 2008 Crochet World magazine


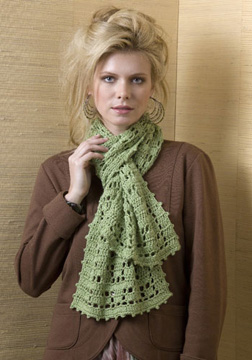
Europa Scarf, published by Caron Yarns


Filet Coaster from my Annie’s class, “Learn to Crochet With Thread”


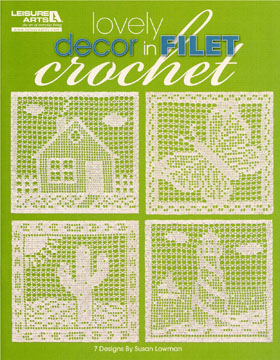
Lovely Decor in Filet Crochet book, published by Leisure Arts in 2010


If you’d like to see all of my published Filet Crochet designs in the past 20+ years, check out this Ravelry search. Most of these designs are done with crochet thread, but a few of them are done with yarn. If you’re interested in the Europa Scarf, which I designed in 2010 with Naturally Caron Spa yarn (a now discontinued yarn), you can download the free pattern here. You can also download several free Filet Crochet patterns on the Red Heart website.


No matter what you use for filet crochet, the technique is the same! It’s just the size of the yarn/thread and hook that makes the difference (and, of course, the pattern)!


This Filet Crochet video was filmed at the same time as my other new video, “Crochet ER: Fixing Damage & Mistakes”, which came out last month. You can read all about that video in my previous blog post here.


Here are a few photos from filming this new Filet Crochet video:


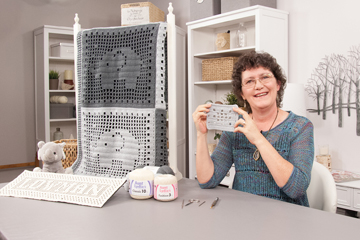
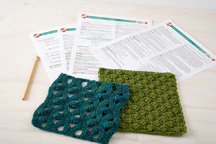
Filet Crochet set and swatch


Learn Filet Crochet set with projects


And here are the 2 class projects from my new Filet Crochet class that you’ll be able to make when you sign up for this class:


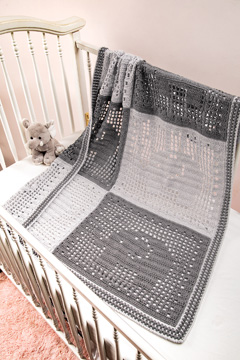
Filet Elephant Baby Blanket


Filet Name Banner


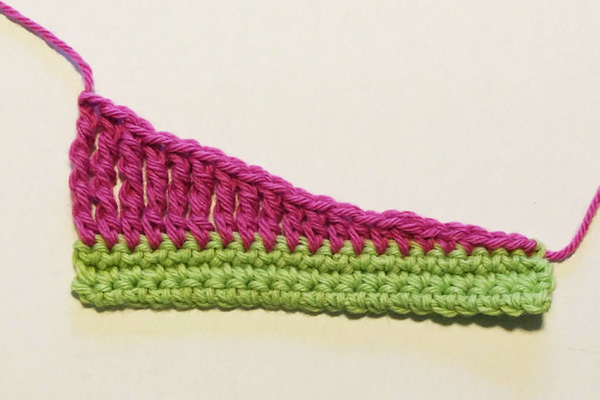
In this class, I teach how to work the closed mesh, open mesh and lacets that comprise Filet Crochet patterns. I also teach how to read and follow Filet Crochet charts, as well as how to calculate the number of chains in the starting chain for a Filet Crochet pattern that is only charted (not written). And I teach 2 ways to make your Filet Crochet mesh more square.


The first thing we work on in the class is a practice swatch. With this swatch, you will learn to work the open and closed Filet mesh, as well as lacets. You’ll also get practice following a Filet Crochet chart. Once you’ve mastered the swatch, you can move on to make either or both of the class projects: the Filet Elephant Baby Blanket and the Filet Name Banner.


The Filet Elephant Baby Blanket pattern includes written instructions and a Filet Crochet chart. In the video, I demonstrate how to make the elephant blocks, as well as how to join the blocks to create the blanket. There are 2 edging options, which are both demonstrated in the video, along with the special stitches used in each edging. Because this blanket is made with yarn, it’s a great way to learn to do Filet Crochet (without any intimidation that using crochet thread and small steel hooks might present!).


Seaming/joining blocks for Filet Elephant Baby Blanket


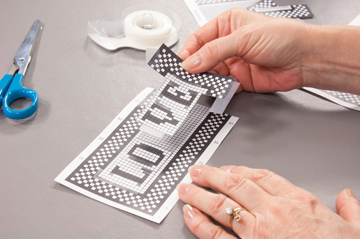
The Filet Name Banner pattern includes a chart for the whole alphabet, as well as the edging, so you can make any name or word you’d like for your Filet Banner. In the video, I demonstrate how to make your customized chart for the name or word you choose to crochet. Then I demonstrate how to crochet several of the rows, following your custom chart.


Making Filet chart for Filet Name Banner project


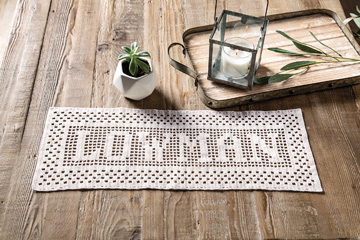
You can get creative with how you’ll use your Filet Name Banner. You may want to use it as is or mount it in some way. To give you an idea of how you may want to mount your banner, here’s a photo of another Filet Name Banner that I crocheted many years ago showing how I mounted the filet piece on some fabric and hung it on the wall with a painted wooden dowel:


Filet “Lowman” Banner


If you’re not comfortable using crochet thread and you’d like to learn to crochet with thread, you may want to check out my other crochet video class with Annie’s called “Learn to Crochet With Thread”. In this thread crochet class, my goal is to help you feel comfortable using crochet thread for your crochet projects. Who knows? You may come to love thread crochet as much as I do!


I hope you’ve enjoyed this look at my new Filet Crochet class for Annie’s! If you’d like to take a look at this video class, as well as watch the free class overview and introduction segments, check it out HERE (Note: This is an affiliate link, so if you click on this link and purchase the video through the link, I’ll receive a small commission to help compensate me for my hard work! It won’t cost you any extra to purchase the video through this link and I would appreciate your support!).


I hope you’ve enjoyed this look at my new Annie’s video class!


Happy Filet Crocheting,

Susan


Big Announcement: My New Annie’s Video

repairing crochet

Two months ago, I went to Berne, IN to film 2 crochet videos for Annie’s. Today, the first of the 2 videos is being released on the Annie’s website. I’m SUPER EXCITED about this video! The name of the video is Crochet ER: Fixing Damage and Mistakes. I’ve been teaching this topic for 2 years at the CGOA Conference: how to invisibly repair damage to your crochet projects and how to fix mistakes. I LOVE being able to repair any crochet project and I’m THRILLED that Annie’s asked me to do this video!!! Now YOU can learn how to repair damage to your projects (or anyone’s projects) and how to fix the mistakes in your projects (or anyone’s projects) invisibly!


Crochet Stitches Identification Swatch


In this video, I teach you how to “read” your stitches by showing and explaining how each stitch looks on the front and back of the stitch. This is VERY important in learning to repair or fix crochet projects. You have to know what stitches were worked (or were supposed to be worked) in order to replace the stitches correctly! When you know the differences between the stitches (how many horizontal, vertical and diagonal strands each stitch has on the front and the back of the stitch, as well as where those strands are located), you’re able to decipher any crochet project and come up with a “game plan” for how to repair or fix it!


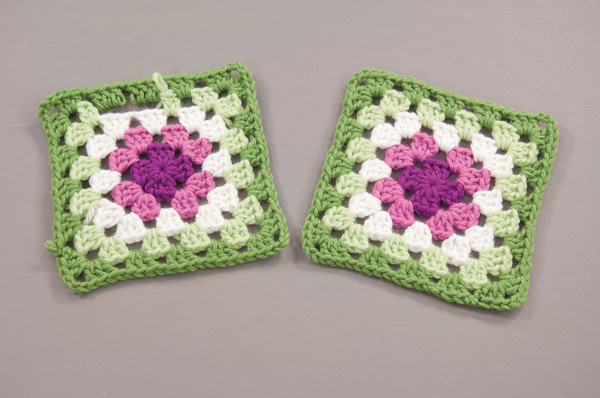
Granny Square Swatch before and after repair


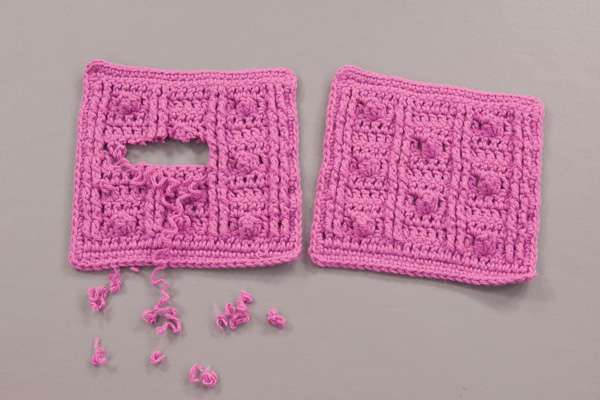
Solid Popcorns Swatch before and after repair


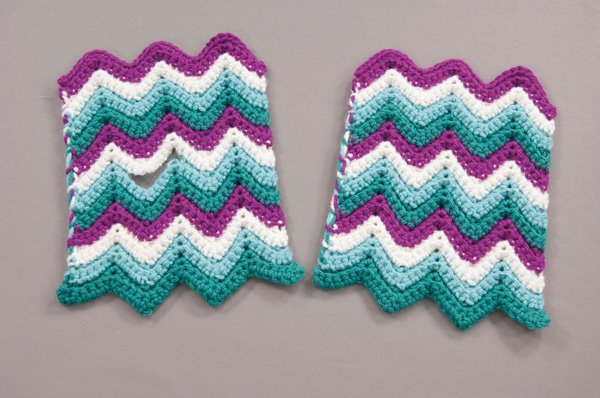
Ripple Swatch before and after repair


In the video, I also demonstrate how to repair 3 crochet swatches (the Granny Square swatch, the Solid Popcorns swatch and the Ripple swatch). You’ll be able to crochet each of these repair swatches (with the included instructions for each swatch) and repair your swatches along with me, enabling you to feel confident repairing your own full-size projects!


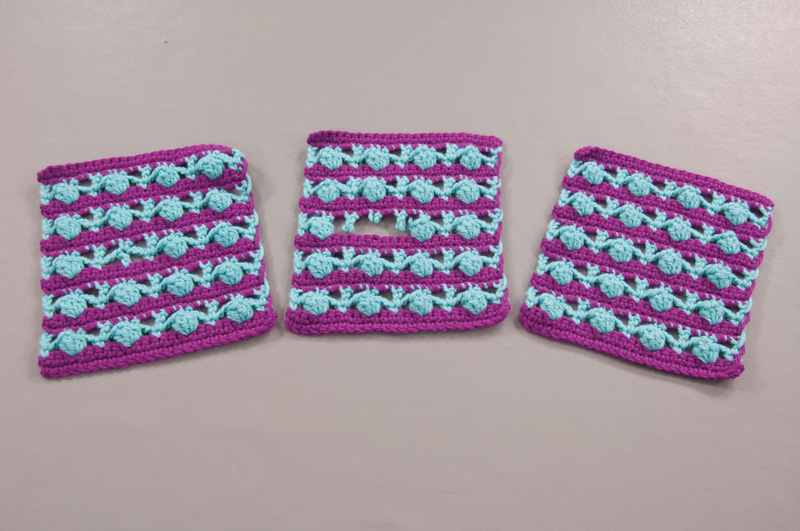
Popcorn Rows Swatch before, during and after fixing mistake


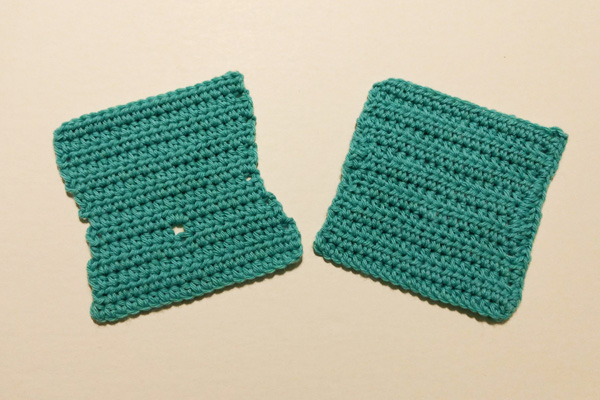
Uneven Edges and Hole Swatch before and after fixing the mistakes


If you make mistakes in your projects (and let’s face it, who doesn’t make a mistake every now and then?), you’ll be able to fix your mistakes invisibly by following along with me as I fix mistakes in the included class projects (the Popcorn Rows swatch has a missing popcorn in it and the Uneven Edges and Hole swatch has 2 uneven edges and a hole in it). You’ll be able to crochet the class mistake swatches (with the included instructions for each swatch) and follow along with me as I fix the mistakes in those swatches in class. After fixing the mistakes in your class swatches, you’ll feel more confident to repair the mistakes in YOUR crochet projects!


To successfully repair or fix any crochet project, you’ll follow the steps that I outline in the class video (in order). I’ll be with you every step of the way, showing YOU how to successfully repair or fix YOUR crochet projects. This is wonderful knowledge for EVERY crocheter to have! I’ve used this knowledge/technique to invisibly repair many crochet projects, even projects worked in the back loop or projects with post stitches, which can both be very tricky to repair or fix invisibly! Now YOU will be able to repair or fix any of YOUR crochet projects, as well!


I had a blast working on this video and I hope it will enable you to learn to repair and/or fix your crochet projects with confidence! If you have a question, you can ask me in the class question forum and receive an answer from me within 2-3 business days (usually sooner). My goal for this class is to enable as many crocheters as I can to succeed in repairing and fixing their (or someone else’s) crochet projects invisibly (so no one knows where the repair or fix was made!).


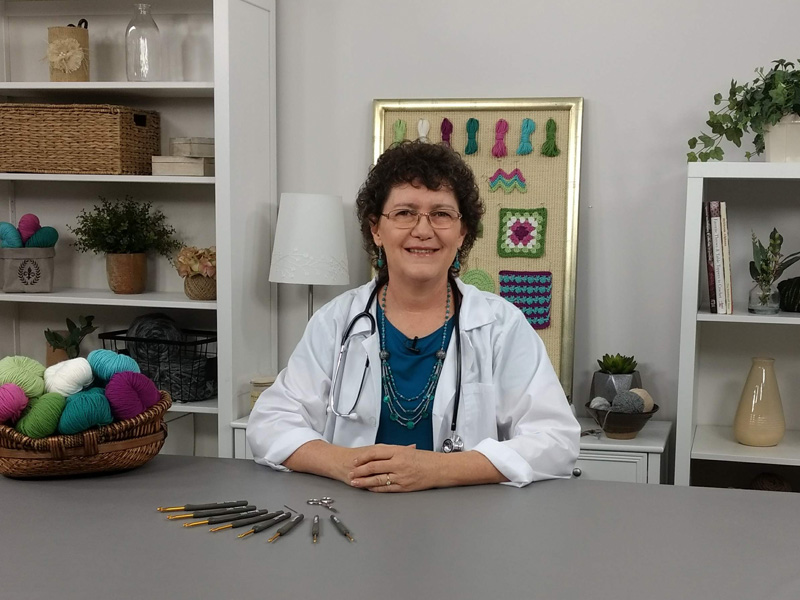
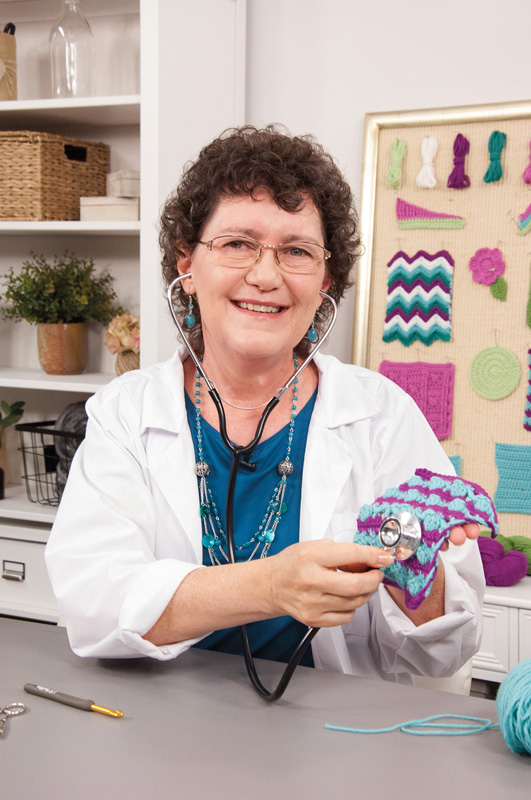
Here are some extra photos from filming this video (some serious and some silly!). I really enjoyed dressing for the part of the “doctor” in the crochet “Emergency Room” (ER) by wearing a lab coat and a stethoscope!


Crochet ER class set


The crazy doctor (me) getting ready to perform surgery on a crochet swatch


Checking the “heart beat” of the crochet swatch


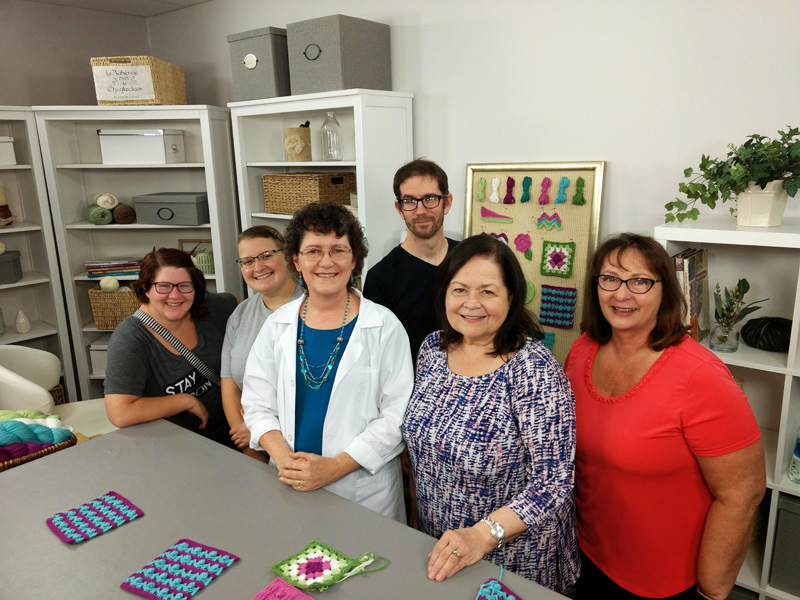
Most of Annie’s video crew and me on the set


If you’d like to take a look at this video, including a free preview, check it out HERE (Note: This is an affiliate link, so if you click on this link and purchase the video through the link, I’ll receive a small commission to help compensate me for my hard work! It won’t cost you any extra to purchase the video through this link and your support would be greatly appreciated!).


If you purchase this video, remember that I’m here to answer your repair/fix questions through the “Ask the Instructor” feature on the Annie’s website. I want YOU to succeed in repairing and fixing YOUR crochet projects so no one will ever know where the repair or fix was done (I have a hard time finding the invisible repair I made to the afghan that our puppy chewed a hole in 3 years ago!).


Happy crocheting and happy repairing and/or fixing your crochet projects!

Susan


Lots of Exciting News!

I have some exciting news for you today! Two weeks ago, I went to Berne, Indiana to film 2 new crochet videos for Annie’s! I can’t tell you yet what the topics of the 2 videos are, but I can tell you that they should be ready for release around the end of November or beginning of December! Yahoo!!! I’m super excited about both of these videos and I hope you’ll enjoy taking a look at them in a month or two! After they’re released, I’ll share a link to the videos and blog about both of them. But consider this “fair warning” that my new videos will be available very soon!


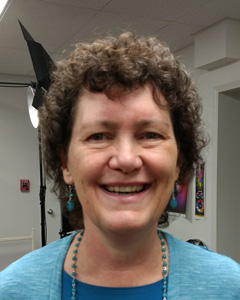
Here are some photos of me before and after makeup/hairstyle at the Annie’s studio:


Before makeup/hair styling


After makeup/hair styling


There’s not as drastic of a change in my looks for these 2 videos as there was over 6 years ago for my other 2 Annie’s crochet videos (see the previous blog post with makeup photos here). I think the makeup artist did a very nice job! What do you think?


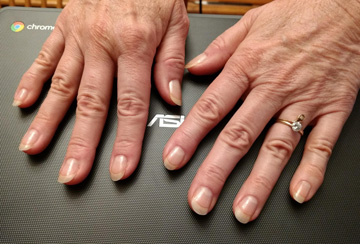
Before the videos, I spent many weeks working on my fingernails and cuticles to get them ready for the videos (you really don’t want to watch me demonstrating with my “regular” nails and cuticles!). Here’s what they looked like for the videos:


My fingernails for the videos


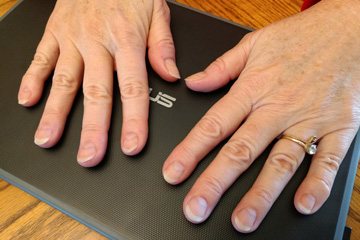
My fingernails never look this nice on a regular basis (without lots of hard work) because I live in a dry climate (Arizona), I do a lot with my hands and I tend to pick at my cuticles! This is how they usually look:


My regular fingernails


As you can see, my fingers are starting to get a little twisted due to age and the fact that arthritis runs in my family. But as long as they keep working so I can still crochet, knit, do bobbin lace and tatting, I’m a happy camper!


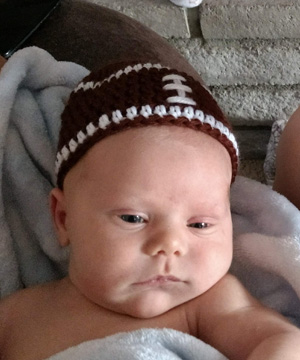
I have some other very exciting news to share with you today, too! I’m a Grandma again! My middle son and daughter-in-law had baby #2 the day after I flew to Indiana to film the videos (I had to wait “patiently” until I returned home to see him, which was very hard)! I’d like to introduce you to my grandson, Ryker:


Baby Ryker


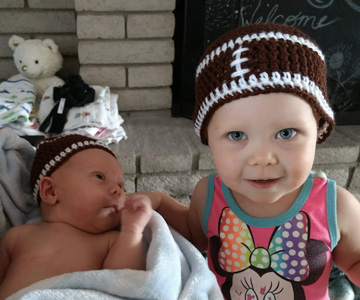
Here’s my 2 grandchildren, Rubekah and Ryker wearing the crochet football hats that I made them:


Ryker and Ru in football hats


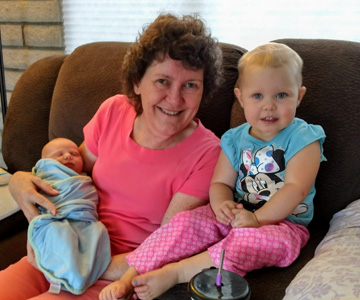
And here are the 3 of us enjoying some “Grandma” time together:


Me with my 2 grandchildren


I’ve been pretty quiet here on my blog and on social media in general for several reasons: 1) it took lots of time to prepare for the 2 videos, 2) I’ve gone on 3 business trips and one personal/anniversary trip this year, 3) I’ve been crocheting for my new grandson and 4) I’ve been enjoying my 2 grandchildren!


If you’d like to see some of the other projects I’ve made for my new grandson (and 2 year old granddaughter), check out my projects page on Ravelry here. I’ve crocheted a lot of baby booties and baby hats (some of the booties went to my husband’s best friend’s oldest daughter, who is due to have her first child/son in a few months)! Baby booties and hats are both great projects for new babies because they’re quick, they don’t take much yarn and they look great! I had a little trouble with my gauge and with the finished sizes, but that’s okay. I can always donate the booties or hats that came out too small to my local pregnancy center or my local hospital (for preemies). I had a good time crocheting each project and sometimes that’s more important than the finished project (the enjoyment we get from the creative process and the relaxation that crocheting provides!).


I hope you’ve enjoyed this look at what I’ve been up to lately. I look forward to sharing more of my crochet news with you very soon!


Happy crocheting,

Susan


Crochet Classes on Sale!

Are you someone who loves to learn more crochet techniques? If so, do you take classes on a regular basis? I absolutely LOVE to take classes (and to teach classes)! I’ll be teaching 5 crochet classes at the CGOA Conference next week in Charleston, SC.  The classes I’ll be teaching next week are: Let’s Get Writing (crochet pattern writing), Playful Polish Star, Intermeshing, Intro to Irish Crochet and Simplifying Symbol Crochet. To read more about these 5 classes, check out my previous blog post.


I love sharing my crochet knowledge and encouraging other crocheters in my classes! There are currently between 13 and 23 students registered for each of my classes. I can’t wait to meet my students (some I already know, but many I will meet for the first time at the conference) and interact with them! It’s so much fun (and hard work, too, but mostly fun)!!!


It’s great to meet new crochet enthusiasts at the conference and in everyday life (I met one yesterday at the bank)! I hope many of you are going to attend the conference and learn more so you can make bigger, better and more challenging crochet projects! To read all about the CGOA Conference (aka: the Knit and Crochet Show), check out this overview of the conference on the CGOA website. The conference is held in conjunction with the TKGA (The Knitting Guild Association) conference, so there will be knitting classes there, too. You can read all about the whole conference, including the knitting classes, here. Oh, I almost forgot: THERE WILL BE SHOPPING, TOO (lots of luscious yarn, patterns and supplies on the show floor)!


If you can’t make it to a conference to learn in person, have you taken any online crochet classes? I’ve taken quite a few crochet (and knitting) classes online. I love the ability to watch them whenever I want, to rewind and rewatch parts that I didn’t understand or got distracted while watching them, take notes in the video and ask the instructor questions. Craftsy is having a 3 day, 50% off sale on their top classes, starting today! I LOVE SALES, don’t you?


Craftsy sale crochet 0716


You can check out their sale here. And if you’d like to narrow the list of sale classes to crochet classes, you can click on the “Yarn & Fiber Arts Classes” classification on the left-hand side of the page. This will give you the knitting, crocheting and spinning classes that are on sale. There are lots of other classes on sale, including classes on cooking, painting, quilting, and more (there’s a total of 214 classes on sale)!


I hope you’ll explore ways to learn more crochet techniques and improve your skills. It’s wonderful to be able to read crochet patterns, read symbol crochet charts, learn new crochet stitches or techniques, etc. I can’t imagine crocheting without this knowledge! It really opens up a whole new world of crocheting possibilities!


Happy crocheting,

Susan


The Art of Patience!

What is it about patience that seems so elusive sometimes? Many people have told me that I’m a patient person. And that’s “somewhat” true. I’m usually patient when I’m teaching a crochet class. However, I’m not patient about everything! Take last Monday, for example.


On Monday, I had to return a DVD to the library because I had already renewed it 3 times! Obviously, I am a HUGE procrastinator! But that’s a subject for another day! (Note: I asked my husband to read this blog post and he said I should tell you about another library book that I renewed 3 times. I never really finished reading the whole book. And the subject of the book: procrastination, of course!).


Anyway, I wanted to watch the DVD before I returned it. When I went to play the DVD on my laptop, I didn’t have a program to play DVDs on my laptop anymore (my husband had changed the hard drive on my laptop to help it run faster and he didn’t download a program to play DVDs on my laptop after the installation, so it wasn’t there)! Now I’m NOT an electronic person (ask anyone who knows me well and they’ll agree). In fact, I call myself “electronically challenged”! I’m not as bad as some people when it comes to electronics, but I have a LONG way to go to be comfortable with them all the time. I can do lots of things on my laptop, like type my crochet/knit patterns, download and manipulate digital photos, create symbol crochet charts, create knitting charts and more! I even have a smart phone now that doesn’t scare me too much! So I’m not a total imbecile with electronics! They’re just not always my friends. And I get frustrated with them easily, unlike my husband, who is an electronic genius!!!


A few minutes after I realized that I didn’t have a program on my laptop to play the DVD, my husband called. He tried to talk me through downloading the program to play the DVD, but I clicked on the wrong “download” button and something else was starting to download instead! Also, the internet went down (I can’t remember if it was before or after trying to download the program). He talked me through unplugging the power to the modem and plugging it back in (and telling him which lights were flashing so he’d know if there was a big problem or if it was just resetting itself). Is this starting to sound like an “I Love Lucy” episode? Wait, it gets better!


After closing the window where the “other” program was downloading, my husband suggested that I watch the DVD on the TV. Well, you have to realize that I’m much more comfortable with the “old-fashioned” TV and DVD set up (where you push the power button and play button on the device itself), not the complicated set up that we have now! There are 6 remote controls in our living room! That’s right, 6!!! Some of them are labeled, but I am NOT the person who uses them in the evening, that’s my techie husband (I just sit happily crocheting and/or knitting and look up at the TV sometimes when the show gets good)! So I’m not familiar with what each remote actually controls. There’s the TV, the receiver and the DVD player (and possibly more that I don’t know about and frankly, don’t care about!). We also have DirecTV, which is a whole ‘nother ball game, especially for this wife who doesn’t usually even touch the remote controls (unless I’m straightening up or cleaning), much less USE them!
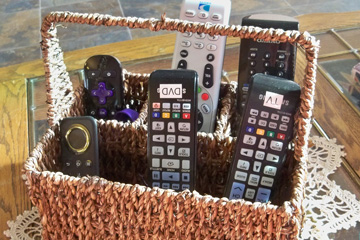
 

Remote Controls


So imagine an episode of “I Love Lucy” when Ricky is trying to get Lucy to understand how to do something. Do you have that image in your mind? Good. Obviously, I’m Lucy and my husband is Ricky. He’s trying to tell me (over the phone) which remote control to use and which button to push on each remote control. There’s a certain progression of which electronic to turn on first and sometimes you have to push a button on the right remote control to change the control to the specific electronic element that you want to control! I told you it was complicated, especially for those of us who are “electronically challenged”! Well, the story has a good outcome and he talked me through everything I needed to do with the TV, DVD player and receiver in order to watch the DVD before having to return it. The DVD was Doris Chan’s video from Interweave Crochet. The subject was crocheting a garment from the top down, which I’ve done before, but I wanted to learn more from the “master” of top down garments, Doris Chan! And I finally found the “right” button to push to control the volume (each remote control has a volume button or two, but none of them was working for me until I used the “right” one!). If you’d like more information on Doris’ crochet video, you can see it here. The video is available in DVD format, regular video download or high definition video download.


Well, what does this story have to do with crocheting and knitting? Here’s my take on it…


When you’re new to learning something (whether it’s a skill like crocheting/knitting or using remote controls for electronics), you NEED to have patience with yourself. Obviously, I didn’t have much patience with myself and was totally frustrated (which my puppy picked up on right away, making my frustration worse!). It’s funny how I usually have patience with myself when I’m learning something new in the fiber realm (crocheting and knitting), but I have little patience when it comes to learning electronics! But I AM improving, since a year or two ago, I never wanted to have a smart phone and here I am with one now! Sometimes I’m patient when I’m learning something new on my smart phone and other times I’m not. But at least I’m learning and not shying away from it. Now if I can just learn to use the remote controls for the TV, receiver and DVD player (until my husband reconfigures the electronics once again and it’ll all change!).


So how much patience do you have with yourself when you’re learning something new? Are you like me, trying to learn something about electronics and getting frustrated with it? Or do you have patience with yourself when learning a new crochet/knit technique (or learning to crochet or knit for the first time)? Like most things in life, having patience with yourself (and others) is something we should all strive to have more of each day. I fell flat on my face on Monday, but each day is a new day and I’m striving to do much better!


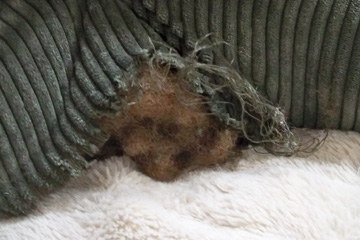
It’s funny how being stressed out and frustrated can affect other people (and animals), too. Our puppy, Maggie, did something on Monday afternoon while I was at my weekly knit/crochet group at the library. She decided that her bed was a chew toy and chewed up about half of it. I came home to pieces of foam and fluff all over the living room floor! It was a big mess! About 10 minutes later, my husband came home and we both cleaned it up (I waited on cleaning it up so he could see what a mess our “cute little puppy” had made)! Well, the bed may not be a total loss, but it definitely won’t be the same as it was before she chewed the hole in it and removed half of the stuffing! We were both ready to spit nails (again)! The rest of this week, Maggie has been happy and hasn’t chewed up anything else, I think because I haven’t gotten that stressed out again!
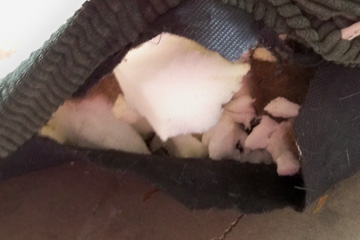
 

Maggie's torn up bed


Maggie's torn up bed 1


I hope you’ve enjoyed this true life story and you’re encouraged to be more patient with yourself, especially when you’re learning something new (whether it be electronics or fiber/crochet/knit)!


Are you electronically challenged (like me), an electronic guru/genius (like my husband), or somewhere in between?


Happy crocheting,

Susan


I Love Textural Crochet!

Fun and Fantastic Textured Crochet Stitches


I love learning new crochet techniques and stitches, don’t you? Earlier this month, I watched a new Craftsy class called “Fun & Fantastic Textured Crochet Stitches” by Beth Graham. I think this is a really nice class, especially for those who don’t know some of the textured crochet stitches out there, like front and back post dc and tr, bobbles, puffs, popcorns and lots more. I know how to do most of these stitches, but I learned a few new things myself from the class!
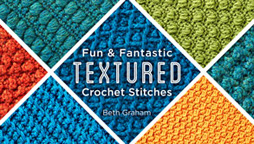
 

When I first started watching the class, my first impression was that Beth portrayed enthusiasm and knowledge! She remained enthusiastic and knowledgeable throughout the class. I’ve never met Beth in person, but we’ve corresponded through e-mails and social media for a few years. She’s actually married to one of my cousins in Canada! One of these years, we must meet in person!!! In her Craftsy video class, Beth is patient and explains everything she’s doing. She shares lots of great tips on how to make your projects more successful, too!


Customizable Swatches


Like most Craftsy classes, there are 7 lessons in this class. Beth teaches 16 stitches, or variations of stitches. The basic stitch categories are: Effortless Texture, Puff Stitches, Bobble Stitches, Popcorn Stitches, Post Stitches and Elaborate Texture. Beth starts with the easiest textural stitches at the beginning of the video and ends with the most complex textural stitches. In the class, Beth demonstrates where to insert your hook to create each of these textured stitches, like working in the front or back loop, around the post of the stitch, in the chain spaces, in the back bump of the foundation chain and more.


Every textural stitch that Beth demonstrates has a stitch sampler square pattern included in the class. You can have fun practicing these stitches while making each 7 ½” square and join them all together when you’re done to make an afghan, if you wish. Or you can make dishcloths out of some of them. But either way, it’s nice to practice on something this small instead of committing to a large project, especially when learning something new!


I found a few stitches in the video that Beth called a different name than I do. But that’s fine because they’re worked the same way! As in most crochet projects and instructions, the same stitch can be called something else, depending on the person who’s naming it or what book it’s in. Several years ago, I learned the “berry stitch” from the “365 Crochet Stitches a Year” calendar by Jean Leinhauser and Rita Weiss. I noticed that Beth calls this stitch a “picot sc”. So I did a little research online and found that Tamara Kelly of Moogly also calls this a “picot sc”. No matter what you call a certain stitch, it’s great to know lots of crochet stitches and be able to use them to their best advantage!


Playful Textures Cowl
Playful Textures Scarf & Cowl


Once you’ve mastered the textured stitches in the class, you’ll probably want to crochet the class project, which is the Playful Textures Scarf & Cowl. I love this project! It has such nice textures and is symmetrical, which appeals to me! The scarf and cowl are crocheted the same, but if you want yours to be a cowl instead of a scarf, then you’ll seam the 2 short edges together.


For more information about this class, check it out on the Craftsy website here. The class is regularly $29.99, but it looks like it’s discounted to $19.99 today! I think it’s a bargain at either price!


I hope you’ve enjoyed my review of this new Craftsy crochet class and that you’re inspired to learn more in 2016!


What crochet techniques do you want to learn this year?


Until next time…


Happy crocheting,

Susan


Crochet Lace Class & Giveaway

The last guest blogger I have for you this month is Ellen Gormley. She’s one very talented designer, as are all of my guest bloggers this month! I had the pleasure of teaching Ellen how to do Bruges Lace at a past CGOA Conference and she’s really taken off with it! Go Ellen!!! I’ll let Ellen tell you all about her new Annie’s class! And don’t forget to read all the way to the bottom of this post for another chance to win the Annie’s class of your choice!


Hi, I’m Ellen Gormley, Editor of Crochet! magazine, and I was WRONG. I admit it. I can admit I was wrong, here among friends, right? I was wrong about the difficulty of crochet lace.


Ellen Gormley's Learn to Crochet Lace class
Ellen Gormley’s Learn to Crochet Lace class


Back in my first days of crochet, way before I made it my career, I would not have ventured into Broomstick Lace or Hairpin Lace. Why expand into more lace and tools when there is so much to be done without?


The truth is, I think as a new crocheter, I was intimidated by Crochet lace. All that loose yarn, and the big loops that could so easily become jumbled and unruly. Simply keeping count of traditional stitches and learning shaping seemed like a big enough task.  I was wrong, it’s not that hard. The learning curve is SHORT. I’m talking like 20 minutes.  In 20 minutes of practice with each skill, Hairpin, Broomstick, and Bruges Lace, you can gain tremendous comfort with the techniques.


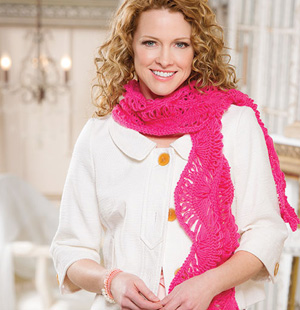
Gentle Waves Hairpin Lace Scarf


Why should the knitters have all the fun getting to use more than one tool at a time? And Bruges Lace, you don’t even need anything special, just ONE crochet hook. So if you aren’t ready add more tools to your tool bag, start with the satisfaction of Bruges Lace first.


Once a crocheter has learned the basics of crochet (Check out my Learn to Crochet online class!) and maybe learned how to crochet with beads, (Check out my Crocheting with Beads online class!) it might be fun to branch out into Crochet Lace!


Broomstick Lace Shawlette


In my BRAND NEW Annie’s online class I demystify the tricky juggling of a hairpin loom and the broomstick along with the winding path of Bruges lace all in one class!  There are 2 projects for each technique and many lessons for you to see exactly how to get a handle on the tools and methods.


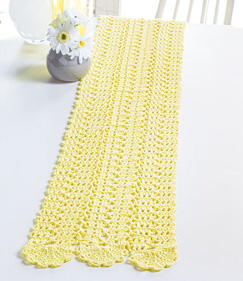
Sunbeam Bruges Lace Table Runner


As a designer, I learned these techniques because there weren’t many patterns for them, so I figured I could be more marketable with Bruges, Hairpin and Broomstick patterns.  As a crocheter, the three techniques are just so much fun and rhythmic that I see a whole new world of possibilities.


Ellen Gormley

www.GoCrochet.com


I’m thrilled that Ellen has done a class on Bruges Lace, Broomstick Lace and Hairpin Lace. These are all fabulous crochet techniques and I hope you’ll enjoy learning them.


Here is your last chance to enter to win the Annie’s online class of your choice. Just leave a comment on this blog post to enter to win. I’ll pick one lucky winner at the end of the month. Good luck everyone and happy crocheting!


Susan


Bavarian Crochet Class by Jenny King & Giveaway!

I have a guest blogger again this week. It’s Jenny King, who I met at a CGOA Conference sometime in the past 12 years (I can’t remember exactly which year it was)! Jenny has a fantastic crochet class on Annie’s and I’ll let her tell you all about it! Be sure to read all the way to the bottom to enter to win a free Annie’s class!


Jenny King in her Bavarian Crochet class


G’day my name is Jenny King and I am an Australian crochet addict!


Let me come visit and sit down with you and show you just how to do Bavarian crochet. Yes, at your place. In this Annies online class you will feel like I am there. I will do what the Mother and daughter from Bavaria had endeavoured to do in Australia and that is how to create the beauty of Bavarian crochet without need for translation.  You will love it and you will become addicted.


I walk you through the process slowly and repeat myself so much that you may nearly get sick of hearing my Aussie accent telling you to pull through 2 and pull through 2. I am grinning ear to ear as I say this to you.


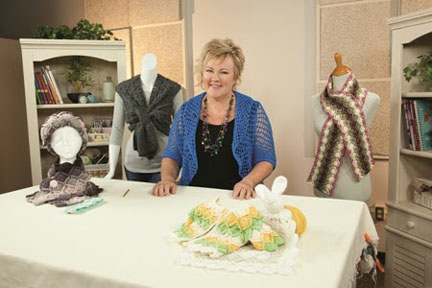
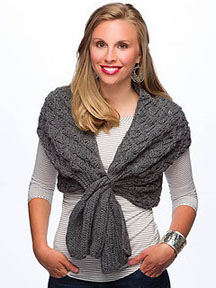
Bavarian Wrap
Bavarian Wrap


We start with a headband working in a simple strip to demystify the stitch and its 2 row repeat.  Although this class is taught in USA crochet terms I couldn’t help but tell you how to do it in the terms used by the rest of the English speaking world so no-one gets left out. So if you live in the United Kingdom, South Africa, New Zealand or Australia you will be able work along with me as well.


I originally wanted to call it this the Mystery history stitch as the origins of this amazing stitch eluded me for over 15 years of thorough searching. I even took samples to USA to consult with the experts. Funnily enough all searches led me back to my own state of Queensland, Australia.  You can hear all the history as I explain the stitches.


Baby Crop Cardigan
Baby Crop Cardigan


I have simplified this original Mother and Daughter design  and instead of only working it in a square  I have experimented to make all manner of shapes . Let me show you how to do this stitch in a long strip as a scarf, as a decorative edging on slippers, and finally extend your skills to create a top-down seamless baby jacket, and nearly everything else  in between.


I should warn you though that Bavarian crochet is just delightful and you may become addicted. It can be worked in any color combination of your choice or you can experiment with the wonderful textured stitch if it is done in just one color as in the wrap vest in charcoal.  That is just Yummy.


See you soon at your place. I can’t wait.


Jenny


So now you know something about Jenny’s Bavarian Crochet class. To learn more about Jenny’s class, just visit the Annie’s website here. To learn more about Jenny King, visit her website here.


Now, as promised, here is the information about my giveaway of a free class from Annie’s! To enter, just leave a comment on this blog post. I’ll pick the winner at random at the end of this month and will announce it right here (and I’ll send the winner an e-mail, too). There are so many great classes at Annie’s! To see all of the classes offered, check them out on the Annie’s website.


Good luck everyone and happy crocheting!


Susan


Learn to Crochet Creative Jewelry

Today I’m featuring a guest blogger who has been in the crochet business for many years. Please welcome Robyn Chachula, who will be talking about one of my favorite things to crochet with thread: JEWELRY!


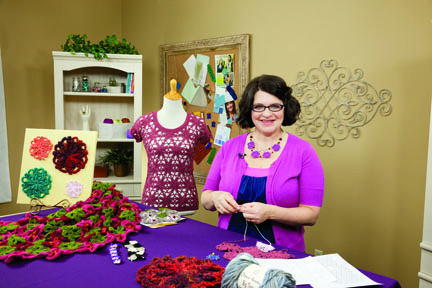
Robyn's Jewelry class
Robyn’s Jewelry class


I love jewelry.  I love big bold funky statements to delicate classic beauties.  I never feel truly dressed until I am wearing a matching necklace.  My kids have other ideas.   In steps crochet to my rescue.  Instead of worrying about yet another “mysteriously” missing necklace my daughter borrowed or another being used as a teething ring by my son; I know I can fix all.  With a few quick techniques, I know I can whip up overnight any ring, bracelet, or necklace for any outfit.  So no more stress about ruined favorites, instead my little pumpkins are just giving me more opportunities to crochet!


Flower Motif Necklace


Before I started crocheting jewelry, I thought I would need a ton of equipment and tools to get a true professional look.  Boy, I was mistaken.  In class, I walk you through exactly what you need to make your perfect accessory.  And most of them are probably sitting in your yarn bag or toolbox right now.   We will talk about a few tools that you might want to get after you get completely hooked, but for the most part your main tool will just be your hook.


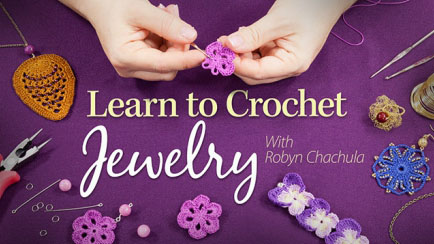
Learn to Crochet Jewelry class at Annie's
Learn to Crochet Jewelry class at Annie’s


The most important tool I try to stress is understanding crochet patterns.  Whether you are looking at a modern stitch dictionary with all the directions completely listed or an antique crochet leaflet with just some diagrams; I want to make sure you are totally in control.   In class we will de-mystify crochet diagrams and sharpen our skills at reading patterns.  We go through learning patterns and diagrams so you can grab any stitch dictionary and be able to turn an edging you love into a bracelet or a motif into a ring.


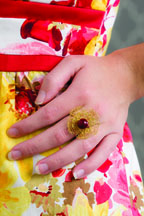
Golden Petals Ring
Golden Petals Ring


What do I want you to make jewelry out of?  Anything.  In class, we talk about all materials from basic crochet thread, to thin gauge wire, to leather and hemp; and even end with yarn.  The materials do not make the jewelry, you do.  So we talk about how to dress up or down the material you are working with.  One basic way is using metal chains, jump rings, and beads to connect your crochet together.  In just a few steps, I show you all you need to know to attach your beautiful crochet together into fantastic jewelry.  One word of warning, is the jewelry techniques I show you in class are so simple it is very easy to slip into another hobby and love every minute of it.


The best part of creating and making jewelry is it always cheers up my day.  Any day I get to crochet for a few minutes is great.  To be able to then wear something I made the next day, even better.  Hope you will join me in Learn to Crochet Creative Jewelry class.  I truly can’t wait to see what you can create!


To find out more about Robyn’s “Learn to Crochet Jewelry” class, see all of the projects in the class and watch the introduction video, visit Annie’s website here.


To learn more about Robyn Chachula, visit her website here or her blog here. I think Robyn will be holding a contest to win her class this month, so visit her blog and enter to win! Her class looks absolutely fabulous to me!


I hope you’ve enjoyed my guest blogger, Robyn Chachula, today. I’ll have a guest blogger during each of the next 2 weeks, so check back to read what my other 2 guest bloggers have to say about crochet!


Leave a comment on this blog post to be entered to win my Annie’s class, “Crocheting With Thread” (or another Annie’s class of your choosing). During the next 2 weeks, you’ll have 2 more chances to enter to win the class (one chance per week). I’ll pick the lucky winner at the end of this month. So if you’d like to learn to crochet with thread, this is the class for you!


Good luck everyone and happy crocheting!


Susan