Do you every wonder why some people’s crochet projects look better than others? Sometimes it’s because of the difference in skill levels of the crocheters. But other times, the difference is in the little details, like blocking and finishing, which can make a big difference! Here is an example of a project that turned out much better with a little added effort.

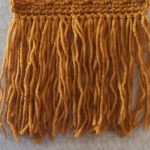
I crocheted a scarf the other day and added cut fringe to the short ends. The fringe looked scraggly and not very attractive. Here’s how it looked:

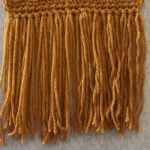
It looks very messy, doesn’t it! The yarn I used was acrylic, so I decided to steam it to straighten out the kinks in the yarn. Here’s how it looked after steaming the left half of the fringe:

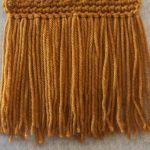
You can see that the kinks are gone on the left half now. Here’s how it looked after steaming all of the fringe:

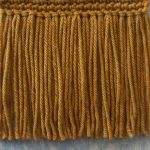
That’s quite a difference! But look at how uneven the strands of yarn are at the bottom. That doesn’t look very good either! The final thing I did for this fringe was trim the bottom of the strands. Here’s how it looked after trimming the fringe:


Now doesn’t that look much nicer than the kinky, scraggly, uneven fringe I started with? Take a few minutes for that finishing touch of steaming (or blocking, depending on the fiber content) your fringe to remove the kinks in the yarn and trimming the fringe to an even length. You’ll be glad you did! The difference is like night and day!

