Teaching at the 2018 CGOA Conference

CGOA Conference

Now that I’m back from teaching at the Interweave YarnFest in Loveland, CO last week, I thought I’d write a blog post about my next teaching engagement this year.


I’ll be teaching at the CGOA (Crochet Guild of America) Conference in Portland, Oregon from July 25-28, 2018! I always LOVE teaching at the CGOA Conference! There are so many lovely, friendly crocheters at the conference, both professionals and hobbyists! It’s great to meet new crocheters there and spend time with so many of the crocheters who attend every year (or almost every year)! I’ve been attending the CGOA Conference since 2003 and teaching there since 2009. It’s so much fun! If you’ve never attended, I hope this will be the year you make the decision to go and meet like-minded crocheters who all speak the same language of crochet!


To read all about the conference, check out the CGOA website here. To register for the conference, go to this page.


Here are the classes I’ll be teaching in July:


Wed, July 25, 6 – 9 pm:

SIMPLIFYING SYMBOL CROCHET

About the class:

Symbol crochet diagrams are much easier to read and follow than written crochet patterns. Once you learn symbol crochet, you’ll wonder what you ever did without it! You’ll learn what each symbol means, thus enabling you to read and understand symbol crochet diagrams from any pattern, even foreign crochet patterns with international crochet symbols! You’ll even try out your symbol crochet knowledge by making 2 small projects from symbol crochet charts in class. This class includes instructions on starting/working in the round and making motifs, both techniques found in the CGOA Masters of Advanced Crochet Stitches and Techniques program.
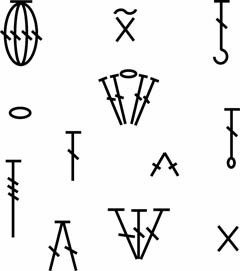
 

Simplifying Symbol Crochet class


Thur, July 26, 9 am – 12 pm:

MULTIPLE MOTIFS

About the class:

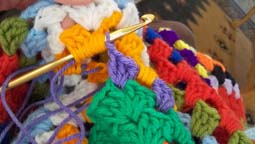
Do you love the look of projects made with crochet motifs, but don’t enjoy weaving in all the ends? Then this is the perfect technique for you! With this method of crocheting motifs continuously, instead of separately, the number of ends is decreased dramatically, saving you time and energy! In this class, we’ll make continuous crochet motifs worked in joined rows. You’ll learn how to follow the necessary symbol crochet charts with this motif method. Once you’ve learned how to make many motifs using one continuous strand of yarn or thread, you’ll feel confident tackling any continuous crochet motif pattern.
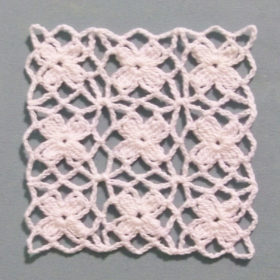
 

Multiple Motifs class


Fri, July 27, 9 am – 12 pm:

INVISIBLE REPAIRS

About the class:

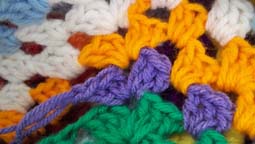
Do you have a crochet project that’s gotten cut, torn, chewed, etc? Do you want to learn how to professionally repair it? Then this is the class for you! In this class, you’ll learn how to repair all sorts of crochet projects, replacing the “bad” stitches and making your repairs “invisible”! You’ll learn how to replace stitches and chain spaces in the middle of a row, locking the top of the new stitches to the bottom strands of the stitches in the row above. Your work will look as good as new! Learn how to bring your damaged crochet projects back to life again! This technique also works great to “invisibly” seam the first and last rows in a crochet cowl!
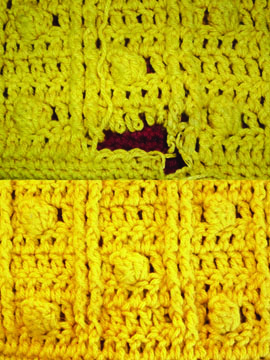
 

Invisible Repairs class


Fri, July 27, 2 – 5 pm:

BEGINNING BRUGES LACE CROCHET

About the class:

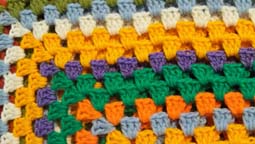
Bruges Lace Crochet mimics the decorative Bruges Lace made with bobbins in Bruges, Belgium. Bruges Lace Crochet is a fabulous technique and is easy to learn. In this beginning class, we’ll make several different styles of Bruges Lace, as well as curve the lace and join it to make circles, squares and triangles. Once you’ve learned the basics of Bruges Lace Crochet, you’ll be ready to tackle more complex Bruges Lace patterns. If you’re not a “threadie”, don’t fret! Bruges Lace isn’t just for thread crochet. It can be done with yarn, as well. Come and learn to make basic Bruges Lace in crochet.
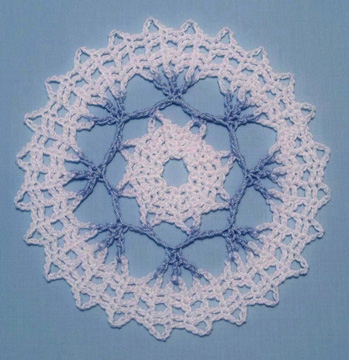
 

Beginning Bruges Lace Crochet class


Sat, July 28, 2 – 5 pm:

Intermediate Bruges Lace Crochet

We’ll take Bruges Lace Crochet to the next level in this intermediate class. You’ll learn many more variations of the lace itself, more joining techniques, and how to curve the lace over itself for more variety. We’ll explore more intricate Bruges Lace designs and you’ll learn how to achieve them in this class. Prerequisite: Beginning Bruges Lace Crochet class should be taken before taking this intermediate class (or have knowledge of the Bruges Lace technique).
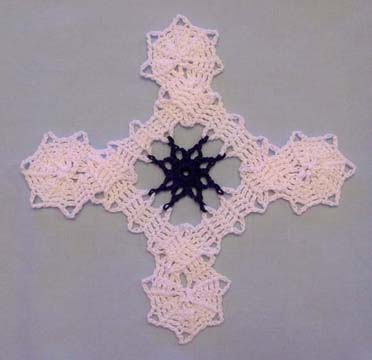
 

Intermediate Bruges Lace Crochet class


I’m excited to be teaching these classes. Last year, my Invisible Repairs class sold out and I was able to add a 2nd class for this “technique” of repairing crochet projects invisibly. This year, I’m teaching Multiple Motifs for the first time (this is also called Continuous Crochet Motifs, which I’ve blogged about before)! I always enjoy teaching Bruges Lace Crochet and Symbol Crochet!


I hope you’ll consider attending the conference. If you attend for the first time because of reading my blog, please stop me at the conference and let me know (or leave a comment below)!


If you’ve attended the CGOA Conference before, what do you enjoy most about the conference?


See you in Portland in July!


Happy crocheting,

Susan


What a Cute (and Destructive) Puppy!

So you’ve lovingly crocheted a gorgeous afghan and you enjoy using that afghan in the winters to help you, or someone in your family, stay warm. Or maybe you’ve received an afghan as a gift from someone else who lovingly crocheted it. And you have a new puppy who loves to chew on everything she/he gets her/his mouth on! You know where I’m going with this, don’t you? Yes, this happened to me last week. Our 6 month old puppy named “Maggie” chewed a hole in our favorite afghan. Here’s a photo of the guilty dog:


Guilty Maggie!
Guilty Maggie!


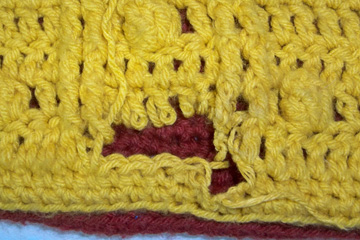
Maggie is adorable when she’s being good, playing nicely or sleeping, but she’s not so cute when she’s done something wrong, like last week when she chewed a hole in our favorite afghan. I scolded her and she knew she had done something wrong (she avoided me for about a minute, hung her head low and her tail was between her legs instead of up and wagging), but the damage was already done. So what’s a crocheter to do? Repair it, of course! Here’s a photo of the damage that Maggie did:


Hole in Afghan
Hole in Afghan


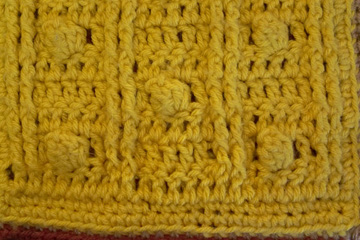
I designed this afghan for Crochet World magazine’s August 2010 issue (it’s called “Patchwork Squares Afghan”, in case you’re wondering). You can see the whole afghan on my Ravelry page here. I used Bernat Berella yarn and a size I (5.5mm) crochet hook for this afghan. I actually found that exact yarn and color in my stash (I’m very thankful that some was left over from the afghan itself). Once I cooled down and found the time to do the repair, I got to work on it (just a few days ago). This is how that area of the afghan looks now:


Repaired Hole in Afghan


Can you see where I repaired the hole? It’s the bottom 3 rows in the center (the cleaner looking stitches). Well, the repair went so well that I decided to create a crochet class to teach others to repair their crochet projects! I’ll be teaching this class at the CGOA Conference in the very near future!


Merry Christmas and Happy New Year!


Susan Lowman

(aka: The Crochet Architect)


Granny Square Afghan Repair

Today, I finally decided it was time to mend the Granny Square afghan that my step-mom made for me several decades ago. One of the yarns that she used basically started disintegrating in the afghan! None of the other yarns came apart, but this one yarn must have been wool and got eaten here and there in the section of that yarn.


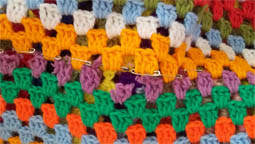
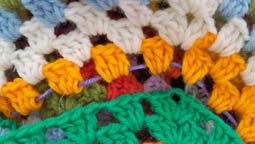
Here’s a photo of some of the bad spots:


The bad yarn is the purple yarn that has holes in it just below the yellow yarn that I put on safety pins so those yellow stitches wouldn’t come out.


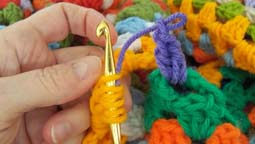
The bad yarn was in the middle of the afghan instead of at the end (it’ll never happen at the end, that’s one of Murphy’s Laws!). I started my mending where the last stitch with the bad yarn was worked. First, I cut out the bad yarn a little at a time. At the same time, I ran the new yarn (with the help of a tapestry needle) through the bottom of the yellow stitches, from left to right like this:


I was careful NOT to split the yellow strands and to run the new yarn through the bottom of all 3 dc stitches in each group of 3 dc (6 strands total: 2 strands per stitch).


When I got to the beginning of the bad purple yarn, I joined the new purple yarn the same as I would when making a color change (I yarned over with the new color and dropped the old color that was used before the bad purple, making sure there was a long enough tail of both yarns to weave in later).


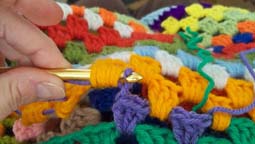
Then I started crocheting with the new purple, working one section of “3 dc, ch 1” at a time. After crocheting each section, I inserted my crochet hook from left to right in the base of the yellow stitches where I ran the new purple thread through, tightened up the yarn between the yellow stitches and the new purple stitches and pulled the purple loop through the base of the yellow stitches like this:


Step 1


Step 2


Step 3


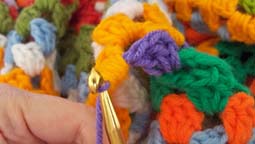
When I got to a corner, I worked the first set of “3 dc, ch 1”. Then I pulled the purple loop through all 6 yellow dc in the corner and worked the second set of “3 dc, ch 1” like this:


Step 1


Step 2


As I worked, I had to pull more new purple thread through all of the yellow stitches to where I was crocheting the new purple stitches. It was a tedious process (it took about 2 hours), but I was able to mend this afghan with great success! Here’s how a section of the afghan looks now with the mending done:


I think it came out quite nice! What do you think? The new stitches look just like the old stitches, except for the shininess of the new yarn. Oh, I also tried to match the gauge that my step-mom used (with some success, but I’m gauge challenged, so it could have been a little better!!!).


I hope this has been helpful for you to feel confident in mending your Granny Square afghan that is in need of some TLC!


Happy crocheting (and repairing),

Susan Lowman