Crochet Lace Class & Giveaway

The last guest blogger I have for you this month is Ellen Gormley. She’s one very talented designer, as are all of my guest bloggers this month! I had the pleasure of teaching Ellen how to do Bruges Lace at a past CGOA Conference and she’s really taken off with it! Go Ellen!!! I’ll let Ellen tell you all about her new Annie’s class! And don’t forget to read all the way to the bottom of this post for another chance to win the Annie’s class of your choice!


Hi, I’m Ellen Gormley, Editor of Crochet! magazine, and I was WRONG. I admit it. I can admit I was wrong, here among friends, right? I was wrong about the difficulty of crochet lace.
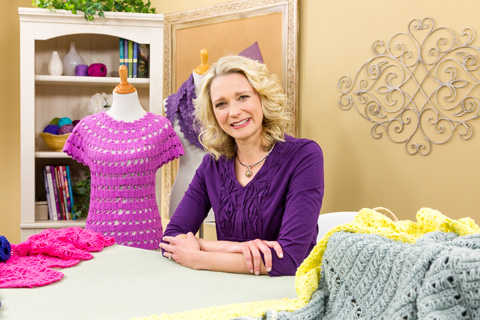
 

Ellen Gormley's Learn to Crochet Lace class
Ellen Gormley’s Learn to Crochet Lace class


Back in my first days of crochet, way before I made it my career, I would not have ventured into Broomstick Lace or Hairpin Lace. Why expand into more lace and tools when there is so much to be done without?


The truth is, I think as a new crocheter, I was intimidated by Crochet lace. All that loose yarn, and the big loops that could so easily become jumbled and unruly. Simply keeping count of traditional stitches and learning shaping seemed like a big enough task.  I was wrong, it’s not that hard. The learning curve is SHORT. I’m talking like 20 minutes.  In 20 minutes of practice with each skill, Hairpin, Broomstick, and Bruges Lace, you can gain tremendous comfort with the techniques.
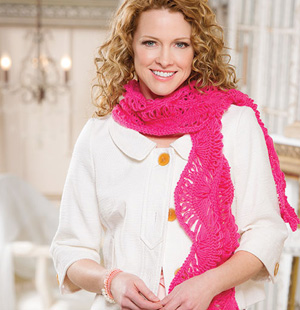
 

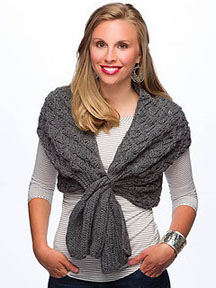
Gentle Waves Hairpin Lace Scarf


Why should the knitters have all the fun getting to use more than one tool at a time? And Bruges Lace, you don’t even need anything special, just ONE crochet hook. So if you aren’t ready add more tools to your tool bag, start with the satisfaction of Bruges Lace first.


Once a crocheter has learned the basics of crochet (Check out my Learn to Crochet online class!) and maybe learned how to crochet with beads, (Check out my Crocheting with Beads online class!) it might be fun to branch out into Crochet Lace!
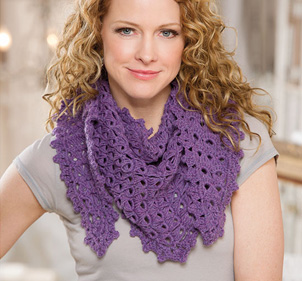
 

Broomstick Lace Shawlette


In my BRAND NEW Annie’s online class I demystify the tricky juggling of a hairpin loom and the broomstick along with the winding path of Bruges lace all in one class!  There are 2 projects for each technique and many lessons for you to see exactly how to get a handle on the tools and methods.
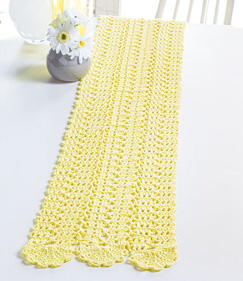
 

Sunbeam Bruges Lace Table Runner


As a designer, I learned these techniques because there weren’t many patterns for them, so I figured I could be more marketable with Bruges, Hairpin and Broomstick patterns.  As a crocheter, the three techniques are just so much fun and rhythmic that I see a whole new world of possibilities.


Ellen Gormley

www.GoCrochet.com


I’m thrilled that Ellen has done a class on Bruges Lace, Broomstick Lace and Hairpin Lace. These are all fabulous crochet techniques and I hope you’ll enjoy learning them.


Here is your last chance to enter to win the Annie’s online class of your choice. Just leave a comment on this blog post to enter to win. I’ll pick one lucky winner at the end of the month. Good luck everyone and happy crocheting!


Susan


Bavarian Crochet Class by Jenny King & Giveaway!

I have a guest blogger again this week. It’s Jenny King, who I met at a CGOA Conference sometime in the past 12 years (I can’t remember exactly which year it was)! Jenny has a fantastic crochet class on Annie’s and I’ll let her tell you all about it! Be sure to read all the way to the bottom to enter to win a free Annie’s class!


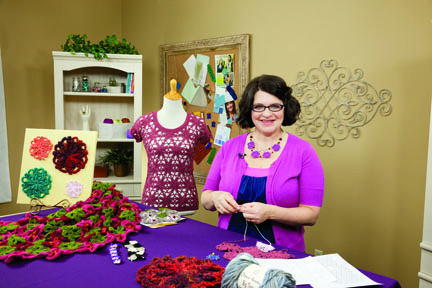
Jenny King in her Bavarian Crochet class


G’day my name is Jenny King and I am an Australian crochet addict!


Let me come visit and sit down with you and show you just how to do Bavarian crochet. Yes, at your place. In this Annies online class you will feel like I am there. I will do what the Mother and daughter from Bavaria had endeavoured to do in Australia and that is how to create the beauty of Bavarian crochet without need for translation.  You will love it and you will become addicted.


I walk you through the process slowly and repeat myself so much that you may nearly get sick of hearing my Aussie accent telling you to pull through 2 and pull through 2. I am grinning ear to ear as I say this to you.


Bavarian Wrap
Bavarian Wrap


We start with a headband working in a simple strip to demystify the stitch and its 2 row repeat.  Although this class is taught in USA crochet terms I couldn’t help but tell you how to do it in the terms used by the rest of the English speaking world so no-one gets left out. So if you live in the United Kingdom, South Africa, New Zealand or Australia you will be able work along with me as well.


I originally wanted to call it this the Mystery history stitch as the origins of this amazing stitch eluded me for over 15 years of thorough searching. I even took samples to USA to consult with the experts. Funnily enough all searches led me back to my own state of Queensland, Australia.  You can hear all the history as I explain the stitches.


Baby Crop Cardigan
Baby Crop Cardigan


I have simplified this original Mother and Daughter design  and instead of only working it in a square  I have experimented to make all manner of shapes . Let me show you how to do this stitch in a long strip as a scarf, as a decorative edging on slippers, and finally extend your skills to create a top-down seamless baby jacket, and nearly everything else  in between.


I should warn you though that Bavarian crochet is just delightful and you may become addicted. It can be worked in any color combination of your choice or you can experiment with the wonderful textured stitch if it is done in just one color as in the wrap vest in charcoal.  That is just Yummy.


See you soon at your place. I can’t wait.


Jenny


So now you know something about Jenny’s Bavarian Crochet class. To learn more about Jenny’s class, just visit the Annie’s website here. To learn more about Jenny King, visit her website here.


Now, as promised, here is the information about my giveaway of a free class from Annie’s! To enter, just leave a comment on this blog post. I’ll pick the winner at random at the end of this month and will announce it right here (and I’ll send the winner an e-mail, too). There are so many great classes at Annie’s! To see all of the classes offered, check them out on the Annie’s website.


Good luck everyone and happy crocheting!


Susan


Learn to Crochet Creative Jewelry

Today I’m featuring a guest blogger who has been in the crochet business for many years. Please welcome Robyn Chachula, who will be talking about one of my favorite things to crochet with thread: JEWELRY!


Robyn's Jewelry class
Robyn’s Jewelry class


I love jewelry.  I love big bold funky statements to delicate classic beauties.  I never feel truly dressed until I am wearing a matching necklace.  My kids have other ideas.   In steps crochet to my rescue.  Instead of worrying about yet another “mysteriously” missing necklace my daughter borrowed or another being used as a teething ring by my son; I know I can fix all.  With a few quick techniques, I know I can whip up overnight any ring, bracelet, or necklace for any outfit.  So no more stress about ruined favorites, instead my little pumpkins are just giving me more opportunities to crochet!


Flower Motif Necklace


Before I started crocheting jewelry, I thought I would need a ton of equipment and tools to get a true professional look.  Boy, I was mistaken.  In class, I walk you through exactly what you need to make your perfect accessory.  And most of them are probably sitting in your yarn bag or toolbox right now.   We will talk about a few tools that you might want to get after you get completely hooked, but for the most part your main tool will just be your hook.


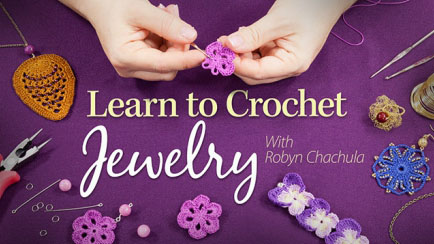
Learn to Crochet Jewelry class at Annie's
Learn to Crochet Jewelry class at Annie’s


The most important tool I try to stress is understanding crochet patterns.  Whether you are looking at a modern stitch dictionary with all the directions completely listed or an antique crochet leaflet with just some diagrams; I want to make sure you are totally in control.   In class we will de-mystify crochet diagrams and sharpen our skills at reading patterns.  We go through learning patterns and diagrams so you can grab any stitch dictionary and be able to turn an edging you love into a bracelet or a motif into a ring.


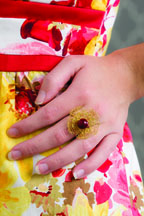
Golden Petals Ring
Golden Petals Ring


What do I want you to make jewelry out of?  Anything.  In class, we talk about all materials from basic crochet thread, to thin gauge wire, to leather and hemp; and even end with yarn.  The materials do not make the jewelry, you do.  So we talk about how to dress up or down the material you are working with.  One basic way is using metal chains, jump rings, and beads to connect your crochet together.  In just a few steps, I show you all you need to know to attach your beautiful crochet together into fantastic jewelry.  One word of warning, is the jewelry techniques I show you in class are so simple it is very easy to slip into another hobby and love every minute of it.


The best part of creating and making jewelry is it always cheers up my day.  Any day I get to crochet for a few minutes is great.  To be able to then wear something I made the next day, even better.  Hope you will join me in Learn to Crochet Creative Jewelry class.  I truly can’t wait to see what you can create!


To find out more about Robyn’s “Learn to Crochet Jewelry” class, see all of the projects in the class and watch the introduction video, visit Annie’s website here.


To learn more about Robyn Chachula, visit her website here or her blog here. I think Robyn will be holding a contest to win her class this month, so visit her blog and enter to win! Her class looks absolutely fabulous to me!


I hope you’ve enjoyed my guest blogger, Robyn Chachula, today. I’ll have a guest blogger during each of the next 2 weeks, so check back to read what my other 2 guest bloggers have to say about crochet!


Leave a comment on this blog post to be entered to win my Annie’s class, “Crocheting With Thread” (or another Annie’s class of your choosing). During the next 2 weeks, you’ll have 2 more chances to enter to win the class (one chance per week). I’ll pick the lucky winner at the end of this month. So if you’d like to learn to crochet with thread, this is the class for you!


Good luck everyone and happy crocheting!


Susan
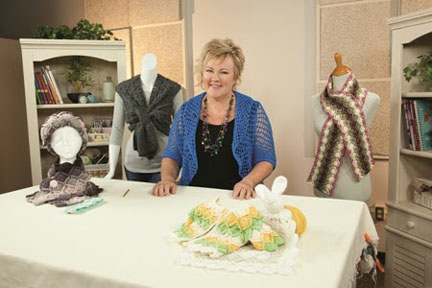
 

Free Crochet Class and Round Robin


Crocheting With Thread Class smaller

During the month of June, I’ll be participating in a “Round Robin” with 3 other crochet teachers from Annie’s online video classes. During the next 3 weeks, I’ll have a special “guest” blogger (once a week)! The teachers who are participating in this guest blogging tour, as well as their class/classes are:


Ellen Gormley: “Learn to Crochet”, “Crocheting With Beads” and her new class coming very soon, “Learn to Crochet Lace”

Jenny King: “Learn to Bavarian Crochet”

Robyn Chachula: “Learn to Crochet Jewelry”

Susan Lowman: “Crocheting With Thread” and “Beginner’s First Doily”


I’ve met these wonderful crochet designers/teachers (Ellen, Jenny and Robyn) at CGOA Conferences over the past 12 years. They’re very friendly and talented ladies! We all enjoy sharing our crochet knowledge with others through our crochet classes and patterns!


We’ll each be sharing some information about our classes, crochet techniques, inspiration and more during the next 3 weeks in June. Plus, each of us will be giving away a FREE class to a lucky winner at the end of the month, too! So when you read the “guest” blog post on my website from one of the other crochet teachers during the next 3 weeks, check out her website and enter to win!


You’ll also have a chance during the next 3 weeks to enter the giveaway on my website to win my crochet class, “Crocheting With Thread”. Just leave a comment in the comments section at the bottom of the “guest” blog post during that week’s post to enter. I’ll pick one lucky winner and will post the winner’s name on June 30th.


Please check back each week to read the guest blog post from one of the other 3 crochet teachers (or subscribe to my blog to receive an e-mail every time I post a blog entry so you don’t miss any blog posts). You’ll have many chances to win a free crochet class from Annie’s during the month of June!


Good luck everyone!


Happy crocheting,

Susan Lowman (aka: The Crochet Architect)

The Yarn Over and CGOA Videos

If you’re new to crochet or you learned to crochet from someone else, how do you know if you’re crocheting correctly? Do you hold the hook correctly? Are you holding your yarn correctly? Are you yarning over correctly? These are some of the questions you may be asking yourself. Whenever I’m doing something in crochet incorrectly, I really appreciate someone telling me the correct way to do it so I can improve my crochet skills and knowledge. So I thought I’d share with you the correct way to do a “yarn over” in crochet.


Every stitch in crochet uses a yarn over at some point in time, whether it’s at the beginning, in the middle or at the end of the stitch (or in all 3 places). There are many good crochet books written that explain and show how to do the yarn over and the crochet stitches formed by the yarn over correctly. Also, in this age of the internet and internet/website videos, there some great crochet videos to watch that will show you a multitude of fabulous crochet stitches and techniques. I think it’s wonderful to have so much helpful information at my fingertips to learn more about crochet. You probably share this enthusiasm for learning new crochet stitches and techniques, too!


But you know the saying: “Buyer Beware”! Disclaimer: NOT ALL CROCHET VIDEOS ARE CORRECT!


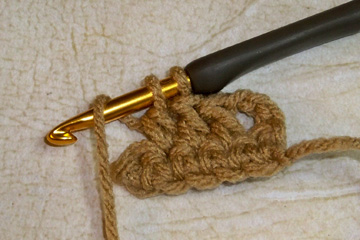
I’d love to be able to say that all of the crochet videos I’ve watched on the internet are sharing the correct information, but that’s simply not true. I’ve seen some videos where the person demonstrating the stitch is saying “yarn over”, but she’s simply grabbing the yarn (with the yarn in front of the crochet hook) and isn’t doing the yarn over correctly. To do a “true” yarn over, you must bring the yarn around the back of the crochet hook, over the top and to the front, like this:

Yarn Over done correctly


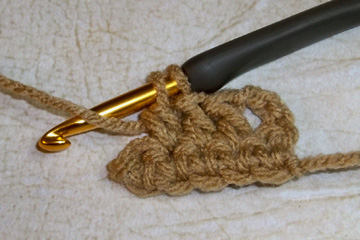
If you’re not making your yarn overs in this manner, then you’re doing them incorrectly. Here’s the incorrect way to do your yarn overs:

Yarn Over done incorrectly


Do you see the difference? When you’re doing your yarn overs correctly, the yarn goes over the top of the hook from the back to the front. It doesn’t just sit in front of the hook to grab it: that’s NOT a “yarn over”!


To see some crochet videos, including the correct way to do a yarn over, please visit the CGOA website here if you’re right-handed or here if you’re left-handed. In each of these videos, Kim Guzman, a respected crochet designer, teacher and author, shows how to do a yarn over correctly. The yarn over is used for making the chain, single crochet, half double crochet, double crochet and treble crochet. It’s also used for many other crochet stitches and techniques, including Filet Crochet, Bruges Lace, Wiggly Crochet, Tunisian Crochet, Hairpin Lace, Broomstick Lace and more. As a CGOA Board member, we discussed adding crochet videos to the CGOA website last year and Kim was enthusiastic about doing them for us (thank you so much, Kim). Kim is a wonderful crochet teacher with lots of knowledge and patience! So check out the crochet videos on the CGOA website to make sure you’re doing your yarn overs correctly! And if you don’t know about all that CGOA (the Crochet Guild of America) has to offer, then check out the rest of the updated CGOA website while you’re there!


As one of the co-chairs and a portfolio reviewer in the CGOA Masters program, I enjoy discussing crochet stitches, techniques and patterns to find out how some people work their stitches (correctly and incorrectly). I learn so much from these discussions! They help me to understand how the written crochet instructions can be interpreted in different ways, which in turn helps me improve my pattern writing and technical editing skills! I’m all for improvement throughout my life!


Are there any crochet stitches, techniques or patterns you’d like to discuss?


Until next time…


Happy crocheting,

Susan


New CGOA Website and Banner

Are you a CGOA (Crochet Guild of America) member? If so, fantastic! If not, why not? If you love crochet and you’d like to be part of a national organization that is dedicated to crochet, then CGOA is for you! We have local chapters that hold monthly meetings for members to share with each other and learn from each other, yearly crochet conferences with lots of classes and fun activities, free crochet patterns “for members only” and many more benefits of CGOA membership! Check out all the member benefits on the CGOA website here. To find a local chapter near you, please visit this webpage.

Do you know about the CGOA website? You can find CGOA at www.crochet.org. The CGOA website has a new look and added features this year. We have some crochet lessons and fabulous new crochet videos (done by Kim Guzman) on the new CGOA website, as well! And there will be more additions to the website in the near future, too.

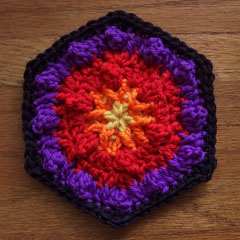
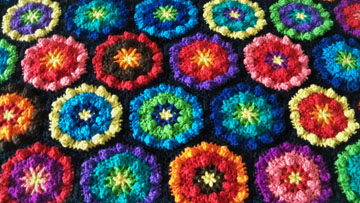
Many of you already know that I am the current secretary on the CGOA Board of Directors. I’m also one of the co-chairs on the CGOA Masters Committee and I’ve taught classes at many of the CGOA Conferences in the last 5 years. As a Board member, I was honored to design and crochet the website banner for the CGOA website this year. If you’re a CGOA member, you can read all about the banner and download the free website banner motif pattern (for members only) here. This is the motif for the CGOA website banner:

CGOA Website Banner Motif

It’s made with popcorns and post stitches, as well as many regular crochet stitches. Here’s a photo of part of the CGOA website banner with many joined motifs:

CGOA Website Banner
CGOA Website Banner

I made this banner with 12 colors of Cascade 220 Superwash yarn. This yarn was a dream to work with! You can see the huge range of Cascade 220 Superwash colors here. There are 220 yards of worsted weight 100% wool yarn in each ball. I know the CGOA banner will last for a long time, since this yarn is completely washable!

Happy crocheting everyone! And remember the CGOA motto:

“When you think CROCHET, think CGOA”!!!

Susan

P.S. I hope you have a very Merry Christmas and a Happy New Year filled with lots of time to crochet! And I hope you learn a new crochet technique in 2014, too!

New Online Video Class

Beginner's First Doily Class mediumHave you ever wanted to learn to crochet with crochet thread? How about learning to crochet doilies? I’m a huge advocate for crocheting with thread. I really love thread crochet and I know some of you do, too.

In previous blog posts, I told you about the online class I have with Annie’s called “Crocheting with Thread” and my experience going to Berne, Indiana in January to film the class. But did you know that I now have a short online class with Annie’s called “Beginner’s First Doily”? It’s a mini class to teach you how to make a beginning doily. This mini class is excerpted from the full-length class on “Crocheting with Thread” and it’s a great way to get your feet wet with online classes. The cost of this mini class is only $4.95. What a bargain!!! If you sign up for this class and decide to take the full length class later on, you’ll get $5 off of the full length class.

To read all about this mini class and to get started on crocheting your first doily, just click on the “Crocheting with Thread” class link on the right-hand edge of this page (it’s also on many other pages of my website). It will take you directly to the online videos on the Annie’s website.

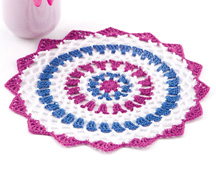
Here’s a photo of the doily made in both classes:

Beginner's First Doily
Beginner’s First Doily

This doily is made with size 10 crochet thread, but you could make a larger doily with size 3 or 5 crochet thread, if you’d like.

All of the projects in the full-length class are made with either size 10 or size 5 cotton crochet thread and a size 7 (1.65mm) or a size 0 (3.25mm) steel crochet hook. Since size 3 and size 5 crochet threads are so close in size, you can easily substitute size 3 for the projects in the class that are worked in size 5.

In case you haven’t seen the projects in my full-length “Crocheting with Thread” class, these are the other 6 projects included in that class:

Seed Stitch Bookmark
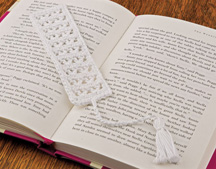
V-Stitch Bookmark
V-Stitch Bookmark


There are 2 bookmarks. One is a seed stitch bookmark and the other is a V-stitch bookmark. They’re both beginner/easy projects to get you started with thread crochet. I demonstrate working the rows and the edging on these projects in the video, as well as how to make the tassel in the V-stitch bookmark project.


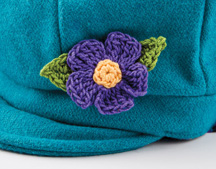
Flower Pin
Flower Pin
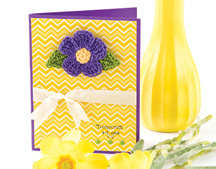
Flower Pin Card
Flower Pin Card


This is the flower pin. If you’ve never worked a crochet project in rounds, this is an easy project to learn how to crochet in rounds. The folks at Annie’s even used this flower to decorate a handmade card! I think the card is very pretty! The instructions for the card are included in the class handout, as well.

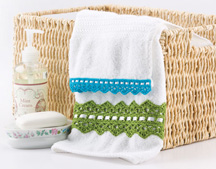
Towel Edging
Towel Edging

Here’s the towel edging that I designed for the thread class. It can be made with 2 edges of shells (shown in the green edging) or with only 1 edge of shells (shown in the turquoise edging). You can use size 10, 5 or 3 thread for the edging. I’ve woven some ribbon through one of the rows of the edging for added visual interest. A towel with a crochet edging such as this would make a great gift any time of the year!

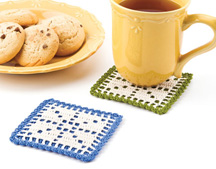
Filet Coaster
Filet Coaster

The class also includes a filet crochet coaster project. If you’ve never done filet crochet before, I’ll teach you how to read a filet crochet chart in the class. A filet crochet chart is almost always included in filet crochet patterns to help shorten the pattern and to make it easier to follow “visually”. I’ll take you step-by-step with this coaster, teaching you how to work the open and closed mesh in filet crochet. The coaster has an edging and 2 layers for added absorbency!

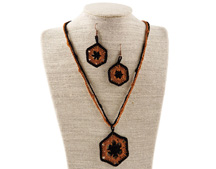
Necklace & Earrings Set


What thread crochet class would be complete without some crochet jewelry? The necklace and earrings in this class are worked in the round with size 10 thread. The necklace has 2 crocheted “chains” for more strength when it’s worn. You can make this thread crochet jewelry set in any desired colors to coordinate with your favorite outfit!


Each of the 7 projects in the full-length class includes a symbol chart for all of the “visual” people out there! If you’re not familiar with symbol crochet charts, you’ll LOVE them! They are a visual representation of the project itself, showing what stitches are worked in the project and where each stitch is worked. I love symbol crochet charts and I think you will, too!

I really enjoy taking crochet classes to expand my crochet knowledge and skills. Whether I take an online class or an “in-person” class, they’re all very enjoyable and I learn a lot from them! And I love to teach crochet classes, as well. I hope you’re continually learning new crochet skills and techniques to challenge yourself, too.

Please check out both of my thread crochet classes and all of the other fantastic online classes by many talented teachers on the Annie’s website. There’s a lot more that we can all learn about crochet and Annie’s has been in the crochet industry for decades!

Happy crocheting,

Susan

Big Announcement: Crochet Video Released!

Okay. Either you’ve been patiently waiting for the big announcement since I returned home from my trip to Berne, Indiana in January, or you’ve forgotten about it and gone about your day-to-day lives (which is probably more believable!). Well today is the “big reveal”, so to speak! The reason I went to Berne, IN was to film a crochet video class for Annie’s. It’s not just any crochet video; it’s a “thread crochet” video! You may have some idea of how much I LOVE thread crochet by now. I would be thrilled if more crocheters came to love thread crochet as much as me! There are some very talented thread crochet designers out there: Kathryn White, Patricia Kristoffersen and many more. If you’ve been thinking about jumping into the world of thread crochet, I hope you’ll consider taking my online video class through Annie’s. I would love to have some of my blog followers take the class so we can get to know each other more and I can help you advance your crochet skills and knowledge (isn’t that what blogging and teaching should be all about anyway?).


You can read all about my “Learn to Crochet With Thread” online video class and watch a few sample segments of the video here. This is my first crochet video and I hope to do many more in the near future!


If you don’t recognize me in the video or in the photo, it’s because I’m wearing makeup in them (I haven’t worn makeup for years). They had a hair and makeup stylist named Amy who did my hair and makeup for the video each of the 3 days I was there. It’s a shock to see myself made up, but it’s probably better that way (I have fair skin and I’d blind everyone without the makeup, so it was necessary!). I’ve heard that when you’re doing photography or videotaping, the colors get washed out under the studio lights, so they added more color to my face to compensate for that! Amy was fantastic, as was everyone involved in producing the video. In the studio each day were: Laura Scott, the producer (the one in charge); Nicole, the video editor; Scott and Turner, the videographers; Allison, the production assistant and Amy, the hair and makeup artist.


Okay, just for fun, here I am before and after makeup:


Before Makeup
Before Makeup
After Makeup
After Makeup


I had a blast filming the video in Berne. Everyone on the set (especially the cameramen) made me feel relaxed. They were very professional and easy to get along with. We all had the same goal in mind: to produce a great video! I thoroughly enjoyed my trip to Berne and filming the video. I hope you enjoy the free video segments of my “Learn to Crochet With Thread” class at Annie’s and seriously consider taking the class (if you’d like to learn to crochet with thread, that is).


Here is another photo of my trip to Berne (inside the video studio):


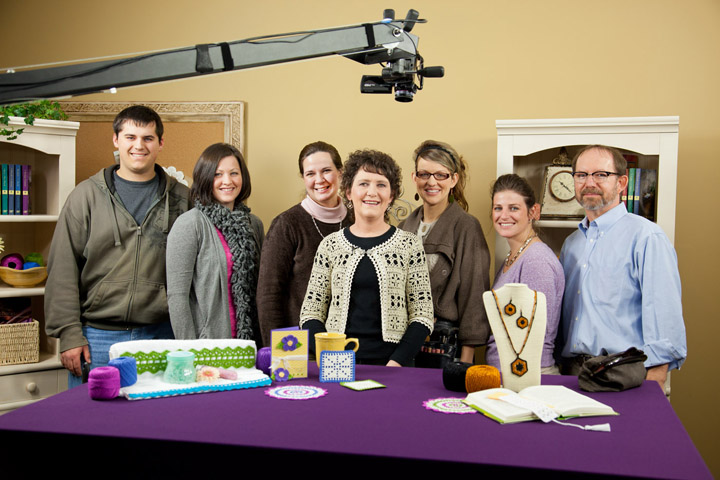
The whole crew
The whole crew


This is the crew and me after the video was finished. From left to right: Turner, Nicole, Laura, me, Amy, Allison and Scott. Don’t we look happy that it’s all over?


I think everyone did a fabulous job. Thanks so much for the hard work that each one of you did, especially you, Laura! Let’s do it again some time!


I hope you enjoyed this little look inside the video studio at Annie’s and will consider taking an online video class through Annie’s to further your crochet skills and knowledge.


Happy crocheting,

Susan