New Year’s Resolutions for Fiber Lovers!

Do you make New Year’s resolutions every year? What is your track record on keeping those resolutions? Like many people, mine isn’t so good! In the past, I’ve resolved to read one book per month, but since I’m not much of a reader, that doesn’t last very long at all! I’ve also resolved to exercise every day, but I’m lazy and I start skipping some days, so that one doesn’t last long, either (or gets modified to a more realistic resolution like exercising 3 times per week)! Why do we set such unrealistic expectations at the beginning of the New Year? I guess we want to improve ourselves in one way or another. That’s not a bad thing to do, especially when we realize where we’re lacking in our lives. Improving ourselves is a great goal and I think we should always strive for improvement! If we don’t strive for improvement, we stagnate and start smelling! Just kidding! But I think improvement in our lives is always a positive goal and I’m all for improvement in my life!


For our New Year’s resolutions in 2015, how about setting some more attainable goals, like learning a new craft or learning more stitches and/or techniques in a craft we already know? Now that’s a New Year’s resolution that would be easy for me to keep! How about you? And it would satisfy the goal of self-improvement, too!


So for my New Year’s resolutions for 2015, I resolve to learn more knitting and crochet techniques. I also resolve to finish more projects than I currently finish and to finish some of my UFO’s (for crocheters and knitters, UFO does NOT mean “unidentified flying object”, it means “UnFinished Objects”). If you’ll notice something about my goals, they aren’t terribly “specific” on how many new techniques I’ll learn or how many UFO’s I’ll finish up in 2015. So these goals are attainable (without being unrealistic)! I guess they’re more of a “guideline” than a goal, but that’s okay with me. At least I can strive for them!


I just did a search on Ravelry.com for UFO groups and there are lots of them! There’s even a group for procrastinating knitters (like putting off the seaming or knitting the 2nd sock)! I’m all in, since I’m a procrastinator, too! In fact, I have 2 books from the library on procrastinating, but I haven’t finished reading them yet! Dare I say that I’m procrastinating on reading them? Unfortunately, nobody has posted in that Ravelry procrastinators group for 2 years! I guess they’re all procrastinating about posting!!!


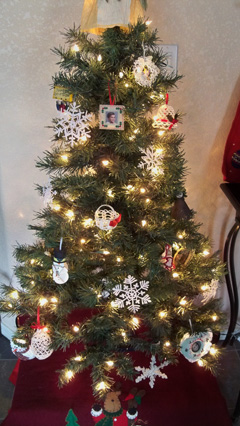
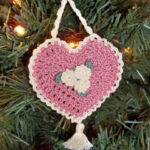
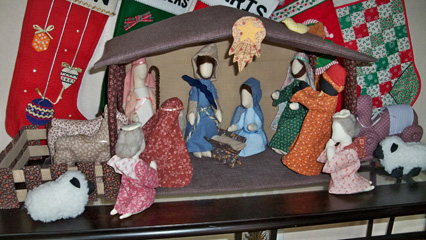
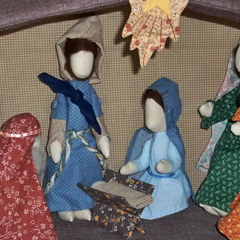
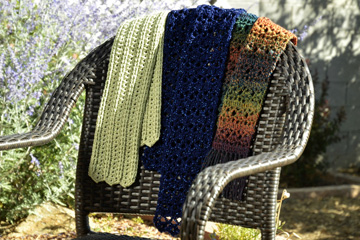
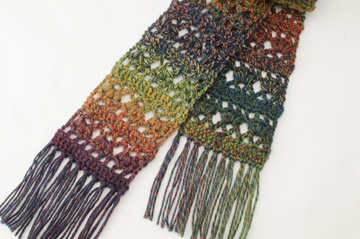
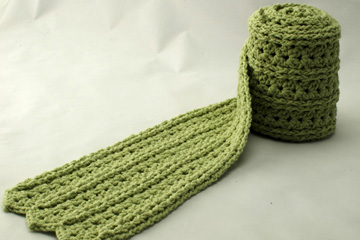
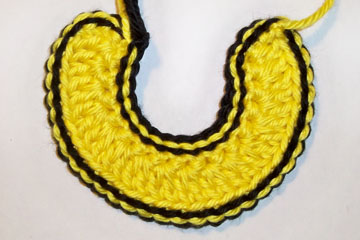
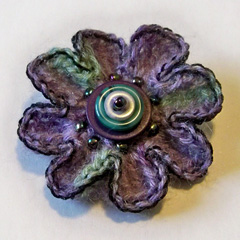
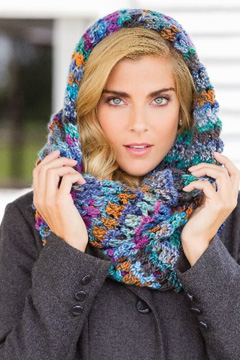
Don’t get me wrong: I finish lots of crochet and knitting projects every year (projects for publication and personal projects, too). I haven’t kept track, but I estimate I’ve finished 10-25 projects this year, ranging from small to large. Here are photos of a few of the published projects I’ve finished this year:


Nantucket Cowl from Dec 2014 Crochet World magazine
Easy Cell Phone Cosy & Heart-Shaped Key Fob from Red Heart UK website
Mosaic Blanket (knit) from Vogue Knitting magazine Winter 2014/2015 issue


Each year, I start some new projects that I don’t finish (at least I finish more projects than I start, so it’s not ALL bad!). If I keep adding to my UFO’s pile, there will be too many to finish in my lifetime! So it’s time to get them out to decide which ones I should finish in 2015! I think I’ll organize them today or tomorrow and make some decisions on how/when to proceed with each one!


How about you? What resolutions are you making for 2015? Are you going to learn a new craft? Are you going to learn some new crochet or knitting techniques? Are you going to finish some projects before starting a new one? I’m definitely NOT going to say that I’ll finish ALL of my UFO’s before starting something new! I know myself and I’m very easily distracted by other things, like new projects! Plus I don’t like to set goals that I can’t keep, no matter how hard I try!


Whatever your resolutions (or lack of resolutions) for 2015, I wish you all a very Happy and Healthy New Year!


Happy crocheting (and knitting),

Susan


Handmade Christmas Ornaments and Decorations

Are you someone who loves decorating for Christmas? Do you love to make your own ornaments? I’ve been making Christmas decorations and ornaments for as long as I can remember. I really love crocheting ornaments for our tree, especially with cotton crochet thread. Christmas ornaments bring back such wonderful memories, especially the ones that my 3 sons made at school and church when they were growing up. My sons have all grown up and moved out now, but I still love the ornaments they made. However, we’ve downsized our Christmas tree and I have an abundance of ornaments that won’t fit on our smaller tree! So what’s a mom and crafter to do? Well, I guess I have to pick my favorite ornaments and/or rotate them each year so I can enjoy them anew each year. Or if I had more time and energy, I could buy several more small Christmas trees and have more than one decorated tree in the house (or buy a bigger tree again)! I learned long ago that I’m allergic to real pine and fir trees, so we only use an artificial tree in our house. It’s not quite as nice as a real tree, but it’s better than the misery of the allergy symptoms I suffer if we have a real tree!


Last night, my husband helped me put up and decorate our small Christmas tree (it’s only about 4 feet tall at the most). Yes, it’s kind of late in the season (only 9 days before Christmas), but better late than never! Since we don’t have any little ones at home any more, there’s not as much incentive to decorate for Christmas as there was when they were growing up.


Here is our decorated Christmas tree this year:


Christmas tree decorated 2014

It’s not the nicest tree and I’m not the best Christmas tree decorator, as you can see! I’m more of a minimalist when it comes to decorating a Christmas tree, I suppose. But I enjoy seeing the Christmas tree in our living room just the same.


Here are some of the handmade ornaments on our Christmas tree this year:


Stiffened Snowflake Ornament 1Stiffened Snowflake Ornament 4Stiffened Snowflake Ornament 3Stiffened Snowflake Ornament 2


Tatted Snowflake OrnamentPaper Snowman Ornament


Heart Shaped Victorian Christmas OrnamentVictorian Christmas Ornament

Candy Cane Victorian Christmas Ornament


As you can tell, I like snowflakes and snowmen! Can you tell that one of the snowflakes is tatted, not crocheted? I tatted that one many years ago. I like Victorian ornaments, too. I crocheted the 3 Victorian ornaments from the Leisure Arts leaflet, “Victorian Thread Ornaments” by Anne Halliday (she’s one of my favorite crochet designers!). Years ago, I held an ornament exchange with a bunch of friends. I held it for 3-5 years, so I have some really nice handmade ornaments from my friends over the years. It was a ton of fun! We would each make a different style of ornament, making one for each of that year’s participants. Then we’d get together one night before Christmas and exchange them with each other. Most of those ornaments are in the box of handmade ornaments because they won’t fit on our current small tree. If I could, I would decorate a whole tree with just those handmade ornaments that we swapped over the years (but I’d need a larger tree to fit them all!).


I’ve made a bunch of Christmas decorations over the years, too. This is the Christmas manger scene that I made from fabric a very long time ago:


Fabric Manger

I made this from a pattern in a book/leaflet. I used fabrics, fiberfill, craft hair, cardboard, ribbons and fabric-covered buttons (for movable joints). Here’s a closer look at Mary, Joseph and baby Jesus:


Fabric Manger close up

This set includes the 3 wise men, a shepherd, 2 angels, 2 sheep, a donkey, a cow and a camel. It doesn’t look as good as it did when I finished it, but it’s not too bad for a 15-20 year old decoration!


I love stiffened crochet snowflakes. I think they turn out wonderful and look fabulous on the tree, especially since the white of the snowflakes contrasts so nicely against the green of the tree. And there are so many nice crochet snowflake patterns to choose from, too. If you’re interested in giving crocheted snowflakes a try, check out my blog post from last December here. And you can also check out my tutorial on stiffening crocheted snowflakes here. One thing I’d like to stress in this tutorial is to remember to include a large enough hole on one of the points of the snowflake when you’re stiffening it so you can insert the hanging wire or thread! Why do I say this now? Because I realized I didn’t leave a big enough hole in some of the snowflakes I stiffened last year! OOPS! I suppose I could have forced the hanging wire into the snowflake, but I didn’t want to mess up the snowflake, so I set those snowflakes aside for another day/year.


I’m sure many of you have made some Christmas ornaments and decorations over the years. What kinds of Christmas ornaments and decorations have you made? Which are your favorites?


I hope you and your family have a wonderful Christmas this year!


Happy crocheting,

Susan


One-Skein Scarves patterns available

crochet scarves
One-Skein Scarves pattern


With only 2 weeks left until Christmas, these One-Skein Scarves are perfect for some last minute gifts! The crochet patterns are available separately or as a “special value” set. They’re sure to please many friends and family members on your holiday list!


Each of our “One-Skein Scarves” patterns includes a symbol crochet chart for those of you who are “visual learners”, like me. As always, each pattern includes the finished size, skill level, materials list, gauge, abbreviations used in the pattern, special abbreviations and full written instructions.


Autumn Romance Scarf


The Autumn Romance Scarf was inspired by the beautiful colors of Patons Kroy Socks FX that I saw in my local yarn store. I knew I simply had to design something beautiful with it! It’s a one-skein scarf worked from one end to the other. Then some fringe is added at each end. There is no edging involved in this scarf. It’s a quick project and I absolutely LOVE the colors of this yarn!


Glamour Scarf
Glamour Scarf


The Glamour Scarf was something I decided to design with a skein of Vanna’s Glamour yarn one day. It’s another quick project with an easy stitch pattern to memorize. It’s worked in 2 halves, from the center to each end of the scarf, making each end symmetrical. The scarf includes a simple edging to finish it off. And the shimmer in this yarn is wonderful!


Pediwick Scarf
Pediwick Scarf


The Pediwick Scarf is made in a beautiful shade of green, but you can make your Pediwick Scarf in any color you desire, of course! It’s also made in 2 halves, from the center to each end. This scarf doesn’t require an edging, since the edges are so straight already. It has a nice stitch pattern on the ends, finishing it off nicely.


Whether you choose one of these scarves or all 3 of them, I’m sure you’re going to love crocheting them up in a jiffy! Each scarf pattern is available for $3.95, or the set of all 3 One-Skein Scarves patterns is available for the special price of $7.95. That’s like getting the 3rd pattern for free! To see more about these new scarf patterns, visit our “Pattern” page here.


I hope you’ll enjoy these One-Skein Scarf patterns and will share photos of your scarves with me. I’d love to see what creative scarves you make with these patterns!


Happy crocheting,

Susan


New Tutorial: Decorative Slip Stitch Edging

Slip Stitch Edging

I love the look of decorative edgings, especially when they’re easy and fast to do! I added a decorative edging to the skirt and collar on my Bear Mitts pattern, as well as the edges of my Button Flower Pin pattern.


Bear Mitts Button Flower Pin

I LOVE the effect I get when I work this slip stitch edging and it’s super simple to do, too! To find out how to work this edging, check out my new tutorial here.


Happy crocheting,

Susan