Are you a CGOA (Crochet Guild of America) member? If so, fantastic! If not, why not? If you love crochet and you’d like to be part of a national organization that is dedicated to crochet, then CGOA is for you! We have local chapters that hold monthly meetings for members to share with each other and learn from each other, yearly crochet conferences with lots of classes and fun activities, free crochet patterns “for members only” and many more benefits of CGOA membership! Check out all the member benefits on the CGOA website here. To find a local chapter near you, please visit this webpage.
Do you know about the CGOA website? You can find CGOA at www.crochet.org. The CGOA website has a new look and added features this year. We have some crochet lessons and fabulous new crochet videos (done by Kim Guzman) on the new CGOA website, as well! And there will be more additions to the website in the near future, too.
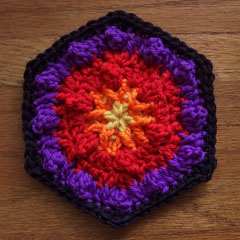
Many of you already know that I am the current secretary on the CGOA Board of Directors. I’m also one of the co-chairs on the CGOA Masters Committee and I’ve taught classes at many of the CGOA Conferences in the last 5 years. As a Board member, I was honored to design and crochet the website banner for the CGOA website this year. If you’re a CGOA member, you can read all about the banner and download the free website banner motif pattern (for members only) here. This is the motif for the CGOA website banner:
CGOA Website Banner Motif
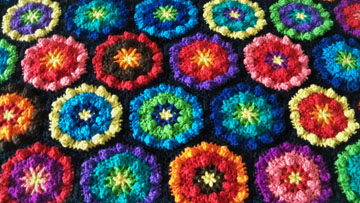
It’s made with popcorns and post stitches, as well as many regular crochet stitches. Here’s a photo of part of the CGOA website banner with many joined motifs:
CGOA Website Banner
I made this banner with 12 colors of Cascade 220 Superwash yarn. This yarn was a dream to work with! You can see the huge range of Cascade 220 Superwash colors here. There are 220 yards of worsted weight 100% wool yarn in each ball. I know the CGOA banner will last for a long time, since this yarn is completely washable!
Happy crocheting everyone! And remember the CGOA motto:
“When you think CROCHET, think CGOA”!!!
Susan
P.S. I hope you have a very Merry Christmas and a Happy New Year filled with lots of time to crochet! And I hope you learn a new crochet technique in 2014, too!
In May of last year, I blogged about the Continuous Crochet Motifs method of making and joining motifs so there are less ends to weave in at the end of the project. This is a really cool crochet technique/method. You can read that blog post here and see photos of the Japanese crochet book that I bought to learn this crochet technique. Since then, I purchased Kristin Omdahl’s book called “Seamless Crochet”. I haven’t had the time to make anything from that book, but it’s definitely the same method of joining motifs as in the Japanese book I bought.
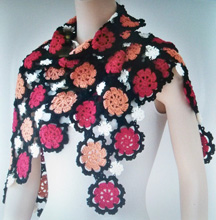
At the time I wrote that blog post, I was designing a shawl to enter in the CGOA Design Contest, made in the Continuous Crochet Motifs method. Well, I got the shawl finished and entered it in the contest. Unfortunately, I didn’t win anything for this shawl and I think the reason was that I didn’t have an edging on it (I couldn’t think of an edging that would work at that time). A few months ago, I added an edging to the shawl and it really finishes off the shawl nicely. I tried many different color combinations for the edging, but in the end, I decided to make the edging all black so it wouldn’t take away from the beauty and design of the shawl itself. I’ll be publishing this shawl design when the pattern is ready (it still needs a little tweaking first!). Here’s a photo of the shawl before I added the edging:
Byzantine Shawl in 2012 CGOA Design Contest
I still need to take some new photos of this shawl with the edging added before I can publish this pattern. But I promise to get to it sometime soon! I’ve veered from my original topic of the Continuous Crochet Motifs method a little, so I’ll get back to that topic now.
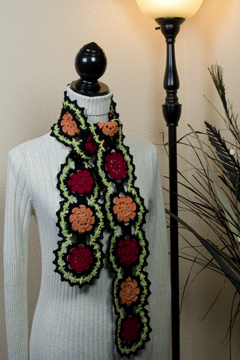
After designing the shawl, I designed a scarf using the same Continuous Crochet Motifs method and some of the same motifs as the shawl. It’s called the “Byzantine Scarf”. I just finished up the pattern and added it for sale here yesterday. You can see the pattern here.
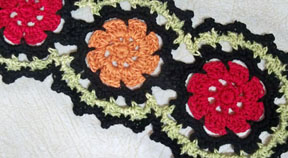
Here’s a photo of the Byzantine Scarf:
Byzantine Scarf
What I love about this scarf (besides the colors) is the Continuous Crochet Motifs method I used for the 2 rounds of black, which are joining the red and orange motifs together (not the final round of black, but the black rounds inside the lime green rounds). With this method of crocheting, I was able to work these 2 rounds of black edging around each of the 15 motifs in the scarf in one long pass! And that means I only had 2 tails of black yarn to weave in on these 2 rounds.
Okay, I realize that the rest of this scarf has plenty of tails to weave in. But by using the Continuous Crochet Motifs method of joining the motifs, I saved myself 28 whole tails to weave in (30 – 2 = 28). I don’t know anyone who enjoys weaving in the tails/ends on their crochet work and I don’t, either. But it’s a necessary evil and has to be done! I love using color in my crochet designs, so I’ve been known to weave in hundreds of tails on larger projects with multiple colors. I just bite the bullet and do it!
I realize that not everyone wants to learn a new crochet technique, so I included the instructions for joining the motifs in the traditional motif joining method (joining with a sl st to the adjacent motif). But when you join the motifs this way (in the traditional method), you’ll have 30 tails of black to weave in on these 2 rounds of motif edging (2 tails for each of the 15 motifs in the scarf). So to me, it’s a “no brainer” to use the Continuous Crochet Motifs method to join the motifs together! But I’m an adventurous crocheter and I love to learn new techniques. I’m sure that not everyone is as adventurous as me, so that’s why I included the instructions for joining the motifs the other way.
Here’s a close up photo of the scarf:
Byzantine Scarf close up
Now you can see the 2 rounds of black around the red and orange motifs better. I also made a symbol crochet chart for each method of joining the motifs (these charts are included in the pattern). So if you like symbol crochet charts and learning new crochet techniques, you might want to give this scarf pattern a try!
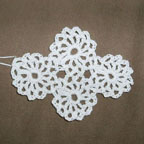
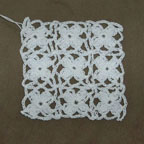
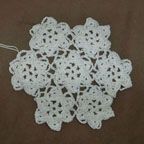
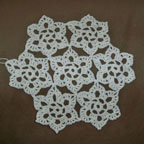
Here are photos of 4 swatches of motifs that I made from the Japanese Continuous Crochet Motifs book a few years ago (right after I got the book in the mail!):
Motif swatch #2Motif swatch #6
Motif swatch #36Motif swatch #43
These swatches haven’t been blocked, so they don’t look as good as they could. What I want you to notice is the number of tails and the number of motifs in each of these swatches (I didn’t weave in any tails at all on them). Each swatch has 4, 7 or 9 motifs that are joined. But since I used the Continuous Crochet Motifs method to make these swatches of motifs, there are only 2 tails that would need to be woven in (if I were going to make these into projects). There would normally be 2 tails to weave in “per motif”! This is a HUGE time saver!!! It means I can spend more time crocheting and less time weaving in ends! Of course, it only works when you’re using the same color of yarn/thread for each motif (or to join each motif). But it’s not a bad thing to use 1 color of thread/yarn. It’s a design decision! And the savings in time it takes to weave in the tails is HUGE!
I hope you’ve enjoyed this closer look into the Continuous Crochet Motifs method and will come back again soon.
I hope everyone who reads my blog is a member of CGOA (Crochet Guild of America) or at the very least, has some crochet buddies they crochet with on a regular basis. I’ve been a CGOA member since 2002 and I love it! CGOA is a great organization and is getting better all the time. And I’m not just saying that because I’m a Board member now! We’re planning some great additions for CGOA and the CGOA website in the coming years. If you’d like to find out more about CGOA and all that is available to CGOA members, just check out the website at http://www.crochet.org.
There will be 2 CGOA Conferences this year: one in Indianapolis, IN in July and one in Charlotte, NC in October. I’m pleased to be teaching 6 classes at the CGOA Conference in Indianapolis in July. I love teaching crochet and I always have a great time at the conference. My students are very eager to learn and I meet so many nice people there, who are also having a great time! It’s almost a week of being surrounded by other crochet enthusiasts and all of us speaking the same crochet language!!! What could be better?
The classes I’ll be teaching at the conference in July are:
MAGICAL MOSAIC CROCHET on Wed, July 17 from 6-9PM
CROCHET PATTERN WRITING 101 on Thur, July 18 from 9AM-noon and 2-5PM
BEGINNING BRUGES LACE on Fri, July 19 from 9AM-noon
INTERMEDIATE BRUGES LACE on Fri, July 19 from 2-5PM
WONDERFUL WIGGLY CROCHET on Sat, July 20 from 2-5PM
READING & UNDERSTANDING CROCHET PATTERNS on Sun, July 21 from 9AM-noon
I love Mosaic Crochet, Bruges Lace and Wiggly Crochet. I’m so glad that I get to teach them again at the CGOA Conference this year in Indianapolis. To see the full schedule of classes and to register for the conference, visit http://www.knitandcrochetshow.com or http://www.crochet.org/event/KCSRegistration2013. If you’re planning to go to the conference and you haven’t registered for your classes yet, you really should do it soon. Several of the crochet classes are already sold out, including my Mosaic Crochet and Beginning Bruges Lace classes. There are only 2 spaces left in my Intermediate Bruges Lace class and 1 space left in my Crochet Pattern Writing class as of the time that I’m writing this blog post. To see which classes are sold out and if the class(es) you’re interested in taking are close to being sold out, you’ll need to go to the registration page on the CGOA website (https://crochet.site-ym.com/events/register.asp?id=298542). Click on each of the class times to open the drop down menu of classes. That’s where you can see which classes are sold out. Since the registration process is different than last year, you won’t see the sold out classes on the Knit and Crochet Show website like in past years.
I hope everyone who attends the conference gets into the classes they want to take the most. There are some really fantastic classes being offered by 21 knit and crochet teachers. If you’ve never been to a CGOA Conference before, you can even request a buddy to help answer all of your questions and direct you to where the classes are located.
Mosaic Crochet
Mosaic Crochet is worked in 2 colors (or more). The color is changed every row or two and some of the stitches are worked in front of the other color in a row or two below the previous row to make the vertical lines. It’s a great technique and really fun to see the pattern come to life before your eyes!!! Lily Chin has a book on Mosaic Crochet called “Mosaic Magic: Afghans Made Easy”. She’s designed some great afghans in Mosaic Crochet in this book.
Beginning Bruges LaceIntermediate Bruges Lace
If you’re not familiar with Bruges Lace Crochet, it’s made to look like the intricate Bruges Lace from Belgium. In the crochet version of Bruges Lace, narrow strips or tapes are made, then joined to form circles, squares, triangles and more. The Russians have some really awesome Bruges Lace designs in their crochet magazines. And many Magic Crochet and Decorative Crochet magazines have Bruges Lace designs in them, as well. Bruges Lace Crochet can be combined with traditional crochet techniques, as well, or even with Irish Crochet. I love Bruges Lace and really enjoy designing in this fun crochet technique.
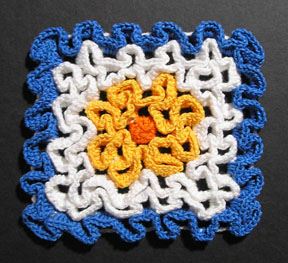
Wiggly Crochet
I’ve been enjoying the Wiggly Crochet technique for many years. You may be familiar with some of my wiggly crochet designs. This is another really fun technique to learn. I was first introduced to this technique when a friend asked me to crochet a new hot pad for her. Her grandmother had crocheted a wiggly crochet hot pad for her many years before and it had seen its better days! I had never seen wiggly crochet before and was intrigued with it. So I analyzed the stitches and crocheted a new hot pad for her. Then I got to thinking that I could design some Wiggly Crochet hot pads with designs on them instead of just concentric squares, like my friend’s hot pad. So I got out my graph paper and colored pencils and started drawing different shapes until I came up with some designs of my own in Wiggly Crochet. I love the textural, dimensional look to Wiggly Crochet. It is a great technique for hot pads, coasters, rugs and more! You can see all of my Wiggly Crochet designs on my Pinterest board here: http://pinterest.com/susanlowman1/wiggly-crochet-patterns/. I love Wiggly Crochet so much that I have 3 Wiggly Crochet booklets published! And I have a few self-published designs in Wiggly Crochet here on my website, too. If you’re intrigued with Wiggly Crochet, I hope you’ll give it a try very soon.
I love to teach others more about crochet in my classes, whether it’s a crochet technique, learning to read crochet patterns or learning how to write crochet patterns (for new designers). If you’re a new designer and you’re struggling with writing patterns for your designs, I’d love to have you in my Crochet Pattern Writing 101 class. I’m aiming to cover all the bases of pattern writing in this full day class! I’ve been designing and writing crochet patterns since 1999 and I’ve edited crochet patterns for nearly 10 years. I’ve learned a lot along the way and I enjoy sharing what I’ve learned with my students!!!
If you’re planning to attend the CGOA Conference and we haven’t met, yet, please leave a comment on this blog post and let me know. I’d love to meet you at the conference this year! I look forward to seeing many friends and making new ones at the CGOA Conference in July.
Have you ever wanted to learn to crochet with crochet thread? How about learning to crochet doilies? I’m a huge advocate for crocheting with thread. I really love thread crochet and I know some of you do, too.
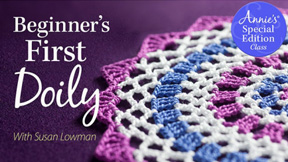
In previous blog posts, I told you about the online class I have with Annie’s called “Crocheting with Thread” and my experience going to Berne, Indiana in January to film the class. But did you know that I now have a short online class with Annie’s called “Beginner’s First Doily”? It’s a mini class to teach you how to make a beginning doily. This mini class is excerpted from the full-length class on “Crocheting with Thread” and it’s a great way to get your feet wet with online classes. The cost of this mini class is only $4.95. What a bargain!!! If you sign up for this class and decide to take the full length class later on, you’ll get $5 off of the full length class.
To read all about this mini class and to get started on crocheting your first doily, just click on the “Crocheting with Thread” class link on the right-hand edge of this page (it’s also on many other pages of my website). It will take you directly to the online videos on the Annie’s website.
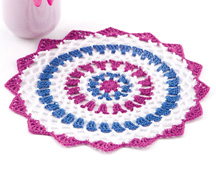
Here’s a photo of the doily made in both classes:
Beginner’s First Doily
This doily is made with size 10 crochet thread, but you could make a larger doily with size 3 or 5 crochet thread, if you’d like.
All of the projects in the full-length class are made with either size 10 or size 5 cotton crochet thread and a size 7 (1.65mm) or a size 0 (3.25mm) steel crochet hook. Since size 3 and size 5 crochet threads are so close in size, you can easily substitute size 3 for the projects in the class that are worked in size 5.
In case you haven’t seen the projects in my full-length “Crocheting with Thread” class, these are the other 6 projects included in that class:
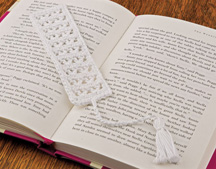
Seed Stitch BookmarkV-Stitch Bookmark
There are 2 bookmarks. One is a seed stitch bookmark and the other is a V-stitch bookmark. They’re both beginner/easy projects to get you started with thread crochet. I demonstrate working the rows and the edging on these projects in the video, as well as how to make the tassel in the V-stitch bookmark project.
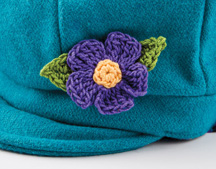
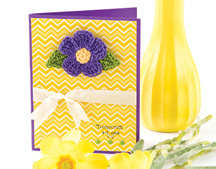
Flower PinFlower Pin Card
This is the flower pin. If you’ve never worked a crochet project in rounds, this is an easy project to learn how to crochet in rounds. The folks at Annie’s even used this flower to decorate a handmade card! I think the card is very pretty! The instructions for the card are included in the class handout, as well.
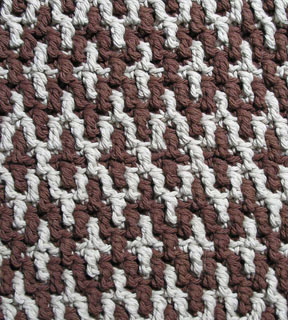
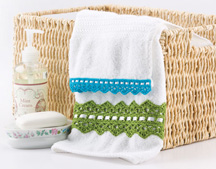
Towel Edging
Here’s the towel edging that I designed for the thread class. It can be made with 2 edges of shells (shown in the green edging) or with only 1 edge of shells (shown in the turquoise edging). You can use size 10, 5 or 3 thread for the edging. I’ve woven some ribbon through one of the rows of the edging for added visual interest. A towel with a crochet edging such as this would make a great gift any time of the year!
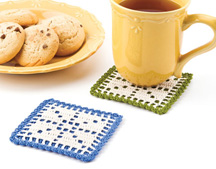
Filet Coaster
The class also includes a filet crochet coaster project. If you’ve never done filet crochet before, I’ll teach you how to read a filet crochet chart in the class. A filet crochet chart is almost always included in filet crochet patterns to help shorten the pattern and to make it easier to follow “visually”. I’ll take you step-by-step with this coaster, teaching you how to work the open and closed mesh in filet crochet. The coaster has an edging and 2 layers for added absorbency!
Necklace & Earrings Set
What thread crochet class would be complete without some crochet jewelry? The necklace and earrings in this class are worked in the round with size 10 thread. The necklace has 2 crocheted “chains” for more strength when it’s worn. You can make this thread crochet jewelry set in any desired colors to coordinate with your favorite outfit!
Each of the 7 projects in the full-length class includes a symbol chart for all of the “visual” people out there! If you’re not familiar with symbol crochet charts, you’ll LOVE them! They are a visual representation of the project itself, showing what stitches are worked in the project and where each stitch is worked. I love symbol crochet charts and I think you will, too!
I really enjoy taking crochet classes to expand my crochet knowledge and skills. Whether I take an online class or an “in-person” class, they’re all very enjoyable and I learn a lot from them! And I love to teach crochet classes, as well. I hope you’re continually learning new crochet skills and techniques to challenge yourself, too.
Please check out both of my thread crochet classes and all of the other fantastic online classes by many talented teachers on the Annie’s website. There’s a lot more that we can all learn about crochet and Annie’s has been in the crochet industry for decades!
I hope everyone enjoyed the National Crochet Month Blog Tour last month. Wasn’t it great? I enjoyed it immensely!!! In fact, I still have a few websites to visit to see what the other CGOA professionals and associate professionals blogged about and what they might have been offering for NatCroMo. There were so many great crochet hints, behind the scenes photos, free crochet patterns, giveaways of yarn and projects, etc. I am blessed to be part of the fantastic organization that is CGOA! And attending the annual CGOA Conference is always a thrill! I learn so much, even when I’m the teacher! I never want to stop learning more about crochet and improving my crochet skills.
Can we have a drum roll, please? Without any further ado, the winner of the faux tatted necklace giveaway is… Marsha Stockton. Congratulations, Marsha! I’ll be e-mailing you today to get your address to send you the necklace. May you enjoy wearing it often! Thank you to everyone who entered. I really enjoyed your comments about thread crochet.
I hope everyone has a fantastic April and the weather warms up for a lot of you in colder climates.
Welcome to The Crochet Architect website. I’m thrilled to be taking part in the National Crochet Month blog tour through Crochetville today! You can read all about the blog tour and see the list of scheduled bloggers here. There’s a lot of crochet talent and knowledge between all of these bloggers, so why not visit each and every blogger this month. The other blog tour participant today is Michele Maks, a very talented crochet designer and the previous editor of Crochet World magazine. You can read her blog post here. Please consider supporting our charity for this blog tour, Project Night Night, either with a financial donation or by donating crocheted blankets. Project Night Night provides security to homeless children. You can read all about Project Night Night here and on the Crochetville blog tour post.
If you’ve never been to my blog and website before, welcome! I hope you’ll take a few minutes and look around. There are 3 free crochet patterns here: one for baby booties and 2 for coasters (one worked in rows and the other worked in rounds to practice increases and decreases). I also have patterns for sale here on my website. I’d like to introduce myself. My name is Susan Lowman. I am a crochet designer, technical editor and teacher. I am a proud member of CGOA (the Crochet Guild of America). If you haven’t heard of CGOA before, please visit the CGOA website to learn more. I am the secretary on the CGOA Board of Directors, as well as one of the 2 Co-Chairs and a portfolio reviewer on the Masters Committee. As you can see, I’m very involved in CGOA! It’s a fabulous organization dedicated to preserving and advancing the art of crochet. We have a conference or two every year. This year I’ll be teaching 6 classes at the conference in Indianapolis. I’d love to meet you at the conference and/or in one of my classes!
When I was asked to take part in this blog tour, I wondered what I would blog about. But then it came to me a few weeks ago: blog about what you love doing! Of course, in general, I love to crochet. But more specifically, I love to crochet with thread! I’m not sure when I started to crochet with thread. I think it was in the 80’s, but I’m not positive. I love to design and crochet with thread. I’m not particular whether I’m going to design something of my own with thread or crochet a thread project from someone else’s design. It makes no difference to me! As long as it’s made with crochet thread, I’m game!!! I love thread crochet so much, that when Annie’s asked me last year to put together an online class on Crocheting with Thread, I said “yes”! You can read all about that class and all the other online classes at Annie’s by clicking on the banner on the right-hand side of my website.
As part of National Crochet Month, I wanted to include something to give away, so please keep reading for the giveaway information a little further down.
I don’t know how many of you reading this now are threadies, like me! If you’re already a threadie, what is your favorite thing to crochet with thread? Do you love making doilies, jewelry or something else with crochet thread? Do you have a favorite crochet technique with thread (filet crochet, Bruges Lace, Wiggly crochet, etc)? Do you always use white thread for your thread crochet projects or do you like using certain colors of crochet thread in your thread projects? What is your favorite brand of crochet thread?
If you’re not a threadie (a person who loves to crochet with thread), what is holding you back from learning to crochet with thread? Do the small crochet hooks intimidate you? You don’t have to crochet with size 10, 20 or 30 thread for your first thread crochet project. You can start out with size 3 or 5 thread for your first thread crochet project (and use a size D or E crochet hook with these sizes of thread). Yes, I suppose it does take a little time to adjust your tension when using smaller thread and hooks. But it’s so worth it! Here are some of the projects I’ve crocheted with thread in the last few years:
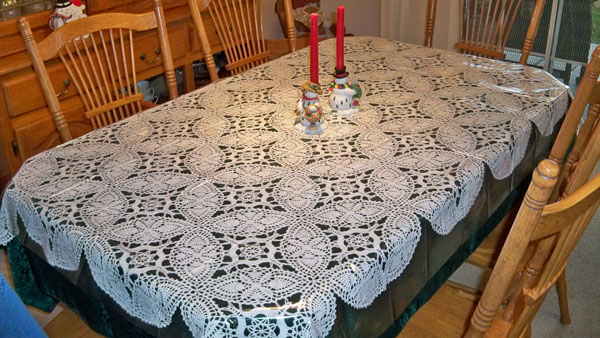
My Crocheted Tablecloth
This is my favorite project (and one that took a lot of time, too!). It is the Pineapple Ovals Tablecloth from the book, Crochet Lace, by Jean Leinhauser and Rita Weiss. Here’s a photo of the front cover of that book:
Crochet Lace book
In 2005, I was extremely blessed to be asked to write all of the patterns in this book (except for the green tablecloth). Rita sent me all of the stitched models for the book from Jean’s collection. I had them in my possession for several years while I wrote the patterns for them. I also made some filet charts and stitched small pieces for the book. It was a true “labor of love”, since they’re all made with crochet thread! The tablecloths and bedspreads in this book are works of art!!! In 2010, I spent 11 months crocheting my tablecloth from the pattern in this book. I always use a clear plastic cover over it to protect it from spills! I think it turned out really nice and it’s the perfect size for my table, too. You can see more photos of this tablecloth in progress on my Ravelry projects page. You’ll be able to distinguish the different motifs of the tablecloth in these Ravelry photos. If you’d like to purchase a copy of this book, it’s still available through sellers at Amazon.com and other websites, as well.
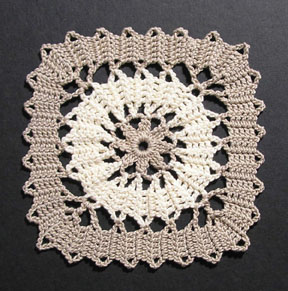
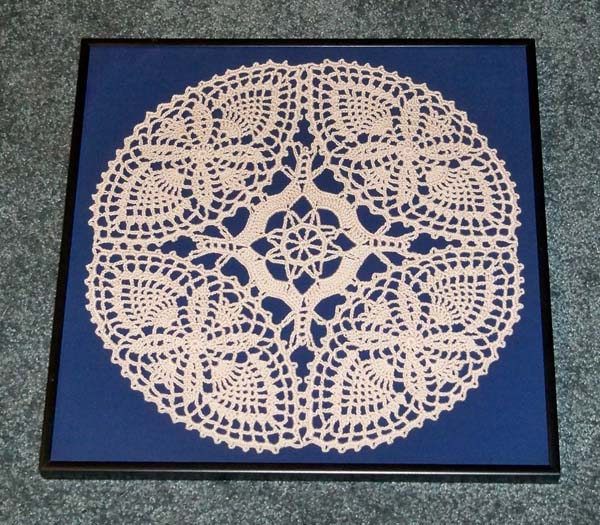
Here’s a small part of the tablecloth pattern that I crocheted and turned into a framed piece of art:
Framed Piece of Tablecloth pattern
I made 2 of these and gave them as Christmas gifts in 2010, after I finished my tablecloth. This piece has 4 of the marquise shaped motifs around the edges and 1 fill-in motif in the center of them. These framed pieces were a lot of fun to make, too!
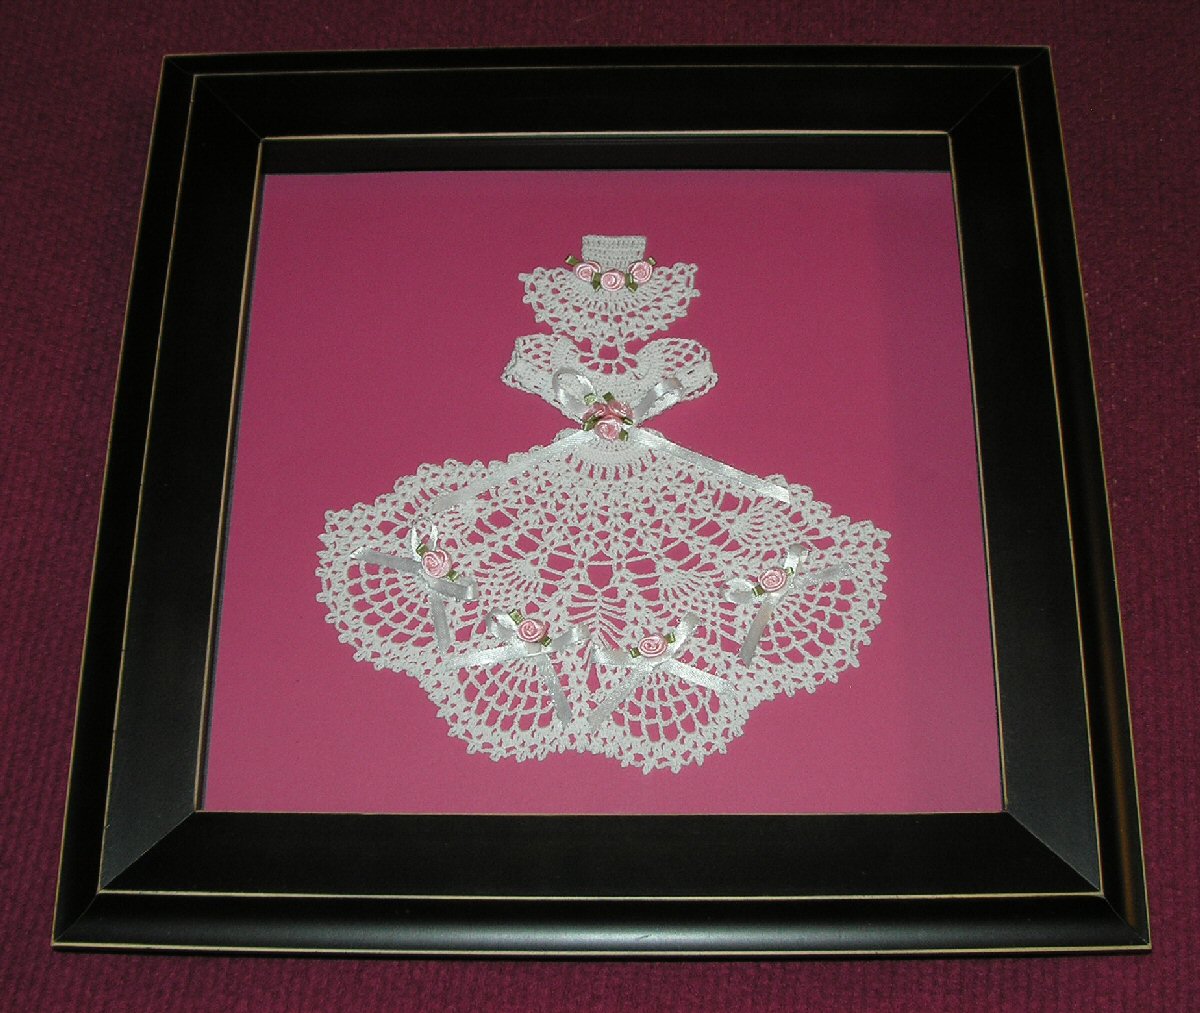
Another one of my favorite thread crochet projects is this Crinoline Lady:
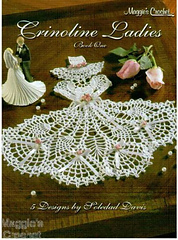
Crinoline Bride framedCrinoline Ladies leaflet
I crocheted her from a Maggie Weldon leaflet called “Crinoline Ladies”. Here’s a photo of the cover of that leaflet:
The Crinoline Lady that I made is called the Bride Doily. It was designed by Soledad Davis. I framed this Crinoline Lady and have her hanging above my bed. If you’re interested in making this Crinoline Lady, the leaflet is available on Maggie’s website.
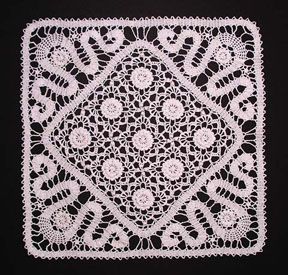
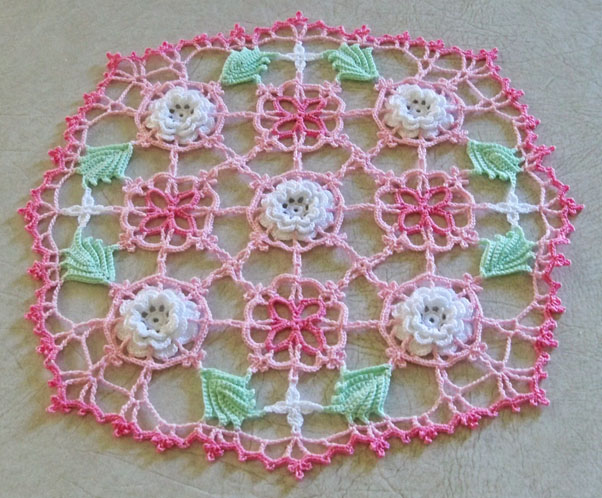
Here’s a doily I crocheted last year from one of Kathryn White’s patterns:
project from Kathryn White’s doily pattern
Kathryn is an extremely talented thread crochet designer and a very good friend of mine. We met at the CGOA Conference in Greensboro, NC in 2011. I love her thread crochet designs! They’re fabulous! Don’t you agree? If you’d like to make this doily, the pattern is available on Kathy’s website.
I could go on and on with photos of beautiful thread crochet designs, but this blog post would get way too long! So I won’t.
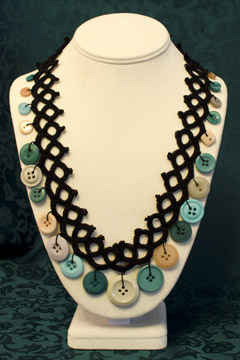
Okay, as promised, I’m going to give away something to a lucky blog reader in honor of National Crochet Month. I’ve chosen one of my thread crochet necklaces to give away. Here’s a photo of the necklace that you have a chance to win:
Faux Tatted Necklace prize
It’s my Faux Tatted Necklace. No, it’s not tatted, it’s crocheted to look like tatting! The pattern for this necklace is available in 2 ways: as just the necklace itself or as part of a set of jewelry (the necklace, bracelet and earrings). I love making these necklaces and I hope the winner will love her necklace, as well. If you don’t win this necklace and would like to make one of your own, the pattern is available here on my website.
To enter for a chance to win this necklace, simply leave a comment on this blog post with the answer to one (or more) of these questions:
1. What is your favorite project to crochet with thread?
2. What is your favorite brand of crochet thread to use?
3. If you’re not a threadie, what is holding you back from learning to crochet with thread?
I’ll draw the lucky winner at random on April 1st, so you have 6 days to enter. The winner’s name will be posted on my blog on April 1st, as well. Good luck!!! (Note: Because of high shipping costs, this giveaway is limited to US residents only.)
I hope you’ve enjoyed this look at thread crochet and are ready to give it a try! Please check back often to read new updates on my blog and to see my new crochet patterns. Or simply subscribe to my blog for automatic updates!
There are still more stops on the National Crochet Month Blog Tour, so keep reading the blog posts through the end of this month. I’m sure you’ll learn more! And there are sure to be more giveaways, free patterns, etc from the other blog participants!
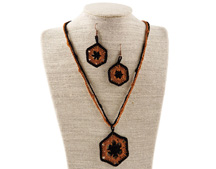
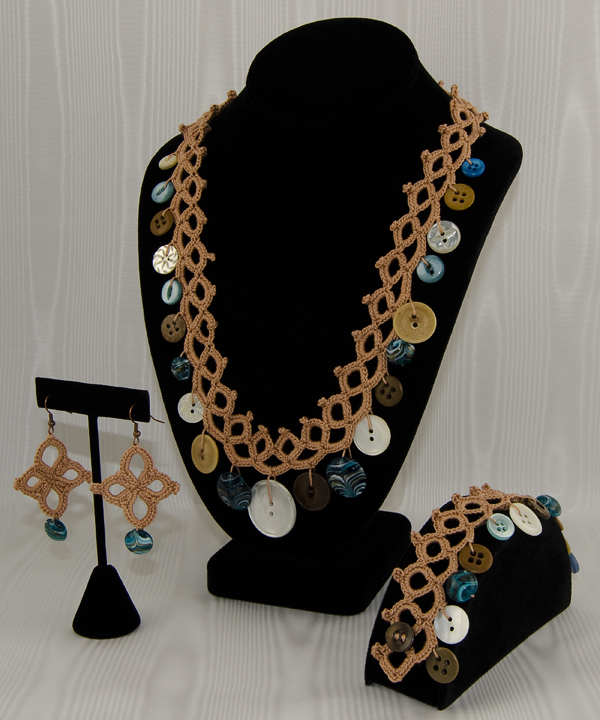
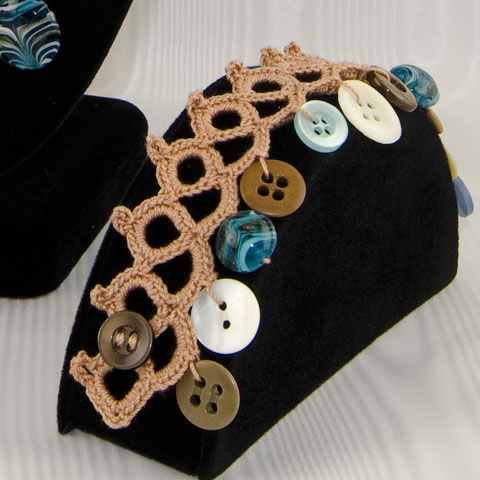
It’s finally done! If you’ve enjoyed making (or have thought about purchasing) my Faux Tatted Necklace pattern, you might be interested to learn that I just self-published a pattern for a whole set of jewelry (necklace, bracelet and earrings). If you’re wondering why I call this “Faux” Tatting, it’s because it isn’t tatted. It’s crocheted to look like tatting! The only stitches used are chains, slip stitches and single crochet. The pattern is easy to follow, includes step-by-step photos and a symbol chart for the necklace (once you’ve made the necklace, the bracelet and earrings are a piece of cake!). Each of these jewelry pieces is crocheted with size 10 cotton crochet thread (for all of us “threadies”), using any buttons, beads or charms you desire.
I designed the bracelet and earrings for this set last summer before the CGOA Conference in Manchester, where I taught a class on making the Faux Tatted Necklace. But in my usual “procrastinating” style, it’s taken me this long to self-publish it! In my defense, though, I’m busy with other crochet work, I’m a perfectionist and I may possibly have ADD because I get distracted very easily (just ask my husband)!!! Aren’t all creative people like that (or many of them)?
Focus, Susan! Back to the jewelry set. I just love making these necklaces! It only takes a few hours to make each one, so I have less chance of getting distracted! Now I can crochet the matching bracelet and earrings for each of the necklaces I’ve made for a complete set (my ears won’t be bare any more). And now YOU can have coordinating sets, too!!!
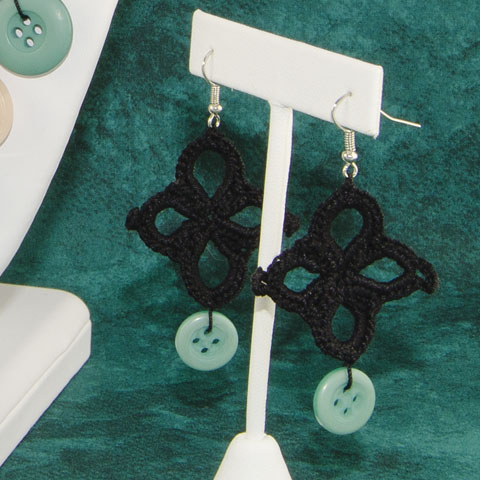
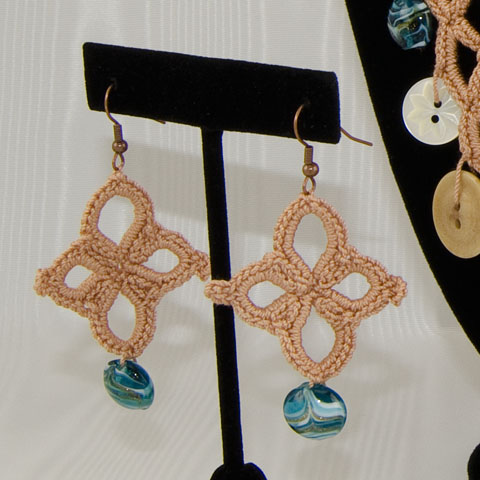
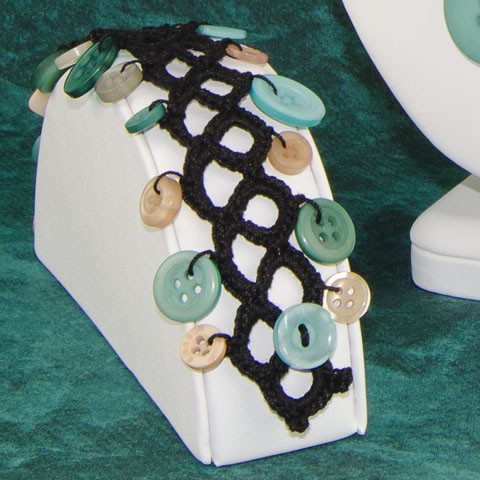
Here are some close-up photos of the bracelet and earrings for you to see:
The bracelet pattern includes instructions for buttons/beads/charms on 1 side (in the brown/blue bracelet photo) or on 2 sides (in the black/green bracelet photo). The bracelet uses 12 or 23 buttons, beads or charms. The earrings have just 1 button on each of them and use earring wires (or your favorite earring findings).
I hope you enjoy this new pattern. And I hope you’ll share photos of your Faux Tatted Jewelry Sets with all of us.
Okay. Either you’ve been patiently waiting for the big announcement since I returned home from my trip to Berne, Indiana in January, or you’ve forgotten about it and gone about your day-to-day lives (which is probably more believable!). Well today is the “big reveal”, so to speak! The reason I went to Berne, IN was to film a crochet video class for Annie’s. It’s not just any crochet video; it’s a “thread crochet” video! You may have some idea of how much I LOVE thread crochet by now. I would be thrilled if more crocheters came to love thread crochet as much as me! There are some very talented thread crochet designers out there: Kathryn White, Patricia Kristoffersen and many more. If you’ve been thinking about jumping into the world of thread crochet, I hope you’ll consider taking my online video class through Annie’s. I would love to have some of my blog followers take the class so we can get to know each other more and I can help you advance your crochet skills and knowledge (isn’t that what blogging and teaching should be all about anyway?).
You can read all about my “Learn to Crochet With Thread” online video class and watch a few sample segments of the video here. This is my first crochet video and I hope to do many more in the near future!
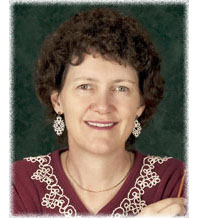
If you don’t recognize me in the video or in the photo, it’s because I’m wearing makeup in them (I haven’t worn makeup for years). They had a hair and makeup stylist named Amy who did my hair and makeup for the video each of the 3 days I was there. It’s a shock to see myself made up, but it’s probably better that way (I have fair skin and I’d blind everyone without the makeup, so it was necessary!). I’ve heard that when you’re doing photography or videotaping, the colors get washed out under the studio lights, so they added more color to my face to compensate for that! Amy was fantastic, as was everyone involved in producing the video. In the studio each day were: Laura Scott, the producer (the one in charge); Nicole, the video editor; Scott and Turner, the videographers; Allison, the production assistant and Amy, the hair and makeup artist.
Okay, just for fun, here I am before and after makeup:
Before MakeupAfter Makeup
I had a blast filming the video in Berne. Everyone on the set (especially the cameramen) made me feel relaxed. They were very professional and easy to get along with. We all had the same goal in mind: to produce a great video! I thoroughly enjoyed my trip to Berne and filming the video. I hope you enjoy the free video segments of my “Learn to Crochet With Thread” class at Annie’s and seriously consider taking the class (if you’d like to learn to crochet with thread, that is).
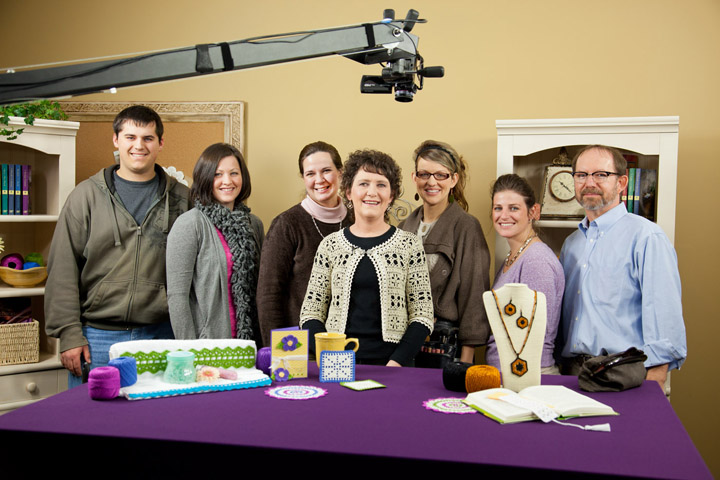
Here is another photo of my trip to Berne (inside the video studio):
The whole crew
This is the crew and me after the video was finished. From left to right: Turner, Nicole, Laura, me, Amy, Allison and Scott. Don’t we look happy that it’s all over?
I think everyone did a fabulous job. Thanks so much for the hard work that each one of you did, especially you, Laura! Let’s do it again some time!
I hope you enjoyed this little look inside the video studio at Annie’s and will consider taking an online video class through Annie’s to further your crochet skills and knowledge.
This is the last stop on the Wiggly Crochet Dishcloths blog tour. Boohoo. I’m sad to see it come to an end! It’s been a lot of fun!
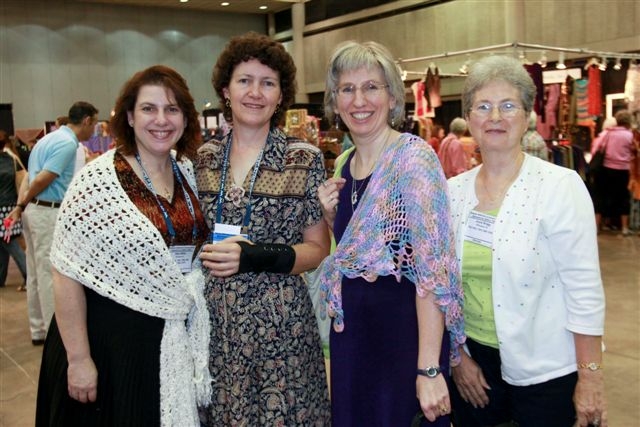
Today, we’re going to visit the blog of Andee Graves. I first met Andee at a CGOA Conference (I think it was in 2009 in Buffalo when I had a broken wrist – I definitely wasn’t able to crochet for a while then!). Here’s a photo of Andee and I, along with Shari White (one of my mentees and a very talented designer) and Joyce Bragg (another very talented designer), waiting to meet with the editors at the Buffalo conference (from left to right: Shari, me, Andee and Joyce):
Waiting for Editors at CGOA Conference in 2009
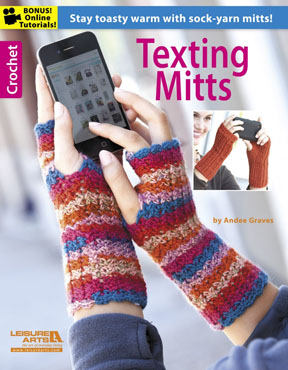
If you’ve been reading my blog for more than a few weeks, you might recognize Andee’s name. I wrote a blog post for Andee’s blog tour of her new Texting Mitts booklet, published by Leisure Arts, on February 10th. Here’s a photo of the front cover of her booklet:
Texting Mitts front cover
Andee’s texting mitts are fun to make! I made 2 pairs of them when I was preparing for her blog tour. You can read more about this booklet on my Feb. 10th blog post or on Andee’s blog!
Andee is a fantastic newer designer (newer than me). She is a bundle of energy and a wealth of information! And she’s a really nice person, too! Andee already has over 50 published designs in just the last 3 years! Wow! Way to go, Andee! You can see all of Andee’s published designs on her Ravelry designer page. This is one of my favorites of Andee’s designs:
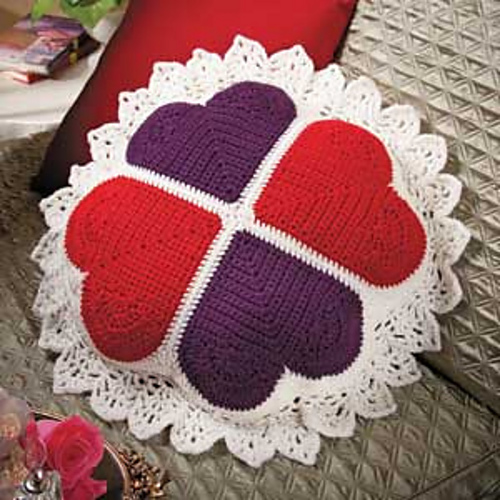
Andee’s Heart Pillow
This heart pillow was published in Crochet World magazine’s Feb. 2012 issue. Isn’t it pretty?
Please hop on over to Andee’s blog to read what she’s written about my Wiggly Crochet Dishcloths booklet and the dishcloth she’s made from the booklet.
Since this is the last stop on my blog tour, I will be picking and announcing a winner for the free autographed copy of my Wiggly Crochet Dishcloths booklet on Friday. If you haven’t entered yet, just leave a comment by 6PM (Arizona time) tomorrow on my blog post from either Jan. 27 or Feb. 9. I wish you all good luck in the giveaway!
My good designing friend, Andee Graves, has had her first crochet booklet published by Leisure Arts. Way to go, Andee!!! Woohoo!!! It’s always very exciting to have your first crochet booklet published and Andee has done an excellent job with her designs in this one! If you’re not familiar with Andee’s work yet, you can read about her and follow her blog here.
Texting Mitts front cover
This booklet includes patterns for 8 pairs of fingerless gloves, which are ideal for texting! I suppose you could use them for doing just about anything that involves having your fingertips free while keeping your hands warm, like talking on your cell phone, crocheting, etc. Since I’m not a big texter (I have to put my reading glasses on to read the small letters, so I don’t text every day), I’d be more likely to use these gloves for keeping my hands warm while crocheting!
These 8 patterns are very nicely designed, mostly starting from the wrist and worked to the fingers. With different stitch patterns and skill levels, there is something for everyone! There is 1 beginner pattern, 3 easy patterns, 2 easy+ patterns (Whatever that means! Perhaps it’s somewhere between easy and intermediate!) and 2 intermediate patterns. Andee has used super fine weight yarn (#1 weight on the yarn label) and a size E (3.5mm) or F (3.75mm) crochet hook for each pattern. A list of the specific yarns used in each pattern is included at the back of the book.
What I find to be very exciting and innovative in this booklet is the online videos for different stitches and techniques that are available on the Leisure Arts website for some of their booklets. Whenever there is a different/challenging stitch in this booklet, a video camera icon is printed in the booklet, letting the reader know that she/he can watch the video online for that particular stitch/technique! I LOVE that!!! If you’ve never done a Front Post double crochet, a foundation single crochet or any of the other “special stitches” in this booklet, all you have to do is watch the video for that stitch/technique that is associated with the pattern in this booklet on the Leisure Arts website and you’ll be mastering that stitch/technique in no time!!! It’s almost as good as having a crochet teacher right next to you to show you how to do these stitches/techniques! Make sure you type in the website link on the first page of this booklet to go straight to the videos for these texting mitts patterns, though. I spent a while looking around their website one day trying to find the videos and finally found them after a lot of time spent looking!
Another nice thing in this booklet is how they used different colors of print in the patterns for the stitch counts and information in each of the 3 different sizes of mitts (some of the mitts patterns include 3 sizes and others have only 1 size). This makes it much easier to find the information you need associated with the size of mitts you’re making!
I made 2 pairs of these mitts last week. Here are photos of the texting mitts I made:
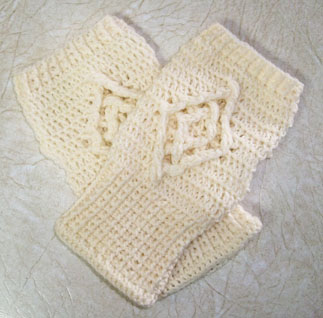
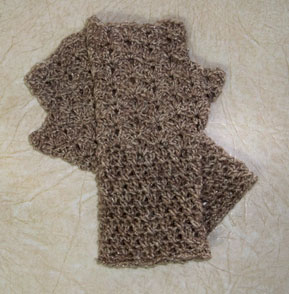
My Diamond Back Texting MittsMy Seashell Texting Mitts
The lighter-colored mitts are from Andee’s Diamond Back Mitts pattern (intermediate skill level) and are made with Patons Kroy Socks yarn. The darker-colored mitts are from Andee’s Seashell Mitts pattern (easy skill level) and are made with Red Heart Stardust yarn. I had both of these yarns already, so I was able to make a small dent in my stash crocheting these mitts!!! I really enjoyed making both of them, especially since I’ve never crocheted mitts/gloves before for some strange reason! I decided to make a few modifications to the lighter-colored mitts (I couldn’t help it! It’s the designer in me! Or maybe it was my “gauge issue” rearing its “ugly head” again!). Anyway, I can still crochet while wearing these, so they’re very handy for keeping hands warm and still being able to crochet (or text or type or whatever) with your fingertips!
To see and purchase this booklet online (and see photos of all 8 of the texting mitts), visit the Leisure Arts website. This booklet is available in print or digital format.
All in all, I like Andee’s first booklet very much. The patterns are well-written and easy to follow. Well done, Andee!!! I look forward to seeing your next booklet when it comes out!