Reversible Crochet Patterns

After too many months of not blogging, it’s time I got back up on the horse! So here goes.

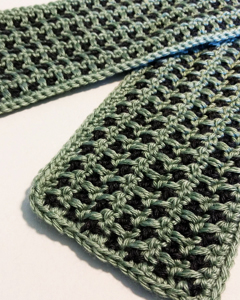
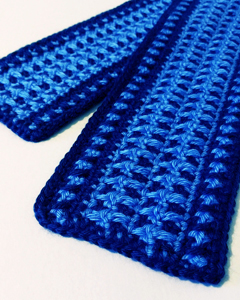
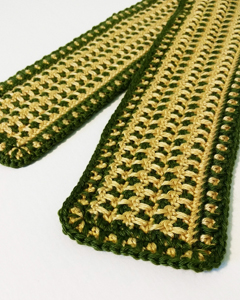
If you’re anything like me, you absolutely ADORE reversible crochet projects, especially scarves! I hate having a wrong (ugly) side on my scarves, so I designed some scarves that are reversible (and a reversible baby blanket, too). Here they are:
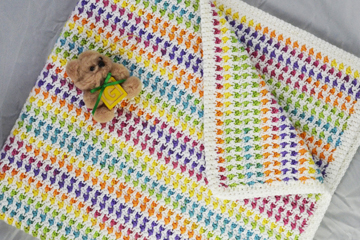
baby blanket
Reversible Stripes Baby Blanket
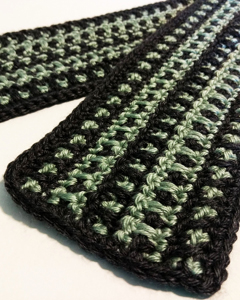
reversible scarf
Striped Scarf from Reversible Scarves pattern
reversible scarf
Spotted Scarf from Reversible Scarves pattern
Spots and Stripes Scarf from More Reversible Scarves pattern
reversible scarf
Bordered Spots Scarf from More Reversible Scarves pattern

All of these projects/patterns use either worsted weight yarn or light weight yarn (I used acrylic yarns). An H/8 (5 mm) hook or a G/6 (4 mm) hook is used, as well.

All of these projects are worked alternating rows of light color, then dark color, back and forth. However, one of the fabulous points about these patterns is you DON’T finish off each row, leaving lots of tails/ends to weave in! I DON’T enjoy weaving in ends, so when I can design something that has a minimum amount of ends to weave in, that’s a HUGE PLUS in my book! At the end of the row, you simply drop the old color and insert a stitch marker in the last loop to secure it. Then you pick up the opposite color yarn, remove the stitch marker from that loop, turn your work and crochet the next row with the new color. If you’d like to see me demonstrate doing this (and the first 3 rows of these reversible patterns/projects), check out my new YouTube video here.

The Reversible Scarves pattern and More Reversible Scarves pattern both contain written instructions, along with symbol crochet charts, for crocheting 2 different, but similar reversible scarves. All of these scarves are made with 2 contrasting colors of yarn. Check out these patterns, as well as my other crochet accessory patterns here.

The Reversible Stripes Baby Blanket pattern is made with either a multi-color and a solid-color yarn or 7 solid colors of yarn. You can find that pattern, as well as my other baby patterns here.

I hope you enjoy crocheting some reversible projects very soon!

Happy crocheting,

Susan Lowman

The Crochet Architect

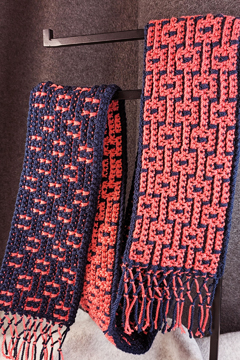
Alternate Spike SC Mosaic Crochet technique revealed

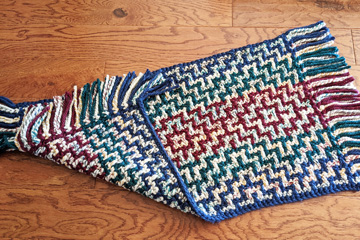
mosaic scarf

If you love Mosaic Crochet as much as me, you’ll really enjoy learning this new technique!

I was introduced to this technique a few years ago by a lady named Stephanie on Ravelry. She had an afghan that was crocheted by her great grandmother in the 1980’s. She couldn’t figure out how it was made and emailed me photos. I looked at them and figured out how the afghan was made. I thought this technique was so unique and fun, so I decided to share it with all of you through some new patterns and a free YouTube video to go along with the patterns.

Do you love the look of reversible mosaic crochet projects? I certainly do! I love having projects with two “pretty” sides! And this technique is so much fun! You get a light side and a dark side with this Alternate Spike SC Mosaic Crochet technique.

To learn this new technique, check out my YouTube video.

mosaic scarf

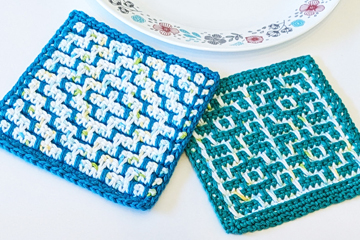
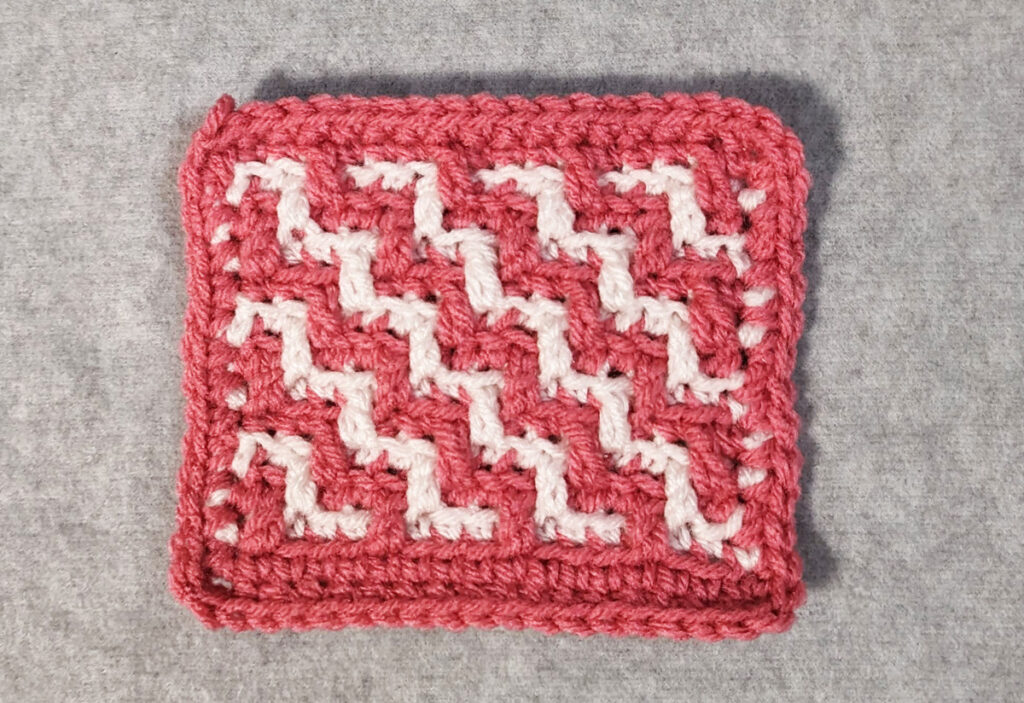
And if you love this technique as much as I do, check out the patterns I’ve created for this fabulous technique! The 3 patterns I’ve created are my “Chain Links Scarf”, my “Geometric Mosaic Hot Pads” and my “Heart Mosaic Hot Pads”. Each of the hot pads patterns actually contains 2 designs for one low price.

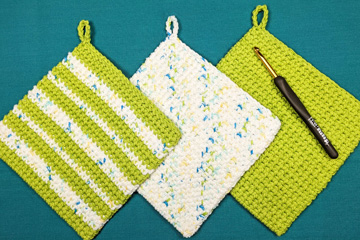
mosaic hot pads
mosaic hot pads

I hope you enjoy learning this new Mosaic Crochet technique!

Until next time! Happy crocheting!

Susan Lowman, The Crochet Architect

Easier Granny Squares! Oh my!!!

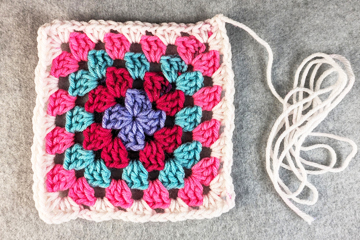
granny square

Have you seen the new Red Heart All in One Granny Square yarn? It changes colors at set lengths for each round of a 5-round granny square! I LOVE this idea! I had to buy a skein to try it out for myself! And it works great! Now there are only 2 ends to weave in instead of 10 ends on each 5-round granny square!

I’ve watched quite a few videos on YouTube for using this yarn. I think crocheters either love it or hate it! If you’ve experimented with making taller or shorter stitches, you should do just fine with this yarn. One skein makes 14-15 granny squares (6″ square). That’s enough for 1-2 scarves, depending on the length.

granny square


I’ve filmed a YouTube video demonstrating working with this yarn. I’ve also put together a written, as well as charted, pattern to accompany this yarn. I didn’t like the short length left over after crocheting the granny square per the instructions on the yarn label, so I changed the pattern here and there to create a different granny square. Now I have 3-4 feet of leftover yarn at the end of each square, giving me plenty of yarn to join the squares together! I’m planning to make a scarf with some of these granny squares. And I’ll have more granny squares leftover for another project!

If you’d like a copy of the pattern, it’s available here.

Happy Granny Square crocheting!

Susan

New Crochet Pattern: Easy Clusters Baby Blanket

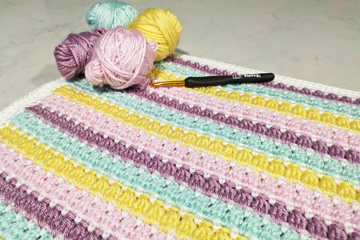
If you’re looking for an easy, quick baby blanket project, I’d like to introduce you to my Easy Clusters Baby Blanket pattern. I started this baby blanket in June of 2020 during a camping trip in Zion National Park with our youngest son and his wife. The pretty colors of the yarn inspired me to design a pattern using the 4 colors of yarn, plus a white.

The pattern is a 2-row repeat with a 2-stitch repeat, as well. That means you can customize the size of your baby blanket (or doll blanket or full-size blanket) with this pattern! You can use the same colors as I did or customize the colors any way you want! This would even make a great scrap-busting project!

I purposely designed the blanket with less ends to weave in by working 2 right-side rows, followed by 2 wrong-side rows. The white (or main color) is carried up the side edge to be used again instead of finishing it off. The contrasting colors are finished off at the end of each row using them (every other row).

This past week, my husband and I filmed a YouTube video where I demonstrate working the blanket from the beginning chain to several repeats of the 2-row repeat in the pattern, including how to work the clusters. I also demonstrate how to carry the main color yarn up the side edge, crochet the edging and weave in the ends securely and professionally. In the video, I made a doll-size blanket to use up some of the scraps of contrasting colors that I had left over from the baby blanket. I think the doll blanket will make a nice Christmas gift for my granddaughter, who turned 7 years old this past summer!

Check out the pattern page here to see what supplies I used and purchase the low-cost pattern. Get started on your baby blanket, doll blanket or full-size blanket today!

Happy crocheting!

Susan Lowman

The Crochet Architect
Mind Blowing Tapestry Thermal Stitch Technique!

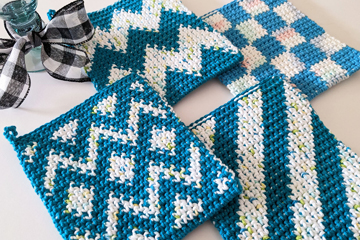
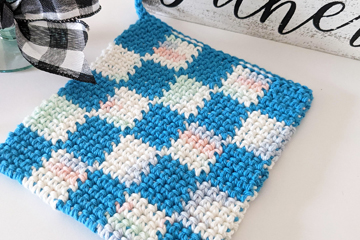
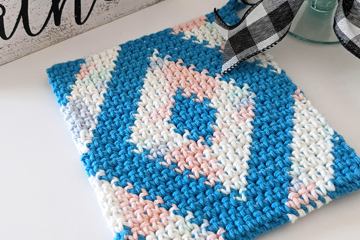
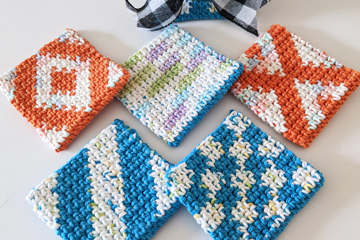
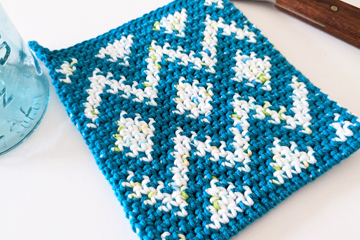
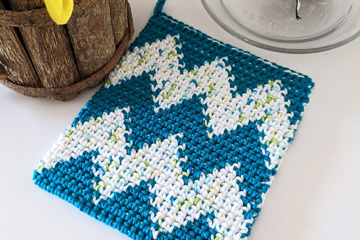
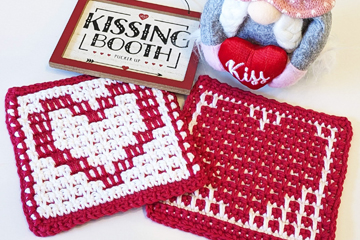
Tapestry Thermal Stitch Potholders

I’ve enjoyed doing the Thermal Stitch for quite a few years now. Last month, Heather (on my YouTube channel) asked if I could make a video showing how to do a potholder in Thermal Stitch with 2 different colored sides. I thought about it and I’ve been playing around with it for a few weeks now. However, I took it to another level! I’m happy to introduce the marriage of Tapestry Crochet with the Thermal Stitch in my new YouTube video and my new Tapestry Thermal Stitch Potholders and Coasters patterns!

Tapestry Thermal Stitch Potholder
Tapestry Thermal Stitch Coasters

If you’ve ever done the Thermal Stitch, you know that you insert your hook in a completely different place than in regular crochet. And if you’ve ever done Tapestry Crochet, you know that you carry the unused yarn under the stitches you’re working and change colors across the row, as needed. So when I thought about doing color changes in Thermal Stitch, I immediately thought about using the Tapestry Crochet technique! And it works!!!

Tapestry Thermal Stitch Potholder

If you’d like to take your Thermal Stitch projects to the next level with designs on one or both sides, watch my YouTube video.

And if you’d like to give Tapestry Thermal Stitch a try, check out my new Tapestry Thermal Stitch Potholders and Coasters patterns on the crochet patterns page.

Happy crocheting to you!

Susan

New Mosaic Crochet Technique!

Back and Forth Overlay Mosaic Crochet

I’ve been playing around with Mosaic Crochet for many years and I have a new technique for Overlay Mosaic Crochet to share with you. I call it “Back and Forth Overlay Mosaic Crochet”! With this technique, you’ll ELIMINATE virtually ALL of the ends that you usually have with traditional Overlay Mosaic Crochet, since you start and stop every row, working all the rows on the right side of the project.

In my new “Back and Forth” technique, you’ll ONLY have a FEW ends to weave in (instead of dozens or hundreds) because you’ll work half of the rows from the wrong side, but you’ll work the stitches “backwards” on these rows, creating ALL “right-side” stitches in your project! If this sounds intriguing to you, check out my new YouTube video where I demonstrate my new “Back and Forth Overlay Mosaic Crochet” technique!

If you watched my video on doing Tapestry Crochet with some backwards rows, this may look familiar to you. But Tapestry Crochet and Mosaic Crochet are done totally different. Tapestry Crochet involves working color changes across the row and carrying the non-working yarn under your stitches. Mosaic Crochet is done with the same color yarn across the whole row (there are no color changes made in Mosaic Crochet).

There are a few other crochet designers who have done something similar to my “Back and Forth Overlay Mosaic Crochet” technique, but they don’t work “backwards” stitches, so you see the “wrong side” of those stitches on the “right side” of the project.

So what are backwards stitches? They involve inserting your hook into the stitch “backwards” and yarning over “backwards” to form your stitches. You also hold the yarn in front of your work instead of behind it. If you’ve never seen this done before, check out my new video demonstrating this backwards technique!

I hope you’ll give crocheting “backwards” a try, and specifically my new technique for “Back and Forth Overlay Mosaic Crochet”! Please let me know what you think about this technique. I know it’s not going to be for everyone (just like my COM technique for Overlay Mosaic Crochet isn’t for everyone). But I know there will be some of you who will say “Wow! Why have I never seen or thought of this before? This is a game-changer!!!”

Happy “Back and Forth Overlay Mosaic Crocheting” to you!

Susan

Crocheting for Easter

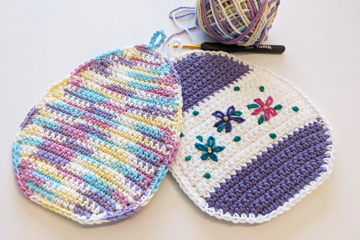
Easter Egg crochet potholder

Do you enjoy crocheting decorations for holidays? I certainly do! I’ve got a brand new crochet pattern for an Easter Egg Potholder for you. This potholder is worked with 2 pieces: a front and a back for double thickness. Using worsted (#4) weight cotton yarn, it’ll keep your hands and fingers protected when removing a hot dish from the oven.

Easter Egg crochet potholder
Easter Egg Potholder

The potholder is worked in rows of single crochet with increases and decreases, as necessary, to form the egg shape. After crocheting 2 egg-shaped pieces, one round of single crochet is added to join the pieces together and to form the hanging loop at the top.

This pattern is easy enough for a beginner crocheter, since basic stitches are used. I’ve done a YouTube video for this pattern, as well, so you can follow along with me in the video and learn to read a crochet pattern while making this cute, useful potholder!

Here’s the pattern page to snag a copy of this pattern at a great price! Then you can crochet some potholders for your Easter celebration (with about 27 days until Easter!) or give one/some to a friend or family member.

I hope you enjoy this pattern and all your crochet projects!


Until next time!

Susan Lowman

The Crochet Architect
New Mosaic Crochet Scarf Pattern and YouTube Video

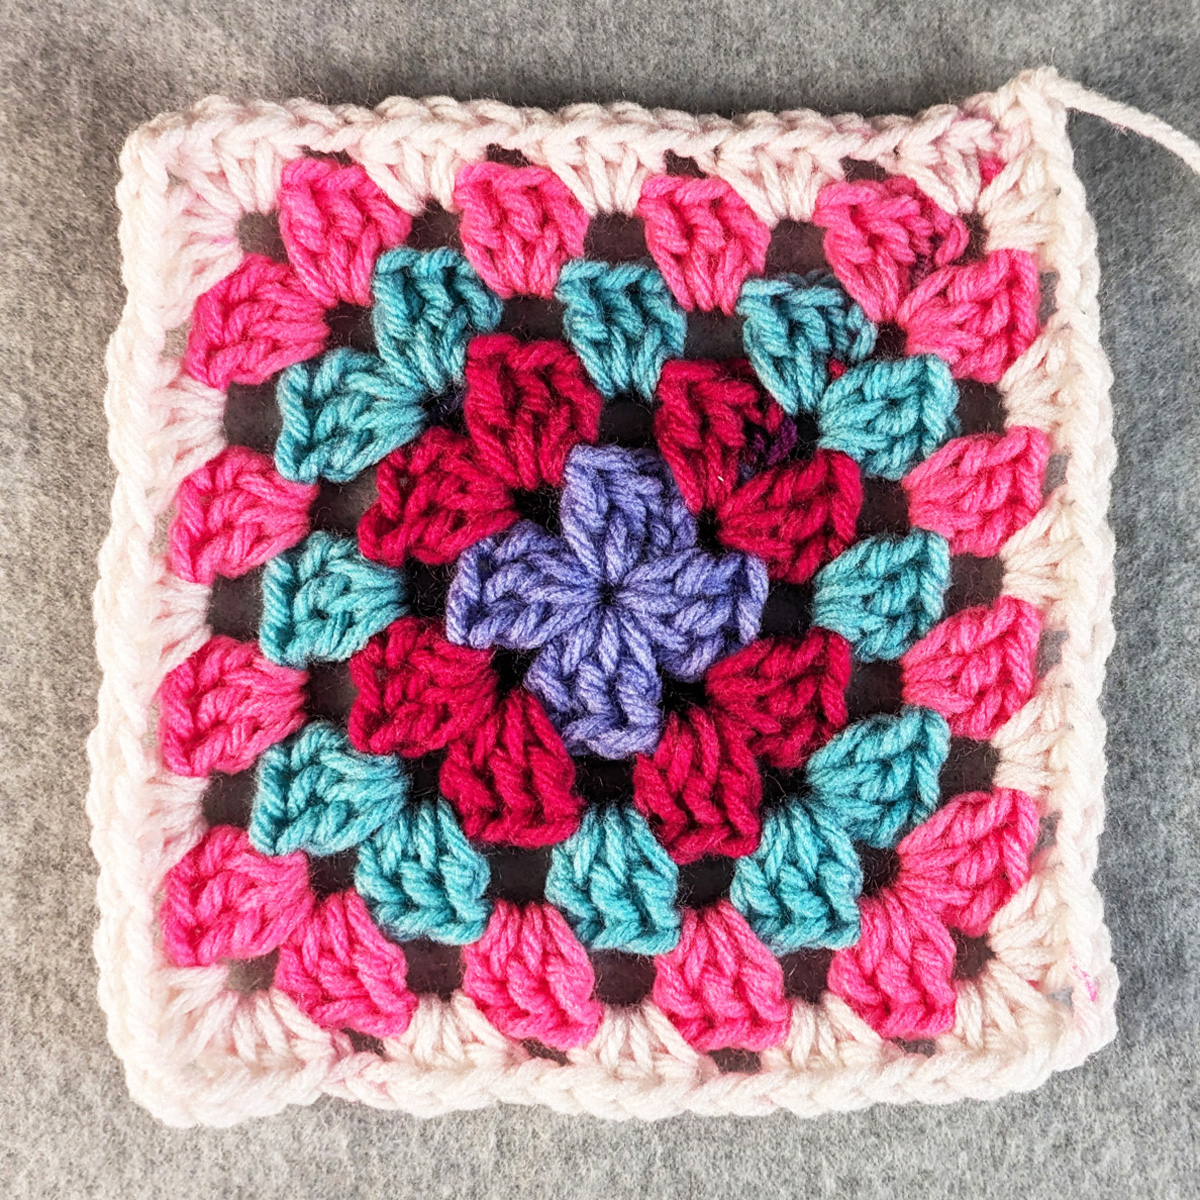
Mosaic Crochet Scarf

It’s been quite a while since I’ve done a blog post, a new pattern or a new YouTube video. I’ve been quite busy with everyday life, including my oldest son’s wedding in August, my mother-in-law’s funeral, also in August (she was 93, so she lived a long, full life) and the birth of 2 grandsons in November. We were there for both births, in Indiana and California, from our middle and youngest sons (and their wonderful wives, of course!). Whew! I feel like I’m finally getting caught up from lots of travel and lots of fun with the grandkids (we now have 4 of them)!!!

My husband and I have been working on a new YouTube video to teach the Spike SC Mosaic Crochet technique. We’ve had all kinds of hiccups with the camera and microphones! It’s been quite “challenging” to say the least! But we persevered and have a video that demonstrates how to work this Mosaic Crochet technique, using “less yarn” than the Overlay Mosaic Crochet technique and making your project “reversible” (because the Spike SC is worked “around” the stitches, not “in front” of them).

To learn the Spike SC Mosaic Crochet technique, watch the YouTube video here.


Mosaic Crochet Scarf
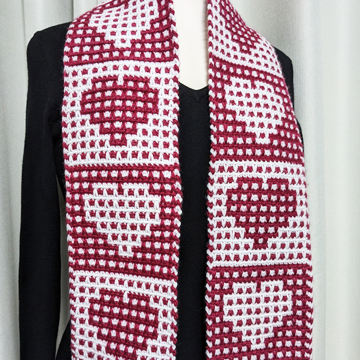
Hearts in Love Mosaic Scarf

To help you practice the Spike SC Mosaic Crochet technique, you can download the free swatch chart here and follow along with me in the video, practicing this Mosaic Crochet technique. Once you’ve mastered this fabulous technique, check out my new “Hearts in Love Mosaic Scarf” pattern, which uses the Spike SC Mosaic Crochet technique. This scarf is completely reversible, using 2 contrasting colors of DK or worsted weight yarn. This scarf is nice and dense, making it great for keeping your neck warm outside in the wintertime! And with all the hearts in the scarf, it’s a great project to make for Valentine’s Day for yourself or anyone you love!

If you have any questions about this Spike SC Mosaic Crochet video or this Spike SC Mosaic Crochet pattern, please don’t hesitate to ask. And if you have any comments about this crochet technique, I’d love to hear them.

Happy Mosaic Crocheting to you,

Susan

Thermal Stitch Potholder Video

I’ve been wanting to film a video to teach the Thermal Stitch for quite a while and I finally have one for you. But first, a little background on how/where I learned this fabulous stitch.

I first learned the Thermal Stitch from Darla Fanton at the 2008 CGOA Conference in Manchester, NH. Darla is a great teacher and I learned a lot in that class. However, life got in the way and I never pursued doing anything with the Thermal Stitch.

Fast forward to around 2015 when a good crochet friend named Jackie showed me the thick potholder she had made from a free pattern on the internet. She shared the link to the free pattern (by Heather Tucker of Stitchery Project) and taught me the stitch (which I had somehow forgotten from Darla’s class). I was immediately hooked! I’ve been making Thermal Stitch Potholders ever since! They’re so easy to make once you learn where to insert your hook! It’s just simple rows of single crochet, which is pretty mindless (sometimes I need a mindless project!).

potholder
Thermal Stitch Potholder

One thing I changed in Heather’s pattern was the placement of the hanging loop. Heather makes her hanging loop at the bottom of the potholder. I decided I wanted to make my hanging loop at the top of the potholder. The reason for this is sometimes I want to make a hot pad without a hanging loop instead of a potholder. So I just don’t work the hanging loop at all. Since I changed Heather’s free pattern, I decided to type up my version of this potholder as a free pattern. You can download my free pattern here.

You can find Heather’s free potholder pattern (named “The Best Crocheted Potholder”) here.

The potholders are economical to make. When I see a sale on worsted weight cotton yarn, I stock up on it. This makes the potholders about $1 each, which I love!

These potholders make great gifts! I’ve given them to friends and family for Christmas and/or birthdays, as “thank you” gifts, and as wedding (or bridal shower) gifts, as well.

To learn the Thermal Stitch, watch my new YouTube video here.

I hope you enjoy crocheting these potholders as much as I do!

Happy Thermal Stitch crocheting,

Susan

Spike DC Mosaic Crochet Video & New Rug Pattern

mosaic crochet rug

Do you love the look of Mosaic Crochet, but wish it was reversible? Well now it is, with no extra work!

I’ve been having fun with a hybrid style of Mosaic Crochet using Spike DC stitches (SPdc for short). With this style of Mosaic Crochet, you still work 1 row of each color and each row on the right side, like Overlay Mosaic Crochet. You work chain spaces, like in Inset Mosaic Crochet, but you only work 1 row of each color. Instead of working your dc, drop down dc, Anchored dc (or whatever you want to call them) in front of the other stitches, you work your Spike DC stitch “around” the other stitches, which makes your projects reversible!

mosaic crochet rug
Reversible Sashiko Mosaic Crochet Rug

I also have a brand new Mosaic Crochet pattern using the Spike DC Mosaic Crochet technique. This pattern is my Reversible Sashiko Mosaic Crochet Rug. It uses some Lion Brand Thick & Quick yarn, along with some Lion Brand Hometown USA yarn that I’ve had in my stash for several years.

When I saw this Lion Brand Wool-Ease Thick & Quick yarn in the Hudson Bay color at my local Walmart store, I knew I had to design something special with it. I used this yarn, along with 3 coordinating solid colors of Lion Brand Hometown USA to design and crochet my Reversible Sashiko Mosaic Crochet Rug pattern. This pattern shows the contrast between the solid, dark colors and the lighter, multi-colored yarn perfectly!

You may ask me why I used the word “Sashiko” in the name of this pattern. Well, I’ve been looking at and playing/designing with Japanese Sashiko embroidery patterns for several years now and I LOVE them!!! They’re mostly geometric, which I LOVE! I’ve got more Sashiko crochet patterns in the works, so stay tuned for those in the near future. I’ve even started learning to do Sashiko embroidery! What fun!!!

So back to my new rug pattern. It’s made with 5 skeins of yarn: 2 skeins of the LB Wool-Ease Thick & Quick and 3 skeins of the LB Hometown USA (1 skein in each of the 3 solid coordinating colors). I used a size “N” crochet hook, which is 10 mm. I started and ended each row, turning the tails into fringe after crocheting all the rows of the rug. I absolutely love this rug being reversible!

To learn this technique, watch my new YouTube video, where I demonstrate the Spike DC Mosaic Crochet technique.

I also created a FREE download for a Spike DC Mosaic Crochet swatch that I demonstrate in the YouTube video. You can download the free chart, along with instructions for working the swatch with either my COM technique (with very little tails) or with traditional Mosaic Crochet, starting and ending each row (with 2 tails for each row).

Once you learn this fabulous Spike DC Mosaic Crochet technique, you’ll be confident to crochet my new Reversible Sashiko Mosaic Crochet Rug!

I hope you’ll give this Spike DC Mosaic Crochet technique a try very soon. It’s a fabulous technique for crocheting reversible Mosaic Crochet projects with no extra effort!

Happy Mosaic Crocheting to you!

Susan