Happenings at the CGOA Conference

It’s been almost a month since my last blog post! Wow! Where does the time go? It’s been a busy month.

Earlier this month, I attended the CGOA Chain Link Conference at the Embassy Suites Hotel in Charlotte/Concord, NC (from Oct. 2-6). It was fabulous, as always! There’s too much to tell you about in one blog post, so I’ll tell you about the classes I took in this post and save the other information for another blog post or two later. I love teaching at the conference, but I also enjoy being a student and stretching my crochet knowledge and skills, too.

I took 7 crochet classes at the conference. The teachers whose classes I took are Margaret Hubert, Jennifer Hansen, Vashti Braha and Dora Ohrenstein (I took 3 classes from Vashti and 2 classes from Jennifer). All of the classes were fantastic! And there were many more classes with other great teachers, too.

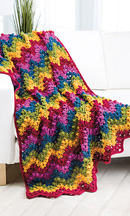
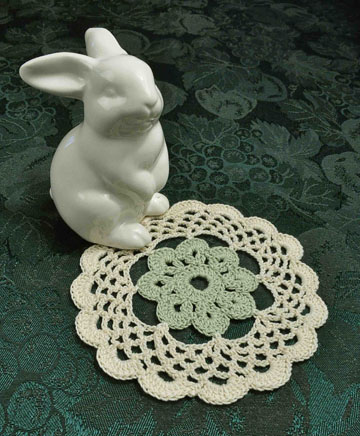
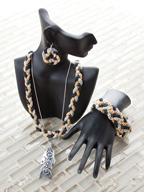
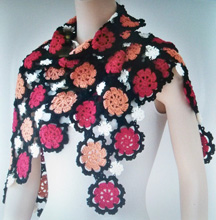
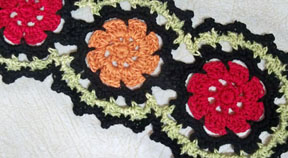
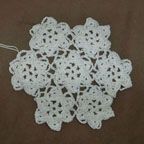
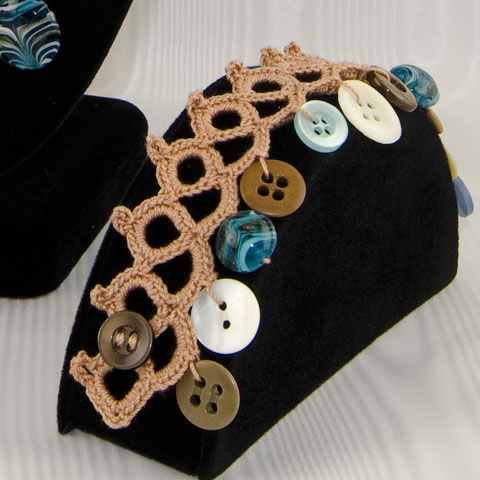
Margaret’s class was Freeform Knit and Crochet. Since I can now knit, as well as crochet, I thought this class would be a good fit for me. However, I’m not sure I’m cut out to be a freeform person (I might be too analytical and black/white). But I truly love the freeform look and would like to be able to do it someday (perhaps in Irish crochet with crochet thread instead of with yarn). Maybe with a little practice (or some wine to help me relax!), I might learn to do freeform well. But I enjoyed the class and drooled over Margaret’s gorgeous freeform pieces. Here’s one of them:

Margaret Hubert's freeform jacket
Margaret Hubert’s freeform jacket


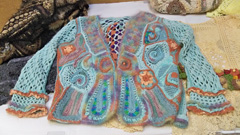
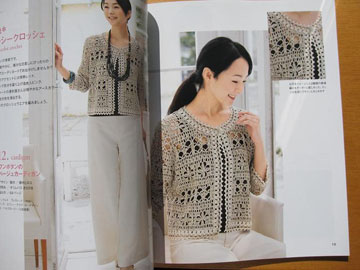
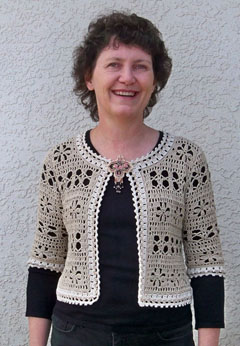
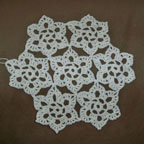
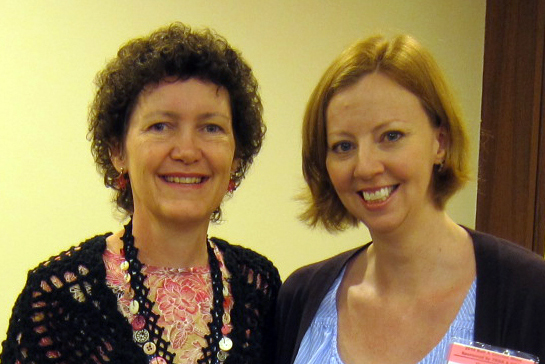
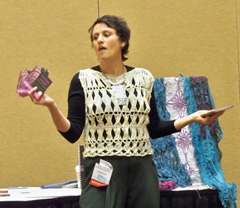
Isn’t this gorgeous? Margaret is a wonderful teacher and designer. Here she is in the class showing us a jacket that she made from purchased doilies to inspire us:

Margaret Hubert's doily jacket
Margaret Hubert’s doily jacket

I was truly inspired (the photo doesn’t do it justice)! All of Margaret’s freeform pieces are inspirational! You can read more about Margaret and see her fabulous creations on her website here.

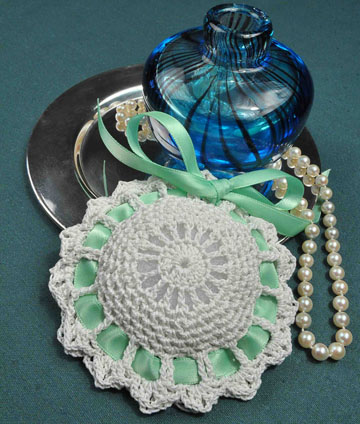
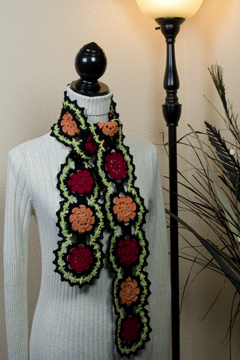
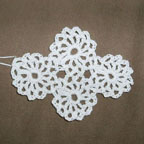
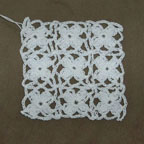
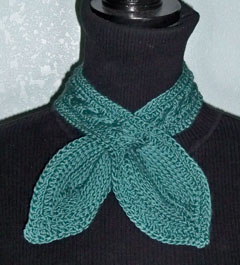
The 2 classes I took from Jennifer Hansen were on Hairpin Lace and Tunisian Crochet. Jennifer is a “Master” at both of these crochet techniques. She has boundless energy, too! In the Tunisian class, we learned to do cables and make a keyhole for her wonderful Tunisian Keyhole Cravat pattern (see pattern on her website here). Here’s a photo of this fantastic design:

Jennifer Hansen's Tunisian Keyhole Cravat from Stitch Diva Studios
Jennifer Hansen’s Tunisian Keyhole Cravat from Stitch Diva Studios


I crocheted my cravat from some extra Naturally Caron Spa yarn that I had. I haven’t blocked it, yet, so I hope it turns out as nice as the one in the Stitch Diva photo. Here’s a photo of that for you to see:

My cravat
My cravat

In the hairpin lace class, we learned how to make many different types of hairpin lace strips and many different ways to join them together. It was great! Here’s Jennifer in the hairpin lace class:

Jennifer Hansen (aka: Stitch Diva Studios)


I learned a TON in both classes! Thanks so much, Jennifer.


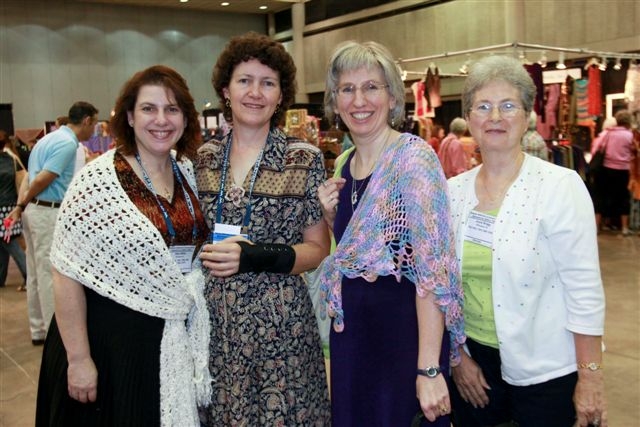
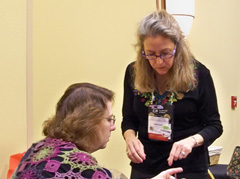
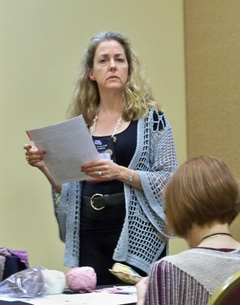
The 3 classes I took from Vashti were on Love Knots, Tunisian Filet and Slip Stitches. Vashti is a wonderful teacher with lots of patience. She’s a very laid back teacher and puts a lot of thought into her classes and her designs. Here she is in the love knots class explaining something to Shari White:

Vashti Braha (on right) and Shari White (on left)


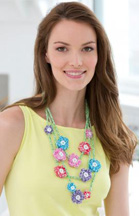
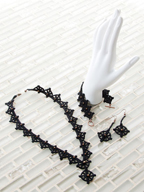
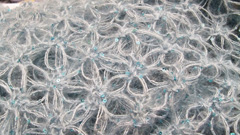
If you’ve never seen love knots before, here’s a photo of some:

Love knots
Love knots

And here’s Vashti in the Tunisian Filet class deep in thought:

Vashti Braha
Vashti Braha


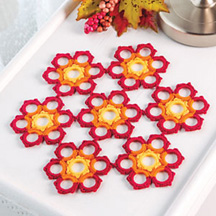
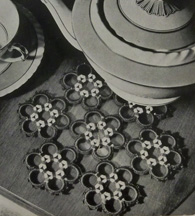
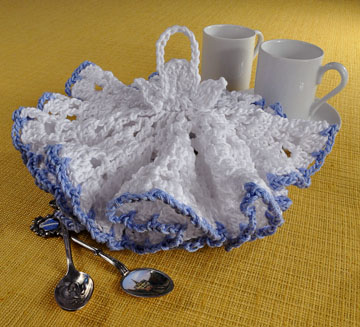
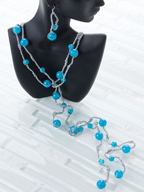
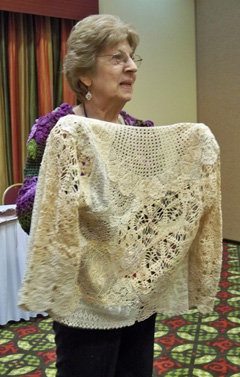
The Tunisian Filet class was based on her Aero Wrap. Here’s a photo of that wrap:

Aero Wrap by Vashti Braha  of "Designing Vashti"
Aero Wrap by Vashti Braha of “Designing Vashti”

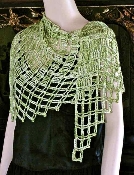
You can see the pattern and read about it on her website here.

I wasn’t able to attend all of the Slip Stitch class because the Board meeting ran late (I’m the secretary on the CGOA Board and we have our annual “face-to-face” Board meeting on Saturday morning at the conference). But I enjoyed what I got out of the class and would like to learn more about it in the future.

Dora’s class was on grading garments (something I don’t like to do and I still need to learn more about it). Dora was very informative, but her class was on the last day of the conference and I was battling “conference brain”! Here’s Dora explaining something about garments:

Dora Ohrenstein of "Crochet Insider"
Dora Ohrenstein of “Crochet Insider”


I took good notes during the class. I think that between my notes and the handout, I’ll learn more when I get a chance to read through it all again. Dora has written several crochet books and they’re all fabulous! To read more about Dora, check out her website here.


I hope you’ve enjoyed this look at the 7 crochet classes I took at the CGOA Conference. If you’ve never attended a CGOA Chain Link Conference before and you’re curious about it, check out the CGOA website here, or the CGOA blog here or the CGOA Facebook page here.

Remember, “When you think crochet, think CGOA”!!!

Until next time!

Happy crocheting,

Susan

3 New Crochet Patterns

Ahoy, matey! Shiver me timbers! Happy “International Talk Like a Pirate Day” to everyone! What will they think of next?

But seriously, I wanted to share a few newly published crochet patterns that I designed with you. And best of all, one of them is FREE!!!

Here’s my Mod Flower Necklace, published by Red Heart/Coats & Clark and available on their website here.

Mod Flower Necklace
Mod Flower Necklace

This necklace is made with a new crochet thread by Coats called Aunt Lydia’s Baker’s Cotton. This is a size 3 cotton thread that comes in 150 yard balls. It’s currently available in 6 colors, which are all plied with white. It’s very soft and has a great drape to it. You can watch a video about this new crochet thread on the Red Heart website, featuring the editor of Crochet Today magazine, Theresa Gonzalez, who is wearing my flower necklace in the video here. I designed this necklace with double-sided flowers, so whichever side of the flowers is facing will be the right side (no backs of flowers for me on this one!). I also added white buttons in the center of each flower, while sewing the flowers onto the necklace chain. And best of all, this pattern is FREE!!!

I just had 2 more patterns published, both in the October 2013 issue of Crochet World magazine. You can see the projects in this issue of Crochet World here.

First is my Reversible Popcorn Ripple Afghan.

Reversible Popcorn Ripple Afghan in Crochet World magazine Oct. 2013

This afghan is made with 5 shades of Plymouth Encore yarn, which is a worsted weight yarn. I designed this afghan with a one-row repeat, changing colors in every other row. Because of the one-row repeat, the popcorn stitches stick out on the front and on the back of the afghan, making it truly reversible! Be creative and use any colors you desire to make this afghan for yourself or as a wonderful Christmas gift for a friend or family member.


Second is my Autumn Blaze Table Mat.

Autumn Blaze Table Mat in Crochet World magazine Oct. 2013

This design is special because it’s the first design I’ve done for the new column in Crochet World called “What’s Old is New Again”. Basically, I’m taking a vintage pattern from the past and turning it into a modern treasure. This design started with the inspiration from this vintage pattern:

Vintage Bone Ring Table Mat pattern


This is the vintage book where I found this pattern:

Vintage Doilies book from 1940


This book was published in 1940 by Spool Cotton Co. It’s book #147 and sold for only 10 cents back then. What a deal!

Anyway, back to my updated version of this table mat. I used 3/4″ bone rings and Aunt Lydia’s Classic, size 10 cotton crochet thread. In the inspiration design, they didn’t cover all of the rings, but left some white showing at the center of the rings where they joined them together by simply wrapping crochet thread around the adjacent rings. I covered all of the 49 bone rings with crochet stitches and added points around the rings that create 6-pointed stars in the empty space between the groups of 7 rings. And I decided to use 3 colors of thread instead of one in each of the 7 groups of 7 rings: the center ring is covered in yellow, while the 6 rings surrounding the center ring are covered in orange and red. I like the way these 3 colors create more visual interest in the table mat. Of course, you can use 3 different colors for your table mat, if you prefer. Color selection is a very personal choice and anyone can change the colors they use in a crochet pattern to suit their own needs, décor or personal preferences.

I hope you’ve enjoyed this look at 3 new crochet patterns. There are new crochet patterns coming out all the time by many very talented crochet designers. I’m sure you have your favorite crochet designers, just like I do!

Happy crocheting,

Susan


New Wiggly Crochet Hot Pads & Coasters Patterns Available

Are you a fan of Wiggly Crochet? Or are you curious about this fabulous crochet technique? I LOVE wiggly crochet and I really enjoy designing wiggly crochet patterns. I’ve had dozens of wiggly crochet patterns published over the last 10 years, from hot pads & coasters to rugs and dishcloths. Most of my wiggly crochet patterns are under copyright with a publisher, but 6 sets of hot pads and coasters that I had published fell out of copyright recently, so I have the rights back to them now. And what better opportunity to reintroduce them for your enjoyment than on my website? So here they are…

These designs were previously published in the booklet “Hot Stuff for the Holidays” by Jeanette Crews Designs in 2003. This is how the front and back covers of that booklet looked:

"Hot Stuff for the Holidays" booklet
“Hot Stuff for the Holidays” booklet front cover
"Hot Stuff for the Holidays" booklet back cover
“Hot Stuff for the Holidays” booklet back cover


Here are our new and improved hot pad and coaster patterns for you:

Wiggly Valentine Hot Pad & Coaster
Wiggly Shamrock Hot Pad & Coaster
Wiggly Easter Hot Pad & Coaster


Wiggly July 4th Flag Hot Pad & Coaster
Wiggly Jack-O-Lantern Hot Pad & Coaster
Wiggly Christmas Tree Hot Pad & Coaster


We’ve taken new photographs, remade the wiggly crochet charts and updated the instructions for each set of hot pads & coasters. All 6 of these holiday Wiggly Crochet Hot Pads and Coasters patterns are available both individually and as a set of 6 right here at The Crochet Architect. The individual patterns are $4.95 each and the complete set of 6 patterns has a special price of just $11.95. That’s a little less than $2 per hot pad & coaster set!

When I first designed these sets of hot pads and coasters, I designed a set for each month of the year (and 2 sets for December). Unfortunately, they didn’t all get published together! The other 7 sets (for January, May, June, August, September, November and December) were published in several books and magazines over the years. Here’s where you can find my other wiggly hot pad & coaster patterns, in case you want to make one for each month of the year:

The July set (Watermelons) was published in Crochet World magazine in June 2008. The November set (Fall Leaves) was published in Crochet World magazine in Oct. 2008. The June set (graduation cap & tassel, along with a scroll) was published in Crochet World magazine in June 2009. The other December set (Christmas wreaths) was published in Crochet World magazine in Oct. 2009. The May set (May flowers) was published on the Coats & Clark website as a free pattern. Here’s the link for that pattern. The September set (an apple for the teacher) was published in the new Leisure Arts book, “Treasury of Holiday Crochet”, by Jean Leinhauser and Rita Weiss. The January set (snowflakes) was sold to a publisher, but hasn’t been published, yet.

I hope you’ve enjoyed this look at my wiggly crochet hot pads and coasters patterns. And I hope you’ll give wiggly crochet a try to expand your crochet skills. You’ll be glad you did!

Happy crocheting,

Susan


New Book – Complete Guide to Symbol Crochet

Complete Guide to Symbol Crochet book front cover
Complete Guide to Symbol Crochet book back cover


It’s been a while since I’ve reviewed a new book, so I thought I’d review a new book for you. This one is special to me because I did a lot of the work in it (and my name is on the cover, too). The name of this book is “Complete Guide to Symbol Crochet” and it’s published by Leisure Arts. I worked on this book, on and off, with Rita Weiss over the course of 5 months during the last year. It was another one of those “labors of love”, just like another book I worked on with Rita Weiss and Jean Leinhauser 5-10 years ago called “Crochet Lace”. I love working on crochet books, whether I’m designing projects, tech editing patterns, writing patterns, making filet crochet charts or symbol crochet charts for them.

This book is special because it teaches how to read crochet symbol charts, which I absolutely LOVE!!! I don’t know what I’d do if I didn’t know how to read symbol crochet charts. They are a visual representation of the crochet project and if you’re a visual person, like me, I’m sure you’ll love them, too. I learned to draw crochet symbol charts a few years ago with Adobe Illustrator. It’s really quite fun (and challenging sometimes) to draw them. But since I love a good challenge, it’s right up my alley!

Our symbol crochet book includes symbols for 47 crochet stitches (or combinations of stitches, such as clusters, popcorns, etc) as well as instructions and diagrams for how to work each of these stitches. It also includes photos, symbol charts and written instructions for 9 projects: 8 of the projects are “easy” and 1 is “intermediate”. Here are photos of the 9 projects in this book:

Granny Square
Granny Square
Little Doily
Little Doily


Crossed Stitch Hat
Crossed Stitch Hat
Snowflake Earrings
Snowflake Earrings


Striped Scarf
Striped Scarf
Sweet Sachet
Sweet Sachet


Kitchen Angel Dishcloth
Galaxy Doily
Galaxy Doily


Pineapple Centerpiece


This book is a digest size book (8.5” x 5.5”), so it’s perfect to take along anywhere and it will fit in just about any size of crochet bag, too!

I hope you’ve enjoyed reading about this new symbol crochet book and you’ll give symbol crochet a try. Some of the current crochet magazines include symbol crochet charts in them, such as Crochet Today. And some good “older” magazines with lots of symbol crochet patterns in them are Magic Crochet and Decorative Crochet. They are/were both published in France and have lots of thread crochet patterns in them. Each pattern starts out with some written instructions, but then says to “follow chart”. And if you’re really adventurous, you can purchase some Japanese crochet books or Russian crochet magazines. Both of these have symbol crochet charts in them. I have many of each, but I can’t read a word of Japanese or Russian to save my life! However, I can follow the symbol crochet charts in both of them. In fact, I crocheted a cardigan several years ago (the one I’m wearing in my Annie’s videos) from a Japanese crochet pattern. The symbol charts were fantastic and the cardigan turned out really nice. I used 2 strands of size 10 DMC Cebelia thread to make my cardigan. Here are photos of the project in the book and me wearing it:

Japanese Cardigan
Japanese Cardigan
My Japanese Cardigan


Isn’t it beautiful? I’m really pleased with how it turned out. Because I have gauge issues (I crochet too tightly quite often), I had to block the heck out of it so it would fit me! I added some waist shaping to my cardigan, too, which wasn’t in the original pattern. My cardigan came from this book:

Japanese Crochet Book front cover

It’s a great book and was well worth the $20 or so that I paid for it (directly from Japan).

To celebrate the publication of the Complete Guide to Symbol Crochet book, Rita and I would like to give away a free, autographed copy to a lucky winner. To enter this contest, you’ll need to leave a comment on this blog post (like if you know how to read symbol crochet charts, if you’d like to learn how to read them or something like that). You’ll also need to be subscribed to my blog. Both of these are quick and painless! To leave a comment, you’ll need to be registered on my website (this cuts down on “spam” comments, so registering is necessary these days). There’s a tab at the top of each page of my website that says “Login”, then a drop down tab that says “register”. Just fill in the blanks and click on the button at the bottom. After you’re registered, you can leave your comment on this blog post (and you can comment on any other blog posts here, too). To subscribe to my blog, simply scroll down a few inches and type in your e-mail address in the field that says “Subscribe to blog via email” on the right-hand side of the page. Now wasn’t that easy? Oh, this contest will end on August 28th (my youngest son’s 21st birthday). So enter today for your chance to win!

I wish everyone the best of luck in winning a free copy of this new book (although, realistically, only 1 lucky person will win). And if you don’t win, I hope you’ll consider adding this new symbol crochet book to your crochet library.

Happy crocheting,

Susan

Jewelry to Crochet

Are you an avid crocheter who likes to crochet jewelry? Have you admired crochet jewelry for a long time and wanted to make some for yourself or others? I love to design and wear crochet jewelry! If you’re like me, you might be interested in a new crochet book I have by Annie’s. It’s called “Jewelry to Crochet” and it was just released for purchase last week. Included are 7 sets of jewelry, made with size 10, 5 or 3 cotton crochet thread, or with Kreinik metallic thread. Many of the sets also include beads. Each set includes a necklace, as well as a bracelet, earrings or both.

I haven’t received my designer copies of this book, yet, so I don’t know how the inside looks. But I think they did a nice job with the photos!

Here are some photos from this book:

Jewelry to Crochet front cover
Black and Gold Set
Black and Gold Set
Oval Pendant Set
Oval Pendant Set
Daisy Set
Daisy Set
Stained Glass Set
Stained Glass Set
Woven Set
Woven Set
Black Shells Set
Black Shells Set
Lariat Set
Lariat Set


There are many reasons why I love crochet jewelry. Here they are (in no particular order):

1. It takes only a small amount of time to make a crochet necklace, pair of earrings and/or bracelet, so I get almost instant gratification!

2. I can make my crochet jewelry in any colors to coordinate with my various outfits.

3. Crochet jewelry doesn’t require much money in materials to make!

4. I love crocheting with thread and crochet jewelry is very conducive to thread crochet!

If you love crocheting jewelry, too, what are the reasons why you love it?

I had a blast designing and crocheting these sets of crochet jewelry. I designed some of them years ago and others just last year. If you’re interested in crocheting some jewelry, you can read more about this book and purchase it on the Annie’s website.

Why not crochet some jewelry today and wear it tomorrow?

Happy crocheting!

Susan


Continuous Crochet Motifs (Part 2) and New Crochet Pattern

In May of last year, I blogged about the Continuous Crochet Motifs method of making and joining motifs so there are less ends to weave in at the end of the project. This is a really cool crochet technique/method. You can read that blog post here and see photos of the Japanese crochet book that I bought to learn this crochet technique. Since then, I purchased Kristin Omdahl’s book called “Seamless Crochet”. I haven’t had the time to make anything from that book, but it’s definitely the same method of joining motifs as in the Japanese book I bought.

At the time I wrote that blog post, I was designing a shawl to enter in the CGOA Design Contest, made in the Continuous Crochet Motifs method. Well, I got the shawl finished and entered it in the contest. Unfortunately, I didn’t win anything for this shawl and I think the reason was that I didn’t have an edging on it (I couldn’t think of an edging that would work at that time). A few months ago, I added an edging to the shawl and it really finishes off the shawl nicely. I tried many different color combinations for the edging, but in the end, I decided to make the edging all black so it wouldn’t take away from the beauty and design of the shawl itself. I’ll be publishing this shawl design when the pattern is ready (it still needs a little tweaking first!). Here’s a photo of the shawl before I added the edging:

Byzantine Shawl in 2012 CGOA Design Contest

I still need to take some new photos of this shawl with the edging added before I can publish this pattern. But I promise to get to it sometime soon! I’ve veered from my original topic of the Continuous Crochet Motifs method a little, so I’ll get back to that topic now.

After designing the shawl, I designed a scarf using the same Continuous Crochet Motifs method and some of the same motifs as the shawl. It’s called the “Byzantine Scarf”. I just finished up the pattern and added it for sale here yesterday. You can see the pattern here.


Here’s a photo of the Byzantine Scarf:

Byzantine Scarf
Byzantine Scarf

What I love about this scarf (besides the colors) is the Continuous Crochet Motifs method I used for the 2 rounds of black, which are joining the red and orange motifs together (not the final round of black, but the black rounds inside the lime green rounds). With this method of crocheting, I was able to work these 2 rounds of black edging around each of the 15 motifs in the scarf in one long pass! And that means I only had 2 tails of black yarn to weave in on these 2 rounds.

Okay, I realize that the rest of this scarf has plenty of tails to weave in. But by using the Continuous Crochet Motifs method of joining the motifs, I saved myself 28 whole tails to weave in (30 – 2 = 28). I don’t know anyone who enjoys weaving in the tails/ends on their crochet work and I don’t, either. But it’s a necessary evil and has to be done! I love using color in my crochet designs, so I’ve been known to weave in hundreds of tails on larger projects with multiple colors. I just bite the bullet and do it!

I realize that not everyone wants to learn a new crochet technique, so I included the instructions for joining the motifs in the traditional motif joining method (joining with a sl st to the adjacent motif). But when you join the motifs this way (in the traditional method), you’ll have 30 tails of black to weave in on these 2 rounds of motif edging (2 tails for each of the 15 motifs in the scarf). So to me, it’s a “no brainer” to use the Continuous Crochet Motifs method to join the motifs together! But I’m an adventurous crocheter and I love to learn new techniques. I’m sure that not everyone is as adventurous as me, so that’s why I included the instructions for joining the motifs the other way.

Here’s a close up photo of the scarf:

Byzantine Scarf close up

Now you can see the 2 rounds of black around the red and orange motifs better. I also made a symbol crochet chart for each method of joining the motifs (these charts are included in the pattern). So if you like symbol crochet charts and learning new crochet techniques, you might want to give this scarf pattern a try!

Here are photos of 4 swatches of motifs that I made from the Japanese Continuous Crochet Motifs book a few years ago (right after I got the book in the mail!):

Motif swatch #2
Motif swatch #2
Motif swatch #6
Motif swatch #6


Motif swatch #36
Motif swatch #36
Motif swatch #43
Motif swatch #43

These swatches haven’t been blocked, so they don’t look as good as they could. What I want you to notice is the number of tails and the number of motifs in each of these swatches (I didn’t weave in any tails at all on them). Each swatch has 4, 7 or 9 motifs that are joined. But since I used the Continuous Crochet Motifs method to make these swatches of motifs, there are only 2 tails that would need to be woven in (if I were going to make these into projects). There would normally be 2 tails to weave in “per motif”! This is a HUGE time saver!!! It means I can spend more time crocheting and less time weaving in ends! Of course, it only works when you’re using the same color of yarn/thread for each motif (or to join each motif). But it’s not a bad thing to use 1 color of thread/yarn. It’s a design decision! And the savings in time it takes to weave in the tails is HUGE!

I hope you’ve enjoyed this closer look into the Continuous Crochet Motifs method and will come back again soon.

Happy crocheting,

Susan

Crocheted Chinese Dragon

Last week, my husband and I drove to Los Angeles to pick up our youngest son at LAX (the airport). Our son had been in China for 2 weeks visiting his brother (our middle son) and our daughter-in-law (our middle son’s wife). I asked my youngest son if he would look for crochet books in China for me. I know there are fabulous Japanese crochet books because I have some of them. I absolutely LOVE Japanese crochet books (and Russian crochet magazines, too, but that’s a different story)! Anyway, my son said they didn’t have crochet books in China, but he bought me something he thought I’d like instead. And here it is:

Chinese Dragon
Chinese Dragon


Isn’t it cool? It’s a Chinese Dragon! And it’s crocheted!!! I LOVE it!!! It has nostrils, a tongue, eyes, feet, and more (I don’t know all the parts of a dragon, so I’m at a loss as to what to call everything on it). His body is bendable with some sort of wire down the middle. It’s hard to tell exactly what kind of wire was used because it’s encased in crochet stitches (it looks green and might be some sort of thick floral wire). The head easily rotates so he can see everything that’s going on in the room! There is a hanging cord so I can hang it, if I desire. But for now, he’s sitting next to me and looking very inquisitive!!! Judging from the shine of the yarn/thread that was used, I’d say he’s made out of nylon. I love the colors that he’s made of and the cute look on his face!

Dragon Face
Dragon Face


What do you think? Isn’t he cute? I already posted a couple of photos of him on my Facebook page and a few people asked me for the pattern. I had to explain that I didn’t design him and he came from China. I don’t have the pattern for him, but if I had the time and inclination, I could probably write a pattern. However, he may be copyrighted, so I won’t do that. Besides, I have other crochet patterns that I’m working on to bring to you very soon! Stay tuned for more to come!


Happy crocheting,

Susan

New Thread Crochet Jewelry Pattern Available

Faux Tatted Jewelry Set

It’s finally done! If you’ve enjoyed making (or have thought about purchasing) my Faux Tatted Necklace pattern, you might be interested to learn that I just self-published a pattern for a whole set of jewelry (necklace, bracelet and earrings). If you’re wondering why I call this “Faux” Tatting, it’s because it isn’t tatted. It’s crocheted to look like tatting! The only stitches used are chains, slip stitches and single crochet. The pattern is easy to follow, includes step-by-step photos and a symbol chart for the necklace (once you’ve made the necklace, the bracelet and earrings are a piece of cake!). Each of these jewelry pieces is crocheted with size 10 cotton crochet thread (for all of us “threadies”), using any buttons, beads or charms you desire.

I designed the bracelet and earrings for this set last summer before the CGOA Conference in Manchester, where I taught a class on making the Faux Tatted Necklace. But in my usual “procrastinating” style, it’s taken me this long to self-publish it! In my defense, though, I’m busy with other crochet work, I’m a perfectionist and I may possibly have ADD because I get distracted very easily (just ask my husband)!!! Aren’t all creative people like that (or many of them)?


Focus, Susan! Back to the jewelry set. I just love making these necklaces! It only takes a few hours to make each one, so I have less chance of getting distracted! Now I can crochet the matching bracelet and earrings for each of the necklaces I’ve made for a complete set (my ears won’t be bare any more). And now YOU can have coordinating sets, too!!!

Here are some close-up photos of the bracelet and earrings for you to see:

faux tatted earrings2faux tatted earrings1

faux tatted bracelet2

faux tatted bracelet1


The bracelet pattern includes instructions for buttons/beads/charms on 1 side (in the brown/blue bracelet photo) or on 2 sides (in the black/green bracelet photo). The bracelet uses 12 or 23 buttons, beads or charms. The earrings have just 1 button on each of them and use earring wires (or your favorite earring findings).

I hope you enjoy this new pattern. And I hope you’ll share photos of your Faux Tatted Jewelry Sets with all of us.

Happy crocheting,

Susan

Last Stop on Wiggly Crochet Dishcloths Blog Tour

This is the last stop on the Wiggly Crochet Dishcloths blog tour. Boohoo. I’m sad to see it come to an end! It’s been a lot of fun!

Today, we’re going to visit the blog of Andee Graves. I first met Andee at a CGOA Conference (I think it was in 2009 in Buffalo when I had a broken wrist – I definitely wasn’t able to crochet for a while then!). Here’s a photo of Andee and I, along with Shari White (one of my mentees and a very talented designer) and Joyce Bragg (another very talented designer), waiting to meet with the editors at the Buffalo conference (from left to right: Shari, me, Andee and Joyce):

Waiting for Editors at CGOA Conference in 2009

If you’ve been reading my blog for more than a few weeks, you might recognize Andee’s name. I wrote a blog post for Andee’s blog tour of her new Texting Mitts booklet, published by Leisure Arts, on February 10th. Here’s a photo of the front cover of her booklet:

Texting Mitts front cover

Andee’s texting mitts are fun to make! I made 2 pairs of them when I was preparing for her blog tour. You can read more about this booklet on my Feb. 10th blog post or on Andee’s blog!

Andee is a fantastic newer designer (newer than me). She is a bundle of energy and a wealth of information! And she’s a really nice person, too! Andee already has over 50 published designs in just the last 3 years! Wow! Way to go, Andee! You can see all of Andee’s published designs on her Ravelry designer page. This is one of my favorites of Andee’s designs:

Andee's Heart Pillow
Andee’s Heart Pillow


This heart pillow was published in Crochet World magazine’s Feb. 2012 issue. Isn’t it pretty?

Please hop on over to Andee’s blog to read what she’s written about my Wiggly Crochet Dishcloths booklet and the dishcloth she’s made from the booklet.

Since this is the last stop on my blog tour, I will be picking and announcing a winner for the free autographed copy of my Wiggly Crochet Dishcloths booklet on Friday. If you haven’t entered yet, just leave a comment by 6PM (Arizona time) tomorrow on my blog post from either Jan. 27 or Feb. 9. I wish you all good luck in the giveaway!

Happy crocheting,

Susan

4th Stop on Wiggly Crochet Dishcloths Blog Tour

Today we’re visiting a very talented crochet designer named Kara Lyon. Kara designs amigurumi dolls that are absolutely amazing! Here’s a photo of one of her dolls:

Kara Lyon's Viking Doll
Kara Lyon’s Viking Doll


Isn’t that awesome? To see all of her amigurumi dolls, visit her website.


When I first saw Kara’s amazing dolls online, I contacted her and encouraged her to attend the CGOA Conference in Manchester, NH in 2010, where we met face-to-face. We had previously communicated through e-mails and it was wonderful to meet her in person! Here we are at that conference:

Susan and Kara
Susan and Kara


Kara took my wiggly crochet class at the conference and I think she really enjoyed it. She designed her own wiggly crochet rug the following year. You can see and read about her rug on her blog. It’s very creative!

Today Kara is blogging about my Wiggly Crochet Dishcloths booklet. I can’t wait to read what Kara has written and see what kind of wiggly crochet dishcloth she’s created (she’s so creative!). I hope you’ll visit her blog to read about what she’s done!

If you haven’t already entered to win a free, autographed copy of my Wiggly Crochet Dishcloths booklet, you still have a few more days. Just leave a comment on either my Jan. 27 or Feb. 9 blog post to enter. Good luck!

Happy crocheting,

Susan