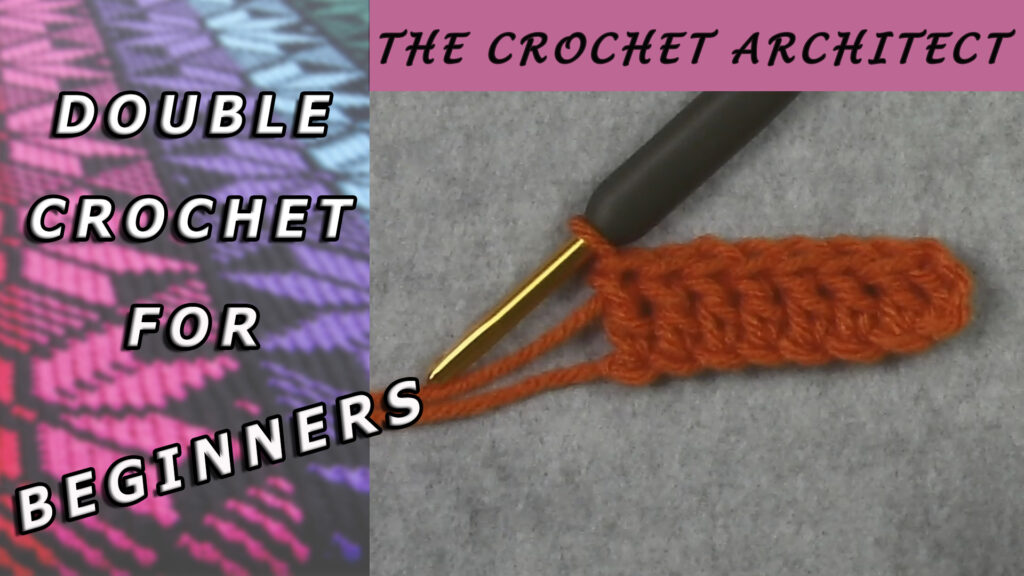
Tutorial: Working in the Back Bump of the Foundation Chain
Have you ever seen a crochet pattern that instructs you to work in the back “bump” (or back “bar” or back “hump”) of the foundation chain? Do you know what part of the foundation chain this is? If you’ve never worked in the back bump of the foundation chain, you’re in for a treat! This is the best thing since sliced bread (well, almost)!
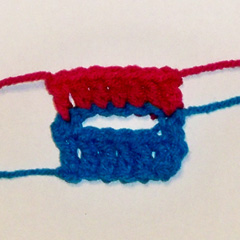
So why would someone want to work into a different loop of the foundation chain than they always work into? In this instance, it is because working in the back bump gives you a nice bottom edge of your project that mimics the top edge of the project. This is what I’m talking about:
Can you see the chain edge at the bottom? Doesn’t that look nice? I LOVE working into the back bump of the foundation chain. Not only does it look nice, it gives a stronger bottom edge, as well.
I’ve made a tutorial for you explaining how to work into the back bump of the foundation chain. You can find it on my “tutorials” page here. I hope you’ll check it out and give it a try. You’ll be glad you did!
Happy crocheting,
Susan
The Yarn Over and CGOA Videos
If you’re new to crochet or you learned to crochet from someone else, how do you know if you’re crocheting correctly? Do you hold the hook correctly? Are you holding your yarn correctly? Are you yarning over correctly? These are some of the questions you may be asking yourself. Whenever I’m doing something in crochet incorrectly, I really appreciate someone telling me the correct way to do it so I can improve my crochet skills and knowledge. So I thought I’d share with you the correct way to do a “yarn over” in crochet.
Every stitch in crochet uses a yarn over at some point in time, whether it’s at the beginning, in the middle or at the end of the stitch (or in all 3 places). There are many good crochet books written that explain and show how to do the yarn over and the crochet stitches formed by the yarn over correctly. Also, in this age of the internet and internet/website videos, there some great crochet videos to watch that will show you a multitude of fabulous crochet stitches and techniques. I think it’s wonderful to have so much helpful information at my fingertips to learn more about crochet. You probably share this enthusiasm for learning new crochet stitches and techniques, too!
But you know the saying: “Buyer Beware”! Disclaimer: NOT ALL CROCHET VIDEOS ARE CORRECT!
I’d love to be able to say that all of the crochet videos I’ve watched on the internet are sharing the correct information, but that’s simply not true. I’ve seen some videos where the person demonstrating the stitch is saying “yarn over”, but she’s simply grabbing the yarn (with the yarn in front of the crochet hook) and isn’t doing the yarn over correctly. To do a “true” yarn over, you must bring the yarn around the back of the crochet hook, over the top and to the front, like this:
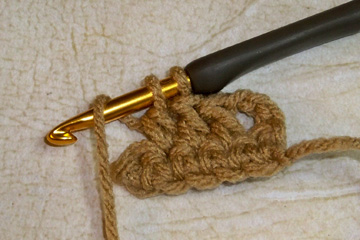
If you’re not making your yarn overs in this manner, then you’re doing them incorrectly. Here’s the incorrect way to do your yarn overs:
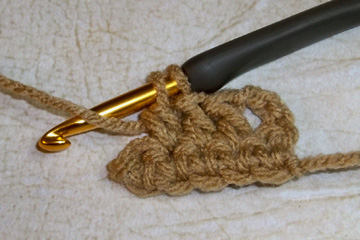
Do you see the difference? When you’re doing your yarn overs correctly, the yarn goes over the top of the hook from the back to the front. It doesn’t just sit in front of the hook to grab it: that’s NOT a “yarn over”!
To see some crochet videos, including the correct way to do a yarn over, please visit the CGOA website here if you’re right-handed or here if you’re left-handed. In each of these videos, Kim Guzman, a respected crochet designer, teacher and author, shows how to do a yarn over correctly. The yarn over is used for making the chain, single crochet, half double crochet, double crochet and treble crochet. It’s also used for many other crochet stitches and techniques, including Filet Crochet, Bruges Lace, Wiggly Crochet, Tunisian Crochet, Hairpin Lace, Broomstick Lace and more. As a CGOA Board member, we discussed adding crochet videos to the CGOA website last year and Kim was enthusiastic about doing them for us (thank you so much, Kim). Kim is a wonderful crochet teacher with lots of knowledge and patience! So check out the crochet videos on the CGOA website to make sure you’re doing your yarn overs correctly! And if you don’t know about all that CGOA (the Crochet Guild of America) has to offer, then check out the rest of the updated CGOA website while you’re there!
As one of the co-chairs and a portfolio reviewer in the CGOA Masters program, I enjoy discussing crochet stitches, techniques and patterns to find out how some people work their stitches (correctly and incorrectly). I learn so much from these discussions! They help me to understand how the written crochet instructions can be interpreted in different ways, which in turn helps me improve my pattern writing and technical editing skills! I’m all for improvement throughout my life!
Are there any crochet stitches, techniques or patterns you’d like to discuss?
Until next time…
Happy crocheting,
Susan
CGOA Conference Preparations and Crochet Hint
I’ve been getting ready for the CGOA Conference (aka: The Knit and Crochet Show or the Chain Link Conference) for weeks and I’m almost ready to go (except for packing on Monday)! I’m teaching 6 crochet classes at the conference next week in Indianapolis, Indiana, which is a lot to prepare for. It’s going to be a blast…it always is!!! For more information about the conference, check out this website. The things I love about the CGOA conference are (in no particular order):
1. The friendly crocheters (and knitters) that I meet there.
2. The wonderful classes I get to take (when I’m not teaching) and the new things I learn about crochet (I love to learn more to expand my crochet knowledge and ability).
3. The market (show floor) with lots of gorgeous yarn, crochet hooks and patterns!!!
4. Professional Development Day where we learn more about earning an income through designing, technical editing, teaching, contract crocheting, etc.
5. Seeing and spending time with crochet friends that I’ve made over the years.
6. The Fashion Show dinner.
7. The design contest.
I’ve been a CGOA (Crochet Guild of America) member for over 10 years and I’m hooked (pun intended)! There are so many wonderful, friendly, helpful crocheters in CGOA who are happy to share what they know with each other (mostly about crochet, but sometimes about life in general, too). I’ve made so many really good friends by attending the CGOA Conference each year. I am truly blessed to know so many crocheters from every walk of like, whether they’re professionals, associate professionals or CGOA members at large (these are the nicest people)! I love to encourage new crochet professionals and share my crochet knowledge with others through my classes. I certainly don’t know all there is to know about crochet, but I’m learning more all the time (and that’s what CGOA is all about…learning about crochet).
I’ve been working on a shawl for this year’s CGOA Design Contest for several weeks. I can’t show you a picture of it because one of the judges might see it before the contest and the entries are supposed to be kept secret. But I can share with you the struggles and trials I’ve had designing this shawl (it’s confession time!). First, I made countless mistakes in this shawl and had to rip out a lot of stitches several times to correct the mistakes (I really should have been paying closer attention to what I was doing!). Oh well. Live and learn! Second, I ran out of yarn before the end of the shawl, so I had to frog (rip out) hours and hours of work on it so I can redesign it a little differently to use just the amount of yarn that I purchased last year at the conference (about 950 yards from the Newton’s booth).
One of the “challenges” with this design (besides all of my mistakes and ripping out so many stitches) was the stitches that I worked into the chain spaces sliding around and not staying evenly spaced. The yarn I’m using is a rather slick mercerized cotton (not all mercerized cotton is slick like this one). I do enjoy the sheen this yarn has and the lighter weight of the yarn, so I’m willing to overlook the sliding stitches “challenge”!
I’d like to share a hint to help your stitches stay in place and not slide around, like mine were doing. I normally work my stitches in a chain space into the space and not into the chains. But with some slippery yarns (like the one I’m using), the stitches can slide around and not be evenly dispersed across the chain space. So I decided (after ripping out a huge chunk of my work) that I’d work into the chains themselves instead of into the chain spaces. Here are a couple of photos showing the difference between working into the chains themselves and working into the chain spaces:
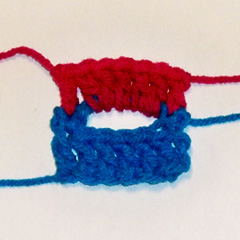
Can you see the difference? The photo on the left shows the center 5 red double crochet stitches worked in the blue chain-5 space below. The photo on the right shows the center 5 red double crochet stitches worked in the chains of the blue chain-5 space below (one double crochet is worked in each of the 5 chains). Can you notice how the red stitches are more evenly spaced in the right-hand photo? And they don’t move around anymore. Of course, working into the chains themselves works best when you have the same number of stitches to work into the same number of chains (like 5 chains and 5 stitches).
Well, I’d better get back to preparing for the conference. I hope you all enjoy the rest of this month and are able to enjoy many relaxing hours of crochet!
Happy crocheting,
Susan

