Upcoming Crochet Pattern Writing Class
I hope you had a wonderful Christmas/holiday season and are doing well in the New Year!
I’d like to announce that I’ll be teaching an online class for new/aspiring crochet designers on Wednesday, January 19 and 26 for CGOA (Crochet Guild of America). This class will teach you everything you need to know to successfully write your own crochet patterns. If you’re anything like me when I first started designing crochet patterns and writing the pattern up so others could follow them, you struggle with many things, especially how to write repeats! I’ve been writing crochet patterns for over 20 years (and editing crochet patterns since 2004), so I know a lot about writing them and I’m excited to share what I’ve learned with others to help them/you be successful with your crochet patterns!
To learn more about this class, called “Let’s Get Writing”, check out the CGOA website. This is a 2-part Professional Development class. Each part is 90 minutes long and takes place from the comfort of your home. There’s no traveling necessary!
The last day to register for this class is next Friday, January 14. If writing better crochet patterns is one of your New Year’s resolutions, don’t put it off! Register today!
I look forward to seeing you in class!
Happy crocheting (and pattern writing),
Susan
Share this:

Microwave Bowl Cozy Pattern Release
Do you ever burn your fingers when you remove a hot bowl from your microwave? I often struggle with this! But I’ll struggle with it NO LONGER, thanks to the crocheted Microwave Bowl Cozy that I designed and made last month. Now you can keep your fingers from getting burnt, too, with my new Microwave Bowl Cozy pattern!
Last year on a trip to visit family and friends, I saw my husband’s best friend’s (Dan) fabric microwave bowl cozy and thought it was a fabulous invention! I was intrigued with it, but thought it might be more than I wanted to undertake on my sewing machine. So I decided to design a crocheted version of this bowl cozy and last month, on another trip to visit family and friends, I took the plunge and designed it while visiting that same friend (and his wife, Janine). I worked and reworked the cozy, getting it to fit a Corelle soup bowl perfectly! And I tried the cozy on several other bowl sizes that Janine had there to make sure it would fit other bowl sizes, as well.
Announcing my crocheted Microwave Bowl Cozy pattern!
As you can see, the cozy conforms to the shape of the bowl really well. It’s a reversible project, so you can use either side facing in/out. It works great, using 2 of the 4 corners to grab your hot bowl out of the microwave. I use my bowl cozy in the microwave with my bowl of food/soup that I warm up and it works just fine. The bowl cozy gets a little warm in the microwave, but nowhere near as hot as the heat of the bowl!!! Some people don’t use their bowl cozy directly in the microwave. They simply transfer the hot bowl into the cozy while taking it out. You can use your bowl cozy either way. And it folds flat for storage, too.
Oh, and it works great to keep your fingers from getting too cold if you’re holding a bowl of ice cream!
This is a great pattern for any level of crocheters, from beginners to advanced. The entire cozy is made with single crochet stitches (except for the center), with increases strategically places to form the shape. There are 2 options for the top edging: reverse single crochet stitches or slip stitches.
These cozies make great gifts for birthdays, Christmas or any occasion! And they’re great items to sell at craft fairs, too!
This bowl cozy is made with 100% cotton worsted weight yarn. I cannot stress enough the importance of using 100% cotton yarn for this bowl cozy. Cotton yarn doesn’t melt, like acrylic yarn, when it comes in contact with heat, so it’s perfect for this project. I used a size I/9 5.5 mm crochet hook for my first bowl cozy and it came out great! However, I used a size H/8 5.0 mm crochet hook for the other 2 cozies and I think it works a little better for a more dense cozy with less stretch to it.
I also decided to film a YouTube video demonstrating each round of this cozy pattern for those of you who are visual learners, like me.
Also, for a limited time (until July 31, 2021), you can get a 20% discount on this pattern with the code “MBC2021”. Here’s the link to purchase this pattern: https://thecrochetarchitect.com/downloads/microwave-bowl-cozy/.
I hope you enjoy my Microwave Bowl Cozy pattern, the YouTube video and the limited time discount!
Happy crocheting,
Susan
Share this:

Sign Up for July 2021 CGOA Crochet Classes!
I just love learning new things, don’t you? I’m very happy to announce that I’ll be teaching 4 online crochet classes next month for the annual CGOA Conference. I’ve taught each of these classes before in person and I’m excited to teach them online/virtually! The nice thing about online/virtual classes is there’s no travel necessary to attend the classes/conference. You can attend classes in the comfort of your own home, which saves lots of time and money! Each crochet class will be taught at Central Standard Time (US time zone) through Zoom. It will be fun to learn new things, so give it a try!
If you’ve never heard of CGOA (Crochet Guild of America), check out the benefits of membership here. I’ve been a CGOA member since 2002 and I started teaching at the CGOA Conference in 2009! It’s a wonderful organization with lots of crochet enthusiasts, including lots of crochet hobbyists, designers, editors and publishers! CGOA members enjoy discounts on classes and lots of other things.
Registration ends soon, so register today for the classes you want to take!
Below are the 4 classes I’ll be teaching at the virtual CGOA Conference next month.
Invisible Repairs: Tuesday, July 20 from 9:00AM-4:00PM CST (with 1 hour lunch break)
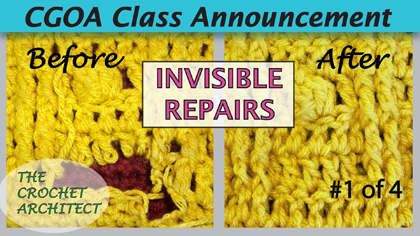
- Repair torn, cut, chewed or burned projects
- Replace stitches and chain spaces, locking them to bottom strands in the row or round above
- Invisibly seam first and last rows in a crochet cowl
- Bring damaged crochet projects back to life again
Intro to Irish Crochet: Friday, July 23 from 1:00PM-4:00PM CST
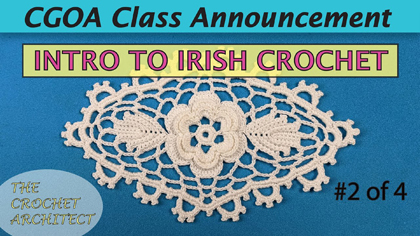
- Introductory class
- Learn to make basic Irish Crochet rose and leaf motifs
- Learn to make a background for joining your finished motifs
- Learn a simple Irish Crochet edging with picots
Reading & Understanding Crochet Patterns: Monday, July 26 from 1:00PM-4:00PM CST
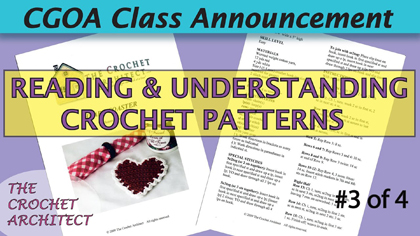
- By learning how to read a pattern, you’ll be able to crochet exciting new projects
- Learn the rules for reading a crochet pattern
- Learn abbreviations, right/wrong side, right/left side, right/left front
- Bring your crochet pattern questions to be answered
- We will make some practice swatches in class
Fantastic Filet Crochet: Wednesday, July 28 from 9:00AM-4:00PM CST (with 1-hr lunch break)
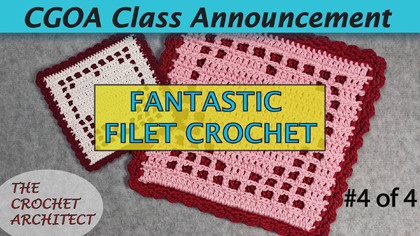
- Learn the basics of Filet Crochet
- Learn open mesh, closed mesh, lacets and square mesh
- Learn increases, decreases and diagonal stitches
- Learn to read a Filet Crochet chart
- We will be making a beginning Filet Crochet project and intermediate swatches
I hope to see/meet many of you in my CGOA classes next month!
Here’s a link directly to the CGOA web page to read about all the classes being offered at this year’s CGOA conference and to register for classes.
Happy crocheting to all of you and keep on learning!
Susan
Share this:

Learn My New REV-COM Technique
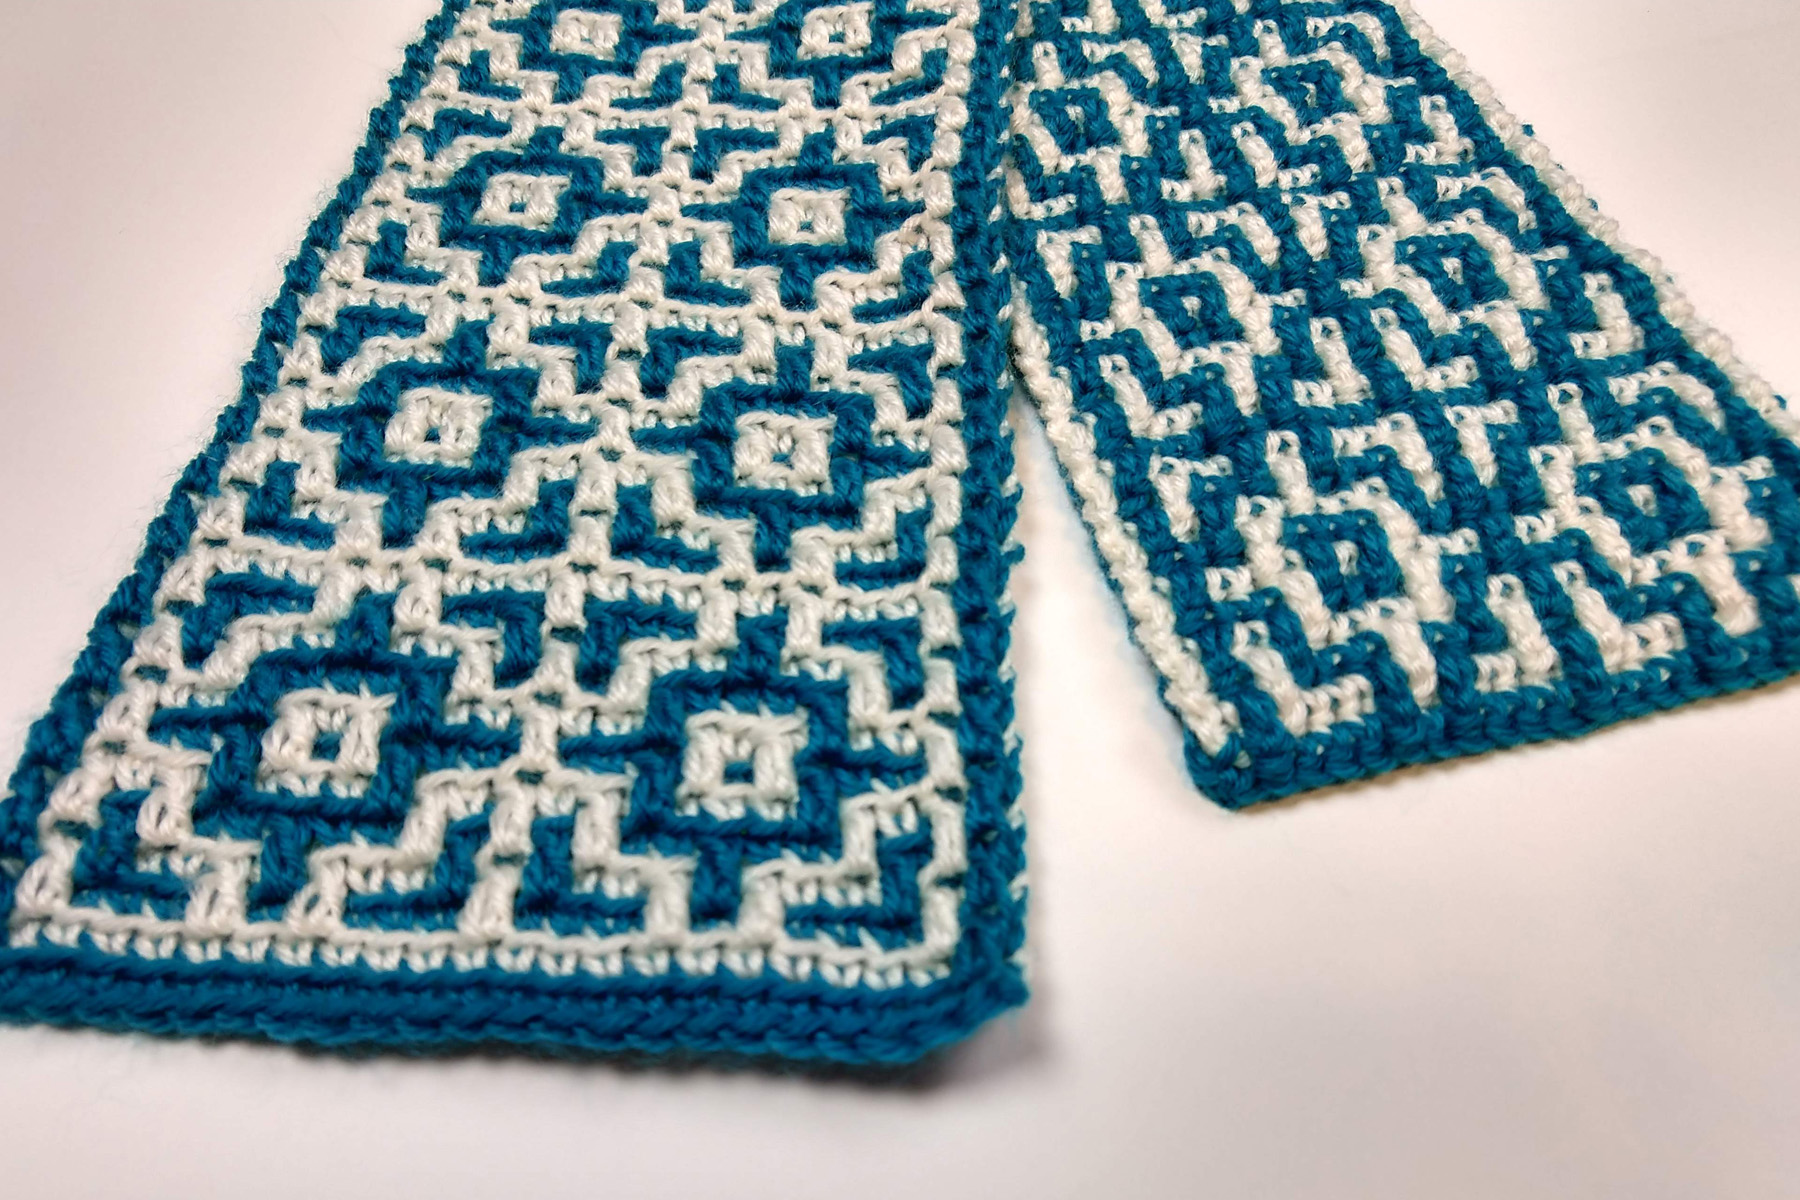
If you’re wondering if you can make your Overlay Mosaic Crochet projects reversible, then wonder no longer! They absolutely CAN be made reversible with REV-COM (Reversible Continuous Overlay Mosaic Crochet)! And the results are stunning!
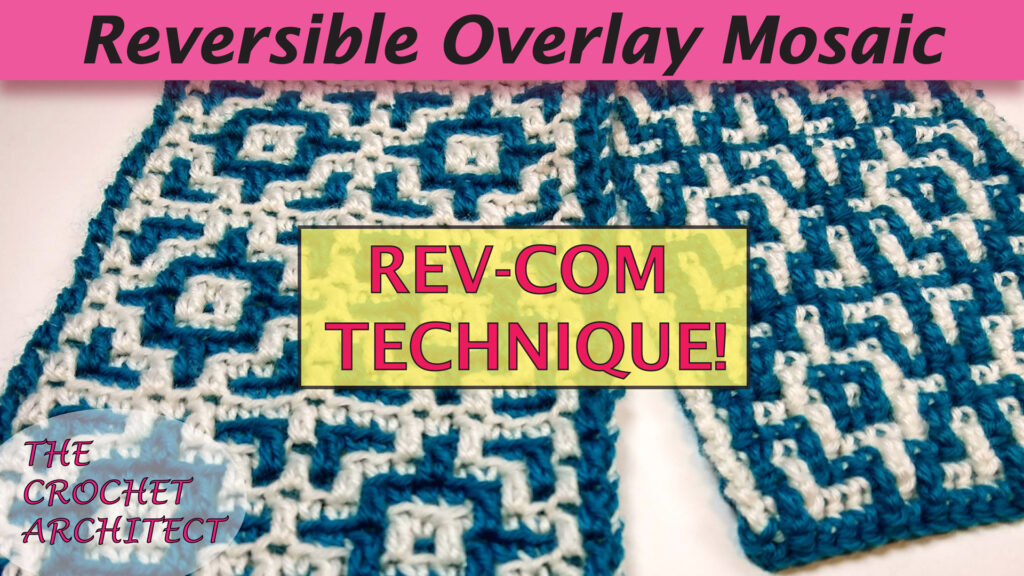
I’ve been playing around with Mosaic Crochet for several years and learning more about the characteristics of this fabulous crochet technique! I have a new YouTube video to teach you how to make your Overlay Mosaic Crochet projects reversible. In this reversible technique, I’ve tweaked my Adc (Anchored double crochet) stitch a little. This small tweak has allowed me to make my Overlay Mosaic Crochet projects reversible! And I’d like to share what I’ve developed with you so you can make your Overlay Mosaic Crochet projects reversible, too!
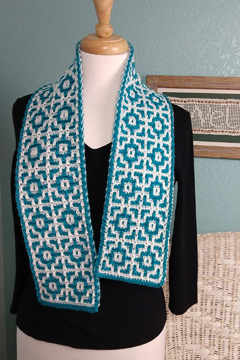
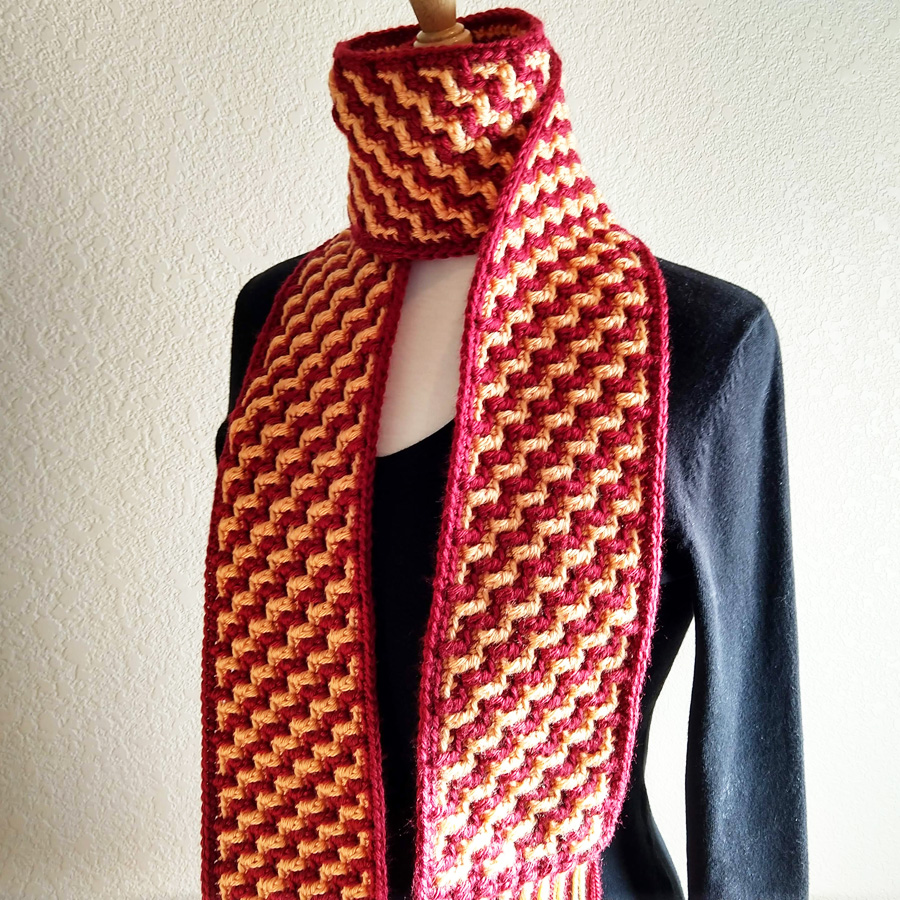
I also have a new Reversible Continuous Overlay Mosaic Crochet (REV-COM) pattern that’s completely reversible. It’s my “Persimmon Flower Scarf”, made with DK weight yarn and a size F/5 (3.75mm) crochet hook. This scarf is worked in short rows (the width of the scarf) so it’s easy to learn this technique with a minimum of mistakes along the way. Who wants to go back hundreds of stitches to correct a mistake in a scarf/project? Certainly not me!
I find that the reversible projects are thicker than one-sided projects, so I used a thinner yarn and a smaller hook to compensate for the additional thickness. This scarf is adjustable in width and length, so you can make your reversible scarf any size you want.
The pattern includes instructions for how to adjust the size of your scarf, full written instructions for each row of the scarf, a chart to use if you prefer working from charts, as well as instructions (and step-by-step photos) for making the FLdc, AdcRS, AdcWS and using the Continuous Overlay Mosaic Crochet (COM) technique.
I’d like to tell (warn) you that when you’re making a reversible project, there are more opportunities for making mistakes. Therefore, I’m making a separate video to teach you how to correct some of the most common mistakes you can make (like me) in your REV-COM projects! That video will be coming out soon!
Obviously, making your project reversible will use more yarn than if you made it one-sided, with stripes on the back, instead of the mosaic pattern on the back. I’m estimating that this reversible technique uses about 15% – 30% more yarn, depending on the number of FLdc (front loop double crochet) or Adc (anchored double crochet) in the pattern. I think the extra yarn is well worth it because both sides are beautiful instead of just the front!
If you’re an intermediate to advanced crocheter (or an adventurous crocheter), watch my YouTube video to learn how to make your Overlay Mosaic Crochet projects reversible today!
Happy Reversible Mosaic Crocheting to you!
Susan
Share this:

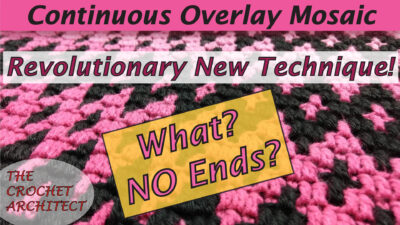
Revolutionary Continuous Overlay Mosaic Crochet (COM) Technique Revealed
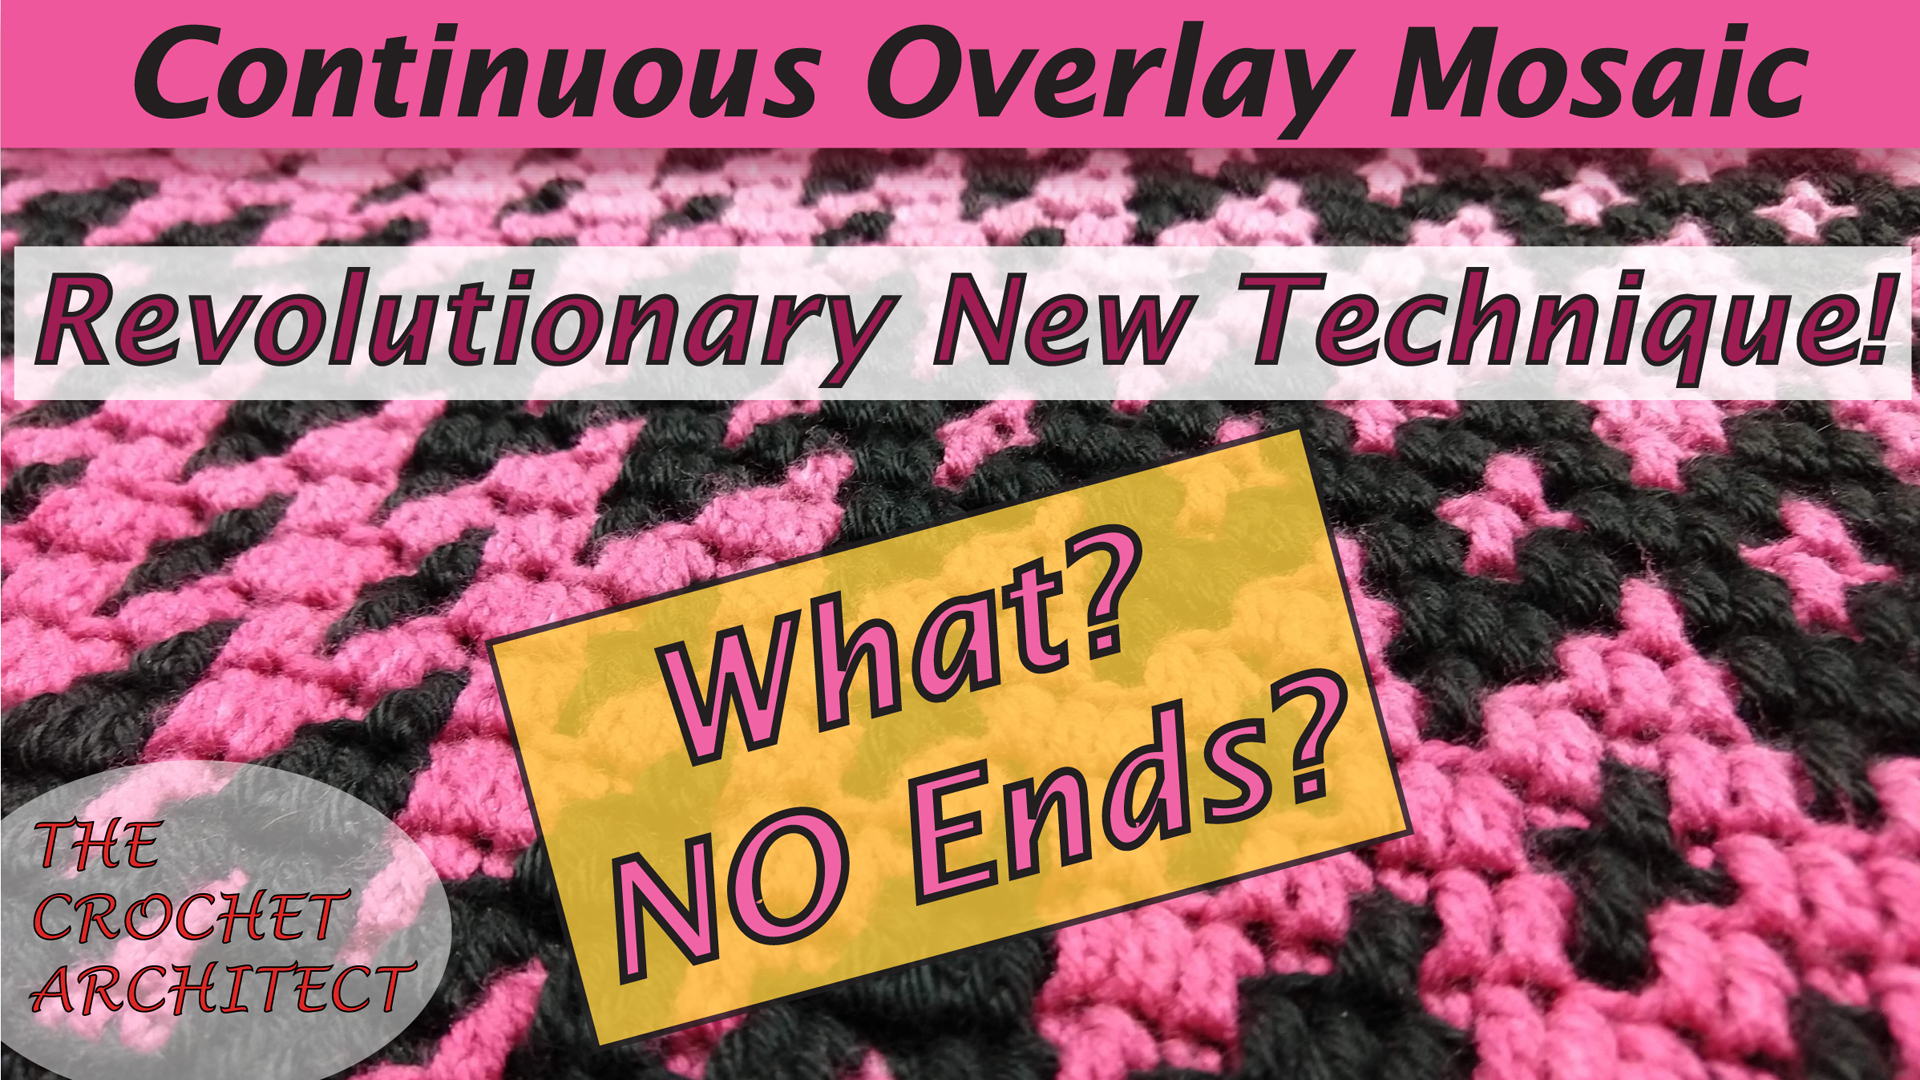
I’m very excited to reveal a new, revolutionary crochet technique that I developed several years ago. I call this technique “Continuous Overlay Mosaic Crochet”, or “COM”, for short! If you love the look of Overlay Mosaic Crochet, which has a gazillion ends to weave in, make into fringe or cover with a double border, you’re going to go crazy for this new technique! There are virtually “NO ENDS” to deal with in my COM technique!
I have a new YouTube video where I’ll teach you all you need to know to successfully crochet your Overlay Mosaic Crochet projects with my COM technique to eliminate all those pesky ends!
I also have 2 new Overlay Mosaic Crochet blanket patterns using my new, revolutionary COM technique: my Wedding Ring Blanket (below left) and my Dueling Diamonds Blanket (below right)! These comprehensive patterns include full written instructions for each row of the blanket, a mosaic chart (if you prefer to use charts), instructions and step-by-step photos for my Anchored dc stitch (Adc) stitch and for using the COM technique, a check list to keep track of which row you’re working in the pattern, as well as the full yardage needed to crochet these blankets (including the little bit of extra yardage needed for making the blankets in my COM technique, WITHOUT ALL THOSE ENDS!).
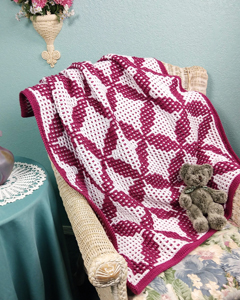

In my opinion, the extra yardage that this technique uses FAR outweighs the fact that you eliminate virtually all of the ends in your project! In fact, I only had 30 ends total to weave in on my Dueling Diamonds Blanket instead of over 250 ends! That’s a huge difference!
If you’d like to use this technique in an Overlay Mosaic Crochet pattern that you’ve already purchased somewhere else, check out my Continuous Overlay Mosaic Crochet video to find out how to calculate the extra yardage to use the COM technique in that pattern.
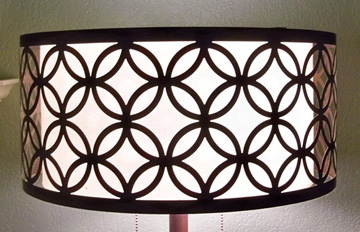
The inspiration for my Wedding Ring Blanket came from the lampshades in my master bedroom. I’ve admired this geometric pattern for years and now I have a crochet blanket pattern with this lovely design in it! Here’s a photo of one of those lampshades:
My revolutionary COM technique for having virtually NO ENDS only works with my Anchored dc stitch and “Overlay” Mosaic Crochet, which is worked with all right-side rows, alternating color every row. This gives you 2 yarn ends for every row you crochet (one at the beginning of the row and one at the end of the row). That’s a lot of ends to deal with in the regular method of Overlay Mosaic! Who wants all those ends? Certainly NOT me!
“Inset” Mosaic Crochet doesn’t have all those ends to deal with because it’s worked with 2 rows of each color and the yarn is carried up one side of the project to be used again. Inset Mosaic Crochet doesn’t have as crisp of a design as Overlay Mosaic Crochet, so it’s not quite as popular as Overlay Mosaic.
If you’ve never worked either method of Mosaic Crochet, check out my Overlay Mosaic Crochet video and/or my Inset Mosaic Crochet video on my YouTube channel to learn how to do these 2 fabulous crochet techniques! There’s no changing colors across the rows of either Mosaic Crochet technique, which makes them much easier to do!
I hope you enjoy my new Continuous Overlay Mosaic Crochet technique. I also hope it saves you lots of frustration and time in your Overlay Mosaic Crochet projects by eliminating all those pesky ends!
I’d love to hear your comments about this new crochet technique. Is it helpful for you?
Happy crocheting!
Susan
Share this:

Inset Mosaic Crochet Video & Free Charts
There are several styles/methods for doing Mosaic Crochet. In my previous Mosaic Crochet video, I taught you how to do Overlay Mosaic Crochet. In my new video, I’ll teach you everything you need to know to successfully do the Inset Mosaic Crochet method.

Inset Mosaic Crochet differs from Overlay Mosaic Crochet because Inset is worked with 2 rows of each color instead of 1. Because of that, you won’t need to finish off each row, creating tails/ends to deal with by weaving them in, turning them into fringe or crocheting a double border.
Both Overlay and Inset Mosaic Crochet are worked with 2 contrasting colors of yarn. You can use a DK weight, worsted weight or whatever weight yarn you desire.
This is a fabulous method of Mosaic Crochet! So if you’d like to learn it, check out my YouTube video. I also have a FREE download for the swatch charts that I used in the video, along with written directions for the swatch. You can find that download on my free patterns page.
Happy Mosaic Crocheting to all of you!
Susan
Share this:

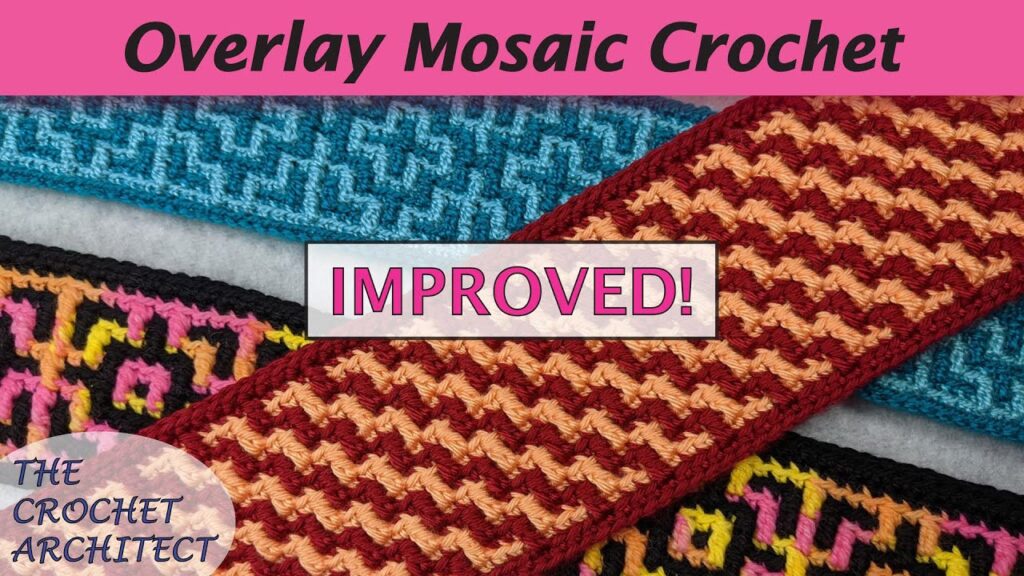
Improved Overlay Mosaic Crochet Video & Scarf Pattern
Mosaic Crochet is one of my favorite crochet techniques. Have you heard of Mosaic Crochet before? It’s an absolutely wonderful crochet technique! With Mosaic Crochet, you can create something that looks much more complicated than it actually is! There are several styles of Mosaic Crochet. The Overlay Mosaic Crochet style is worked in alternating rows of a dark color and a light color (only one color of yarn is used in each row). Each row is worked on the right side, so each row starts and stops (joins and finishes off), creating ends/tails at the beginning and end of each row. I like to turn these ends into fringe, especially when making a Mosaic Crochet scarf. Then there are no ends to weave in on the project!
If you’d like to learn this fabulous crochet technique, I have a new YouTube video teaching the Overlay Mosaic Crochet technique. Check it out and let me know what you think! In this video, you’ll learn everything you need to know while crocheting a swatch along with me (there’s a free chart that goes with the video, as well). Then you’ll be successful with your Overlay Mosaic Crochet projects!
My style of Overlay Mosaic Crochet differs from other designers because I use an Anchored double crochet (Adc) stitch instead of a regular double crochet (dc). This eliminates gaps on the back of the mosaic piece and gives it more stability. You can learn the Adc in my “Improved Overlay Mosaic Crochet” YouTube video, as well as in my separate “Anchored Double Crochet” YouTube video for more success with your Overlay Mosaic Crochet projects.

While planning and creating this video, I decided to design another Mosaic Crochet Scarf pattern for your enjoyment. It’s been many years since I designed my first Mosaic Crochet Scarf pattern. They’re so much fun to crochet and wear! Since this new mosaic pattern looks like stairs, I’ve called it the “Flight of Stairs Scarf”. This scarf is easy to make, following the written instructions and the included charts in the pattern. It’s made similarly to the mosaic swatch in the video with a few differences. If you can crochet the swatch from the video, I’m sure you’ll be successful in crocheting this scarf!
If you’ve never done Mosaic Crochet before, give it a try! You’ll be glad you did!
Happy New Year and Happy Crocheting!
Susan
Share this:

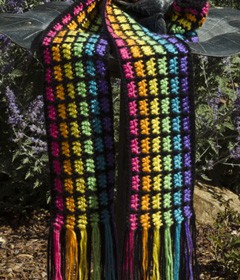
Easy Rainbow Hat Pattern
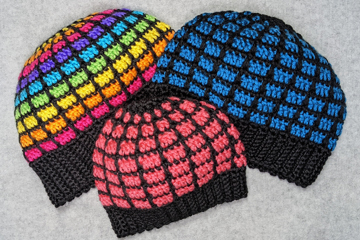
I’m pleased to announce that I’ve published a new crochet hat pattern. My Easy Rainbow Hat coordinates perfectly with my very popular Easy Rainbow Scarf pattern! The hat pattern comes in 2 styles and 3 sizes. You’ll find it easy to make and fun to wear. Easy because my video tutorial will step you through the stitches. Fun because you’ll look so good in it, especially with the matching Easy Rainbow Scarf.
If you’d like to save 20% on the hat pattern or the scarf pattern (or both), watch the video to find a special discount code that’s valid on my website only until Jan. 31, 2021.
Several months ago, someone on Etsy asked me if I had a coordinating hat pattern for my Easy Rainbow Scarf pattern. I said I didn’t, but then I asked myself why I didn’t. So I got to work designing the hat soon afterward, using the same yarn that I used for my Easy Rainbow Scarf pattern: Caron Simply Soft, which is a worsted weight yarn. I designed and made the largest size first, then I thought it would be great to have 3 sizes: child, woman/teen and man.
I love the fact that you can make coordinating sets of hats and scarves now! If you love rainbow colors, like me, you’ll have some very colorful accessories, made with the 6 colors of the rainbow plus black! If you want to keep things simple, use only a dark color and a light color. Either way, the hat looks great! And if you’d like to make a messy bun hat, simply omit the final 3 decrease rounds at the top of the hat!
The pattern comes with complete written instructions, along with step-by-step photos for working in the back bump of the foundation chain, making a Long double crochet (Ldc) and starting a row (joining) with a dc.
The pattern comes with two PDF downloads. One download includes the step-by-step photos and the other download has less photos for ease of printing. Also, the written instructions and stitch counts for each hat size are color-coded to help you follow the instructions for the hat size you’re making.
Since I started a YouTube crochet channel earlier this year, I made a video tutorial teaching how to make the Long dc, working in the back bump of the foundation chain, making the sc ribbing, along with all the decreases used in this hat pattern. So if you haven’t done some of these stitches or techniques before, check out that video here.
You can find my new Easy Rainbow Hat pattern to purchase here.
I wish you all a Healthy, Happy New Year with lots of time to crochet!
Susan
Share this:

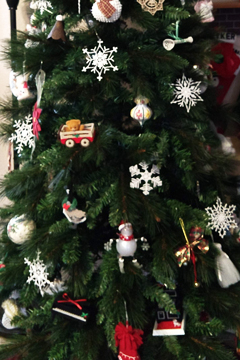
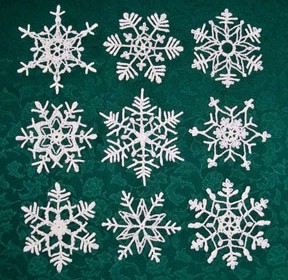
Stiffening Crocheted Snowflakes made Easy
I just LOVE the looks of crocheted snowflakes, don’t you? They look so pretty on a Christmas tree or as decorations anywhere in your home! They make great gifts, as well as package decorations, too! And they’re surprisingly easy to make (with a few crochet skills and knowledge)!
But how do you take a crocheted snowflake from droopy and lifeless to stiffened and lacy? You stiffen it with fabric stiffener and pin it out to dry! It’s not hard at all. Just a little time-consuming, like so many things in life! But it’s so worth it when you’re done! I have a free PDF template that you can use for pinning your snowflakes on to shape them perfectly. You can find that template in my written tutorial.
If you’ve never stiffened crocheted snowflakes before, check out my new YouTube video where I’ll take you step-by-step through the process. I also share my favorite pattern book for crocheting the snowflakes, as well as how I store my snowflakes for years of enjoyment!
So what are you waiting for? Learn to stiffen crochet snowflakes today for many years of enjoyment by you or someone you love!
I wish you all a very Merry Christmas and a healthy, happy New Year!
Happy snowflake crocheting!
Susan
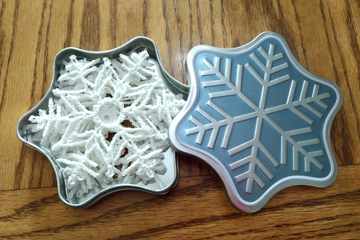
P.S. Here’s another way to store your stiffened crocheted snowflakes. It’s a gift card tin from Amazon! I have several of these and they work great for storing my snowflakes. I can fit 4 medium size snowflakes in each tin. The tin comes with a gift card ($25 minimum card amount) that you can use or give as a gift. Then you can keep the tin and use it to store some snowflakes! Here’s a link to the Amazon gift card page with this snowflake tin (the tin is free with the purchase of the gift card!).