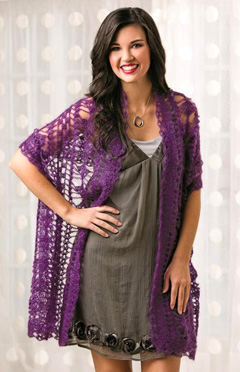
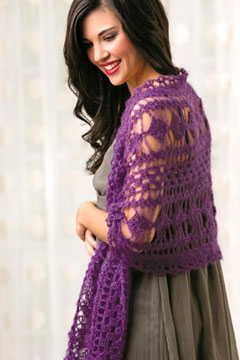
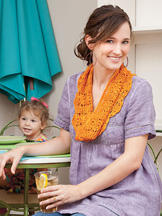
Upon reading the newest issue of the Talking Crochet newsletter this morning, I realized that Crochet World magazine is offering my Purple Haze Wrap pattern for FREE now! And I wanted to share the pattern with all of my blog followers! So here it is…
Here’s the link to the free pattern and some photos of it for you to see:
This wrap was a lot of fun to design and make with Lion Brand (LB Collection) Silk Mohair yarn, which I LOVED using! I was careful to watch my stitching so I didn’t make too many mistakes that needed to be ripped out and restitched, since mohair yarn is “tricky” to rip out! The yarn blocks beautifully to really show off the stitch pattern to it’s full potential! This yarn (and the wrap I made) is as light as a feather!
I remember when the box of yarn arrived for me to crochet this wrap. The box was about 8″ square and weighed maybe a pound at the most! It was hard to believe that inside that small, light-weight box there was enough yarn to make a whole wrap! To see all the beautiful colors of LB Silk Mohair yarn, go to the Lion Brand website here.
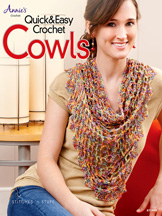
A few months ago, I got 2 new crochet leaflets: “Quick & Easy Crochet Cowls” by Stitches ‘n Stuff (Sue Childress & Frances Hughes) and “Cute Crochet Rugs for Kids” by Tara Cousins, both by Annie’s. I’ve made some crocheted rugs before, but I’d never made a crocheted cowl before, until recently (I know, I’m a little behind the times!).
What is it about cowls that appeals to so many fiber lovers these days? And why are there so many different sizes that can be made? There are short, narrow cowls that just drape around your neck like a wide necklace all the way up to long, wide cowls that can go around your neck several times and also fit over your head. They can even be made much like triangular scarves, but worn backwards with the wide edge at the front and tied or buttoned in the back! Cowls can be made from many different fibers and weights of yarn, from super fine to chunky, too!
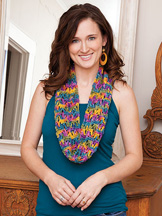
There are 6 projects in this Annie’s cowl book (4 easy and 2 intermediate skill levels). The cowls range from being made in many narrow rows, to less rows with more width in the rows, to a triangular shape. Some are made in solid yarns and others are made in multi-colored yarns. Some have popcorns, shells, V-stitches or clusters for lots of choices. And there are lots of different sizes to choose from, as well. Here are photos of the front cover and a few of my favorite cowls in the book:
Quick & Easy Crochet Cowls front coverBohemian CowlSummer Sorbet Cowl
This is a really nice leaflet and I look forward to making some of the cowls in it. In fact, I’ve already taken the plunge and designed a hooded cowl for a major crochet magazine (I’m sorry, but I have to keep the name of the magazine and month of the issue a secret for now). It was really fun to design and I love the colors in the yarn! It’s very soft and fluffy, which I think will be great for the winter! You can find this cowl book for sale at Annie’s here.
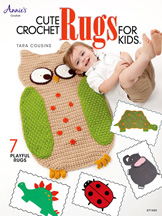
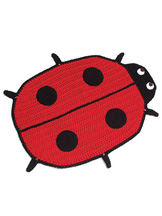
The rug book for kids that I got has 7 different rugs: a dinosaur, elephant, turtle, monkey, ladybug, butterfly and an owl. All of the rugs in the book were made with Deborah Norville Everyday Soft Worsted Solids, which is a medium weight acrylic yarn. I’m sure you could substitute any worsted weight acrylic yarn if you have lots of another brand in your stash! Here are photos of the front cover and some of my favorite rugs in the book:
Cute Crochet Rugs for Kids front coverGranny Shell Turtle RugSpots the Ladybug RugMischievous Monkey Rug
These are really cute and I bet kids will just love them! Of course, my kids are too old for rugs like these (my 3 sons are all in their 20’s). But perhaps when I have grandkids (hint, hint!), I can crochet them some fun rugs like these! You can see all of the rugs in the book on the Annie’s website here.
I hope you’ve enjoyed this look at 2 new crochet leaflets with lots of new crochet patterns in them.
Have you ever been happily crocheting away and the skein of yarn you’re using starts falling apart in front of your eyes? Well, that happened to me over the past month while working on a crochet design for a publisher. I was crocheting a project that is done in the Fair Isle technique. Oh, you haven’t heard of that technique yet, you say? Karen Whooley has designed a lot of projects in the Fair Isle Crochet technique, which is similar to the Tapestry Crochet technique, but not quite the same. You can see some Fair Isle projects that Karen Whooley has designed over the past 7 years on her Ravelry designer page. Check out Karen’s Fair Isle Crochet class on Craftsy, too. It looks like it would be a great class to take for those who want to learn to do Fair Isle Crochet!
In Karen’s Fair Isle Crochet technique, she works her single crochet in the BACK LOOP of the stitches (this is different from Tapestry Crochet, which is worked in BOTH LOOPS of the stitches). Karen also carries the non-working color on top of the stitches, encasing it until needed again, just like in the Tapestry Crochet technique. I worked my project in this style of Fair Isle, which worked very well, since the stitches don’t slant (like they do in Tapestry Crochet) and the back of the project looks as neat as the front!
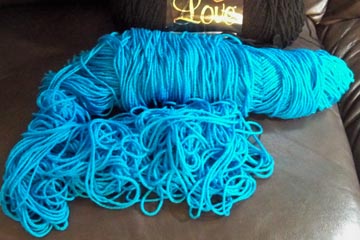
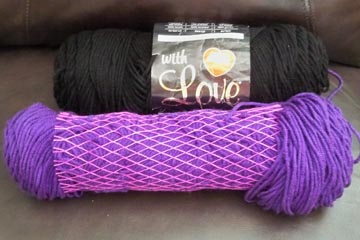
Anyway, back to the trouble I was having with my yarn misbehaving! Since I was using 2 colors in each row of my project, I had to change back and forth between the colors often. And since I always crossed the colors the same way each time (whether that is correct or not, I’m not sure!), the 2 yarns wrapped around each other after a certain number of color changes. So I had to take one skein of the yarn and unwrap the 2 yarns, bringing the skein over and under the strand of the other color yarn many times so they wouldn’t get tangled. But that wasn’t too bad, all things considered. What was bad was how the skein of yarn that I handled a lot to unwrap the 2 yarns starting falling apart on the outside like this:
Yarn falling apart and getting messy!
After working many rows of my project and having the skeins do this, I decided to do something about it! So I purchased some yarn sleeves to keep the outside of the skeins intact! Here’s one of the skeins with the yarn sleeve in use:
Yarn sleeve in use
This yarn sleeve really saved my life (that may be a little bit of an exaggeration, but not too far from it)! I had never used or owned a yarn sleeve before, but it was time to give them a try. And I’m so glad I did. The yarn sleeve worked really well at keeping the yarn together when I handled it so much. And that saved a little of my sanity! When I told a friend of mine that I had bought the yarn sleeves to use, she said I could do the same thing with some panty hose! I hadn’t thought of that, but it sounds like it would work. Have you used something else to keep your yarn under control like this?
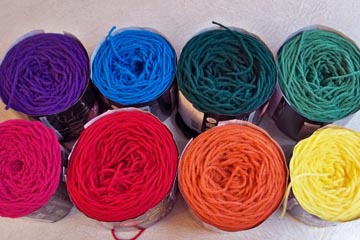
When I was done with my project, I decided to use my handy yarn winder and turn all the leftover skeins of yarn into neat “cakes” so they’d fit better into the box for storage. They’ll also be easier to use the next time I need to design something with these yarn colors instead of pulling my hair out in the middle of the project trying to untangle them! This is how some of the yarns looked before winding them up for storage:
Messy yarn!
And this is how they looked after winding them up:
Neat cakes of yarn
Don’t they look organized and ready to use again? These 8 yarn colors above, plus black, are the colors I used in the project I just completed, which I recently shipped off to the publisher. I can’t show you the project now, but I can show it to you in July or August, after it’s published.
If you’re looking for a way (or 2) for controlling your yarn, I hope you’ll give yarn sleeves and winding the yarn into cakes a try! And if you’re looking for a new/different crochet technique to try, why not try the Fair Isle Crochet technique? It’s actually quite fun and the results are spectacular!