
© 2014 Susan Lowman (http://www.TheCrochetArchitect.com)
Have you ever wanted to add a little something extra to the edge of your crochet project or to a piece of your project? This simple edging could be the answer. It is worked with simple slip stitches! Here’s how:
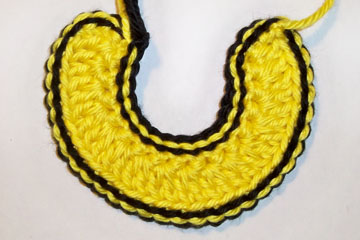
With the WRONG SIDE facing, join the contrasting color that you want to use for this decorative edging with a slip stitch in the BACK LOOP ONLY of any stitch around the edge of the piece. Then simply slip stitch in the BACK LOOP ONLY of each additional stitch around the edge of the piece. Here’s how the front of the edging stitches will look, when looking at the WRONG SIDE of the piece:
You’ll see that I’m only working in the BACK LOOP (OUTER LOOP) of the stitches around the edge, not in BOTH loops. That’s the secret to this simple edging!
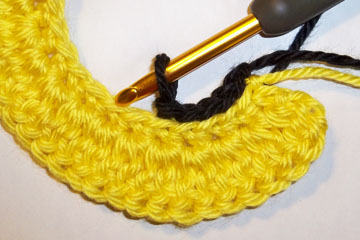
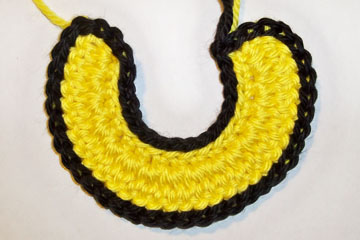
And this is how it will look on the RIGHT SIDE of the piece as you’re working the edging round:
If you make a mistake and work a “single crochet” instead of a “slip stitch”, this is how it will look:
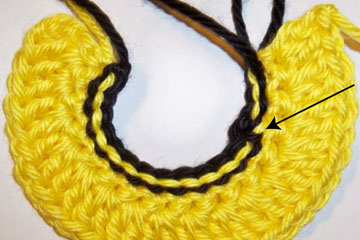
Do you see the crooked spot in the black edging line on the right side of the piece (where the arrow is pointing)? Those 2 lines (that look like a sideways “V”) are the back strands of a “single crochet”, not the straight line from a “slip stitch”. So it might be a good idea to check the back side of your work (the RIGHT SIDE of the piece, when working the edging on the WRONG SIDE) to make sure you haven’t worked a “single crochet” by mistake (it’s easy to do, believe me!).
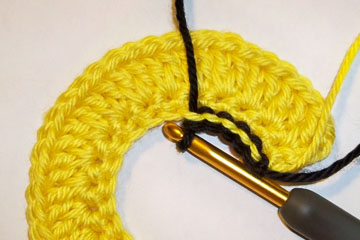
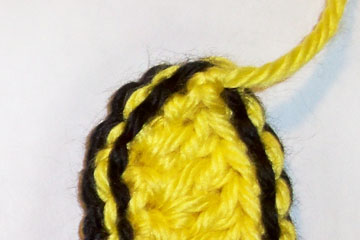
When you work along the edges of the stitches, instead of in the top or bottom of the stitches (such as the edge of the double crochet on Row 2 of the Bear Mitts skirt), you should insert your hook in 1 strand of the stitch, not in 2 strands. This keeps the nice straight lines of the slip stitch edging looking the same as the edging lines worked along the top or bottom of the stitches. Since the double crochet is a fairly tall stitch, I worked 2 slip stitches along the edge of the double crochet in this piece (in 2 different strands along the double crochet edge). Here’s a close up of the edge of the double crochet:
When you get back to the beginning of the edging, simply work a slip stitch in the first slip stitch and finish/fasten off. Weave the ends into the wrong side of the piece (the right side of the edging, as it is worked) so the ends won’t show on the right side of the piece. Then sit back to enjoy the beauty that this simple edging adds to your crochet project!
As you can see, this slip stitch edging doesn’t look that great on the wrong side of the piece, but I think it looks fantastic on the right side!
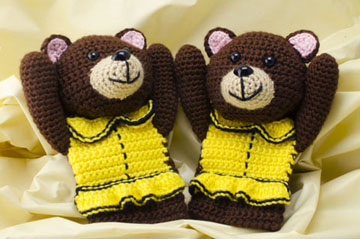
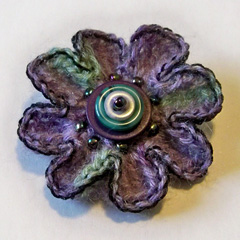
I used this slip stitch edging in my Bear Mitts pattern, Button Flower Pin pattern and Baby Sun Hat pattern. You can find these 3 patterns on my “Patterns” page.
I hope you’ll give this quick, decorative edging a try soon in one of your crochet projects!
Happy crocheting,
Susan
Submit your review | |
