Irish Crochet Book Review & Giveaway

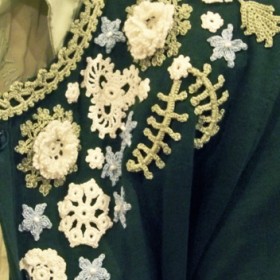
I am thrilled to be taking part in Kathryn White’s blog tour for her new book, “The Go-To Book for Irish Crochet Motifs”! Kathryn (Kathy) is a good friend of mine and an extremely talented designer. She is an expert with a steel crochet hook and cotton crochet thread! I’ve loved her designs for years and met her at the CGOA Conference in Sept. 2011 in Greensboro, NC. I think it was Kathy’s first CGOA conference, but I’d been to many CGOA Conferences before that one. I didn’t get a good photo of Kathy at that conference, but I did get a photo of the Irish crochet motifs that she made and appliqued to the sweater she was wearing when we met. Here it is for you to see:


Kathy's Irish motif appliques
Kathy’s Irish motif appliques


These are beautiful Irish crochet pieces and they show up so nicely on that sweater (or perhaps it was a sweatshirt).


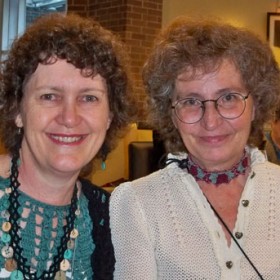
Here is a photo of Kathy and me from another CGOA Conference last year:


Susan & Kathy at CGOA Conference in 2013


You can find Kathy on Facebook, as well as on her website here. And you can follow the rest of the stops on her Irish Crochet blog tour on her blog here.


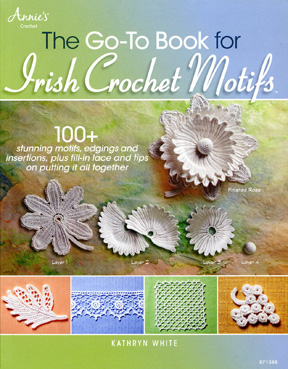
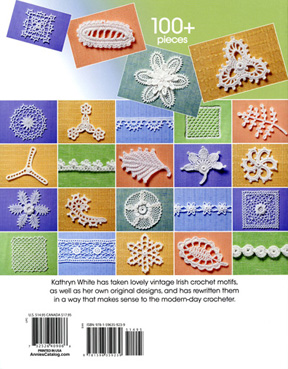
Now on to her fabulous Irish Crochet book! Here’s the front and back covers of the book:


front cover of Irish Crochet book
back cover of Irish Crochet book


As the front cover says, there are over 100 motifs, edgings and insertions in this book, along with fill-in lace and tips on putting it all together. The motifs include various types of flowers, leaves and fill-in motifs. There are also dangles and overlays in this book. There are many motifs to choose from and combine into your very own Irish crochet masterpiece!!!


If you’re not familiar with Irish crochet, it’s a fabulous technique of making motifs (typically with crochet thread), many with something called a “padding cord” or a “padded ring” to give more dimension to the pieces (Kathy explains the padding cord and padded rings in this book, along with giving hints to make them easier). The motifs are then joined together with “fill-in lace” to make a large piece or project. Many of the old Irish crochet patterns are difficult to understand, but Kathy has made them easy to understand with modern crochet terms and updated Irish crochet patterns in her new book. There are motifs for every skill level in this book, as well. And if you don’t want to use a padding cord or padded ring, Kathy gives updated patterns for making the same motifs without them.


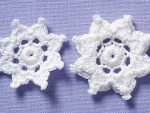
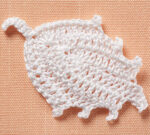
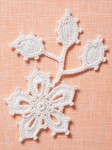
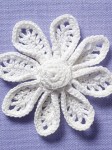
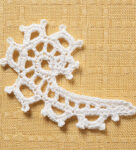
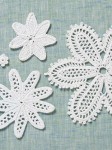
Here are photos of some of the pieces in the book:


Irish crochet roses
Irish crochet roses


Irish crochet leaf
Irish crochet leaf
Irish crochet sampler motifs
Irish crochet flower
Irish crochet scroll
Irish crochet 4-layer flower
Irish crochet insertion
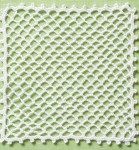
Irish crochet fill-in lace sampler


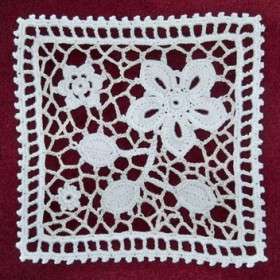
As a thread crochet lover, I absolutely LOVE this book! As one of Kathy’s friends, I actually saw part of the book before it was published. And I got to try out a part of the book last year, too. Here’s my fill-in lace sampler from last year:


My Irish crochet sampler


I learned a lot while making this sampler piece, which is in Kathy’s book. I learned how to use padding cord (successfully) and how to work the fill-in lace between the motifs (successfully, too!). Kathy is a patient teacher and she’s very thorough, too! I love that in a crochet designer/teacher.


You can see more of Kathy’s Irish Crochet book and purchase it as a printed book or in digital format on the Annie’s website here. The book has 96 pages and retails for $14.95 in the US ($17.95 in Canada). It’s a fabulous book and I can’t wait to make more of the motifs in it. I also want to try joining more motifs with more of the fill-in lace methods in this book. Now if I just had more time or some clones to do my work so I could sit and crochet more, which is what many of us would love to do!!!


To celebrate Kathy’s new Irish Crochet book, I’m giving away an autographed copy to one very lucky winner. To enter the giveaway, just leave a comment on this blog post about Irish crochet or crochet in general (or tell me what crochet technique is your favorite). You must live in the US to qualify, since shipping the book to another country is very expensive. I’ll pick the lucky winner on Jan. 21, so you’ll have plenty of time to enter! Good luck everyone!


Happy crocheting (and Irish crocheting),


Susan
 

Design Contest at the 2013 CGOA Conference

Last month, at the CGOA Chain Link Conference in Charlotte, NC, there was a design contest, open to all CGOA members. We have the design contest each year and I always enjoy seeing the fabulous designs that are entered. This year was no exception! There were some fantastic entries and the winning entries were spectacular!!! Here are some photos from the design contest:

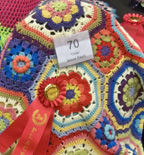
2nd Prize Afghan by Jessie Rayot
1st Prize Afghan by Julia Bryant
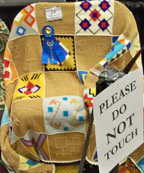
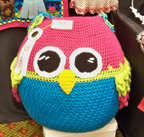
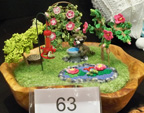
3rd Prize Artistic Expression by Deborah Bagley


1st Prize Artistic Expression by Sachiko Adams


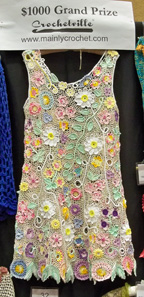
Grand Prize Winner by Dot Drake
Winner's Circle
Winner’s Circle


To see a full list of the winners in the design contest, please visit the CGOA blog here.

We also had a fashion show at the conference. Some of the garments in the fashion show were in the design contest and others weren’t. The fashion show has lots of “eye candy” and is part of the dinner at the conference! It’s a lot of fun! If you’d like to see lots of photos from the fashion show and the design contest, visit the CGOA Flicker page here.

I entered 3 designs in the Design Contest this year. I didn’t win a prize, but that’s okay. At least I tried my best! I LOVE the designs that won, so that’s what counts! Here are the 3 designs I entered:

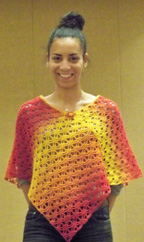
Brandyce modeling my Kauni Poncho

This is Brandyce from Lion Brand Yarn Company modeling my Kauni Poncho in the fashion show. I love the looks of this poncho because the yarn does all the work (well, most of the work!). If you’d like to make a Kauni Poncho of your own, the pattern is available for purchase here on my website, as well as on Ravelry, Craftsy and Etsy. It takes 140 grams (612 yards) of Kauni Effektgarn yarn to make this poncho. This yarn is 100% wool fingering weight and I LOVE the colors it comes in. To see all of the colors of this yarn, please visit the Kauni website here.

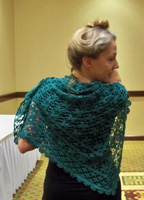
Vashti modeling my Alexandria Shawl

This is my Alexandria Shawl, modeled by Vashti Braha. This shawl is made with 100% cotton yarn. The large triangular section of motifs and the inset of motifs are made in the Continuous Crochet Motifs method, with less ends to weave in because the motifs are made continuously, not separately. If all goes well, I’ll have this pattern available for purchase on my website within the next year.

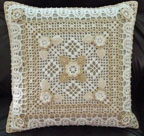
Triple Delight Pillow

This is my Triple Delight Pillow. It’s made with 3 shades of size 10 DMC Cebelia. I made it in 3 techniques: Irish Crochet motifs (the flowers and leaves), Filet Crochet (in the large center section) and Bruges Lace around the edges (hence the word “triple” in the name!). I also added small beads in the center of many of the flowers. I’m not sure what I’m going to do with this design, yet.


If you’re a CGOA member, you’ve tried your hand at designing crochet projects and you haven’t entered them in the CGOA Design Contest, you should consider entering your designs next year. Who knows! You might win! And you don’t have to write the patterns to enter your designs (of course, if they’re going to be published, you’ll need to write the patterns eventually!). The prizes are $100 for 3rd place, $200 for 2nd place and $300 for first place in each of the 6 divisions, plus $1,000 for the grand prize winner! That’s nothing to sneeze at!!! And the designs remain yours to do with as you please after the contest.

Keep watching the CGOA website for more information on the design contest as the 2014 conference gets closer. Next year’s CGOA conference will be July 23-27, 2014 in Manchester, NH. It’ll be the 20th Anniversary of CGOA next year! Yahoo!!! There will be lots of celebrating going on, I’m sure!

Good luck! I hope to see your designs in next year’s CGOA Design Contest.

Happy crocheting,

Susan
Happenings at the CGOA Conference

It’s been almost a month since my last blog post! Wow! Where does the time go? It’s been a busy month.

Earlier this month, I attended the CGOA Chain Link Conference at the Embassy Suites Hotel in Charlotte/Concord, NC (from Oct. 2-6). It was fabulous, as always! There’s too much to tell you about in one blog post, so I’ll tell you about the classes I took in this post and save the other information for another blog post or two later. I love teaching at the conference, but I also enjoy being a student and stretching my crochet knowledge and skills, too.

I took 7 crochet classes at the conference. The teachers whose classes I took are Margaret Hubert, Jennifer Hansen, Vashti Braha and Dora Ohrenstein (I took 3 classes from Vashti and 2 classes from Jennifer). All of the classes were fantastic! And there were many more classes with other great teachers, too.

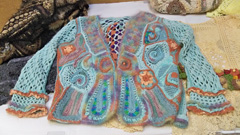
Margaret’s class was Freeform Knit and Crochet. Since I can now knit, as well as crochet, I thought this class would be a good fit for me. However, I’m not sure I’m cut out to be a freeform person (I might be too analytical and black/white). But I truly love the freeform look and would like to be able to do it someday (perhaps in Irish crochet with crochet thread instead of with yarn). Maybe with a little practice (or some wine to help me relax!), I might learn to do freeform well. But I enjoyed the class and drooled over Margaret’s gorgeous freeform pieces. Here’s one of them:

Margaret Hubert's freeform jacket
Margaret Hubert’s freeform jacket


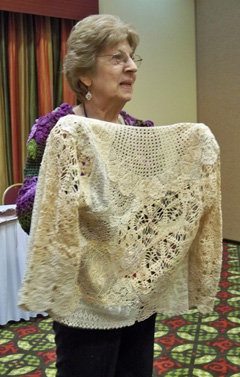
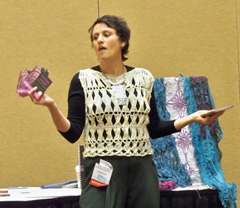
Isn’t this gorgeous? Margaret is a wonderful teacher and designer. Here she is in the class showing us a jacket that she made from purchased doilies to inspire us:

Margaret Hubert's doily jacket
Margaret Hubert’s doily jacket

I was truly inspired (the photo doesn’t do it justice)! All of Margaret’s freeform pieces are inspirational! You can read more about Margaret and see her fabulous creations on her website here.

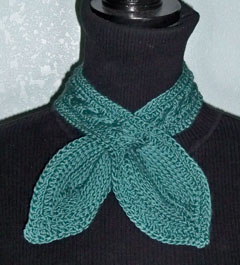
The 2 classes I took from Jennifer Hansen were on Hairpin Lace and Tunisian Crochet. Jennifer is a “Master” at both of these crochet techniques. She has boundless energy, too! In the Tunisian class, we learned to do cables and make a keyhole for her wonderful Tunisian Keyhole Cravat pattern (see pattern on her website here). Here’s a photo of this fantastic design:

Jennifer Hansen's Tunisian Keyhole Cravat from Stitch Diva Studios
Jennifer Hansen’s Tunisian Keyhole Cravat from Stitch Diva Studios


I crocheted my cravat from some extra Naturally Caron Spa yarn that I had. I haven’t blocked it, yet, so I hope it turns out as nice as the one in the Stitch Diva photo. Here’s a photo of that for you to see:

My cravat
My cravat

In the hairpin lace class, we learned how to make many different types of hairpin lace strips and many different ways to join them together. It was great! Here’s Jennifer in the hairpin lace class:

Jennifer Hansen (aka: Stitch Diva Studios)


I learned a TON in both classes! Thanks so much, Jennifer.


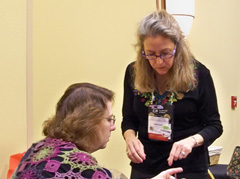
The 3 classes I took from Vashti were on Love Knots, Tunisian Filet and Slip Stitches. Vashti is a wonderful teacher with lots of patience. She’s a very laid back teacher and puts a lot of thought into her classes and her designs. Here she is in the love knots class explaining something to Shari White:

Vashti Braha (on right) and Shari White (on left)


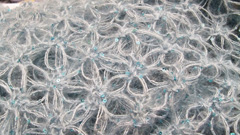
If you’ve never seen love knots before, here’s a photo of some:

Love knots
Love knots

And here’s Vashti in the Tunisian Filet class deep in thought:

Vashti Braha
Vashti Braha


The Tunisian Filet class was based on her Aero Wrap. Here’s a photo of that wrap:

Aero Wrap by Vashti Braha  of "Designing Vashti"
Aero Wrap by Vashti Braha of “Designing Vashti”

You can see the pattern and read about it on her website here.

I wasn’t able to attend all of the Slip Stitch class because the Board meeting ran late (I’m the secretary on the CGOA Board and we have our annual “face-to-face” Board meeting on Saturday morning at the conference). But I enjoyed what I got out of the class and would like to learn more about it in the future.

Dora’s class was on grading garments (something I don’t like to do and I still need to learn more about it). Dora was very informative, but her class was on the last day of the conference and I was battling “conference brain”! Here’s Dora explaining something about garments:

Dora Ohrenstein of "Crochet Insider"
Dora Ohrenstein of “Crochet Insider”


I took good notes during the class. I think that between my notes and the handout, I’ll learn more when I get a chance to read through it all again. Dora has written several crochet books and they’re all fabulous! To read more about Dora, check out her website here.


I hope you’ve enjoyed this look at the 7 crochet classes I took at the CGOA Conference. If you’ve never attended a CGOA Chain Link Conference before and you’re curious about it, check out the CGOA website here, or the CGOA blog here or the CGOA Facebook page here.

Remember, “When you think crochet, think CGOA”!!!

Until next time!

Happy crocheting,

Susan

New Wiggly Crochet Hot Pads & Coasters Patterns Available

Are you a fan of Wiggly Crochet? Or are you curious about this fabulous crochet technique? I LOVE wiggly crochet and I really enjoy designing wiggly crochet patterns. I’ve had dozens of wiggly crochet patterns published over the last 10 years, from hot pads & coasters to rugs and dishcloths. Most of my wiggly crochet patterns are under copyright with a publisher, but 6 sets of hot pads and coasters that I had published fell out of copyright recently, so I have the rights back to them now. And what better opportunity to reintroduce them for your enjoyment than on my website? So here they are…

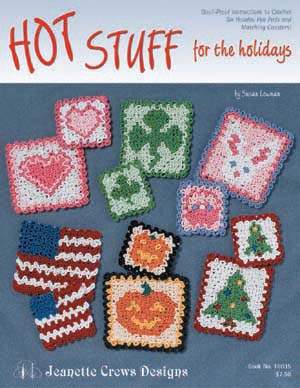
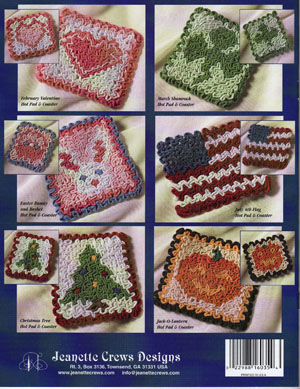
These designs were previously published in the booklet “Hot Stuff for the Holidays” by Jeanette Crews Designs in 2003. This is how the front and back covers of that booklet looked:

"Hot Stuff for the Holidays" booklet
“Hot Stuff for the Holidays” booklet front cover
"Hot Stuff for the Holidays" booklet back cover
“Hot Stuff for the Holidays” booklet back cover


Here are our new and improved hot pad and coaster patterns for you:

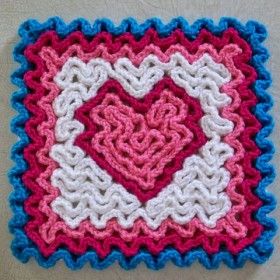
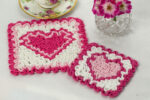
Wiggly Valentine Hot Pad & Coaster
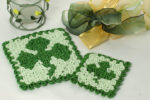
Wiggly Shamrock Hot Pad & Coaster
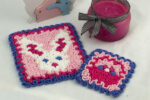
Wiggly Easter Hot Pad & Coaster


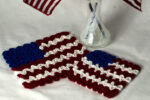
Wiggly July 4th Flag Hot Pad & Coaster
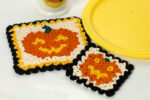
Wiggly Jack-O-Lantern Hot Pad & Coaster
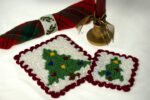
Wiggly Christmas Tree Hot Pad & Coaster


We’ve taken new photographs, remade the wiggly crochet charts and updated the instructions for each set of hot pads & coasters. All 6 of these holiday Wiggly Crochet Hot Pads and Coasters patterns are available both individually and as a set of 6 right here at The Crochet Architect. The individual patterns are $4.95 each and the complete set of 6 patterns has a special price of just $11.95. That’s a little less than $2 per hot pad & coaster set!

When I first designed these sets of hot pads and coasters, I designed a set for each month of the year (and 2 sets for December). Unfortunately, they didn’t all get published together! The other 7 sets (for January, May, June, August, September, November and December) were published in several books and magazines over the years. Here’s where you can find my other wiggly hot pad & coaster patterns, in case you want to make one for each month of the year:

The July set (Watermelons) was published in Crochet World magazine in June 2008. The November set (Fall Leaves) was published in Crochet World magazine in Oct. 2008. The June set (graduation cap & tassel, along with a scroll) was published in Crochet World magazine in June 2009. The other December set (Christmas wreaths) was published in Crochet World magazine in Oct. 2009. The May set (May flowers) was published on the Coats & Clark website as a free pattern. Here’s the link for that pattern. The September set (an apple for the teacher) was published in the new Leisure Arts book, “Treasury of Holiday Crochet”, by Jean Leinhauser and Rita Weiss. The January set (snowflakes) was sold to a publisher, but hasn’t been published, yet.

I hope you’ve enjoyed this look at my wiggly crochet hot pads and coasters patterns. And I hope you’ll give wiggly crochet a try to expand your crochet skills. You’ll be glad you did!

Happy crocheting,

Susan
 

Continuous Crochet Motifs (Part 2) and New Crochet Pattern

In May of last year, I blogged about the Continuous Crochet Motifs method of making and joining motifs so there are less ends to weave in at the end of the project. This is a really cool crochet technique/method. You can read that blog post here and see photos of the Japanese crochet book that I bought to learn this crochet technique. Since then, I purchased Kristin Omdahl’s book called “Seamless Crochet”. I haven’t had the time to make anything from that book, but it’s definitely the same method of joining motifs as in the Japanese book I bought.

At the time I wrote that blog post, I was designing a shawl to enter in the CGOA Design Contest, made in the Continuous Crochet Motifs method. Well, I got the shawl finished and entered it in the contest. Unfortunately, I didn’t win anything for this shawl and I think the reason was that I didn’t have an edging on it (I couldn’t think of an edging that would work at that time). A few months ago, I added an edging to the shawl and it really finishes off the shawl nicely. I tried many different color combinations for the edging, but in the end, I decided to make the edging all black so it wouldn’t take away from the beauty and design of the shawl itself. I’ll be publishing this shawl design when the pattern is ready (it still needs a little tweaking first!). Here’s a photo of the shawl before I added the edging:

Byzantine Shawl in 2012 CGOA Design Contest

I still need to take some new photos of this shawl with the edging added before I can publish this pattern. But I promise to get to it sometime soon! I’ve veered from my original topic of the Continuous Crochet Motifs method a little, so I’ll get back to that topic now.

After designing the shawl, I designed a scarf using the same Continuous Crochet Motifs method and some of the same motifs as the shawl. It’s called the “Byzantine Scarf”. I just finished up the pattern and added it for sale here yesterday. You can see the pattern here.


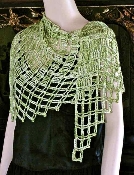
Here’s a photo of the Byzantine Scarf:

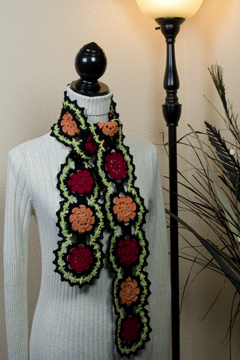
Byzantine Scarf
Byzantine Scarf

What I love about this scarf (besides the colors) is the Continuous Crochet Motifs method I used for the 2 rounds of black, which are joining the red and orange motifs together (not the final round of black, but the black rounds inside the lime green rounds). With this method of crocheting, I was able to work these 2 rounds of black edging around each of the 15 motifs in the scarf in one long pass! And that means I only had 2 tails of black yarn to weave in on these 2 rounds.

Okay, I realize that the rest of this scarf has plenty of tails to weave in. But by using the Continuous Crochet Motifs method of joining the motifs, I saved myself 28 whole tails to weave in (30 – 2 = 28). I don’t know anyone who enjoys weaving in the tails/ends on their crochet work and I don’t, either. But it’s a necessary evil and has to be done! I love using color in my crochet designs, so I’ve been known to weave in hundreds of tails on larger projects with multiple colors. I just bite the bullet and do it!

I realize that not everyone wants to learn a new crochet technique, so I included the instructions for joining the motifs in the traditional motif joining method (joining with a sl st to the adjacent motif). But when you join the motifs this way (in the traditional method), you’ll have 30 tails of black to weave in on these 2 rounds of motif edging (2 tails for each of the 15 motifs in the scarf). So to me, it’s a “no brainer” to use the Continuous Crochet Motifs method to join the motifs together! But I’m an adventurous crocheter and I love to learn new techniques. I’m sure that not everyone is as adventurous as me, so that’s why I included the instructions for joining the motifs the other way.

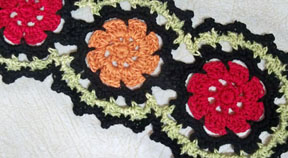
Here’s a close up photo of the scarf:

Byzantine Scarf close up

Now you can see the 2 rounds of black around the red and orange motifs better. I also made a symbol crochet chart for each method of joining the motifs (these charts are included in the pattern). So if you like symbol crochet charts and learning new crochet techniques, you might want to give this scarf pattern a try!

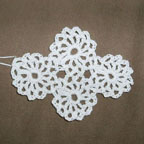
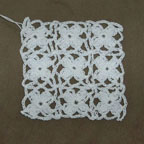
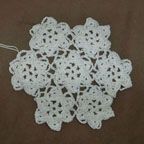
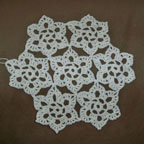
Here are photos of 4 swatches of motifs that I made from the Japanese Continuous Crochet Motifs book a few years ago (right after I got the book in the mail!):

Motif swatch #2
Motif swatch #2
Motif swatch #6
Motif swatch #6


Motif swatch #36
Motif swatch #36
Motif swatch #43
Motif swatch #43

These swatches haven’t been blocked, so they don’t look as good as they could. What I want you to notice is the number of tails and the number of motifs in each of these swatches (I didn’t weave in any tails at all on them). Each swatch has 4, 7 or 9 motifs that are joined. But since I used the Continuous Crochet Motifs method to make these swatches of motifs, there are only 2 tails that would need to be woven in (if I were going to make these into projects). There would normally be 2 tails to weave in “per motif”! This is a HUGE time saver!!! It means I can spend more time crocheting and less time weaving in ends! Of course, it only works when you’re using the same color of yarn/thread for each motif (or to join each motif). But it’s not a bad thing to use 1 color of thread/yarn. It’s a design decision! And the savings in time it takes to weave in the tails is HUGE!

I hope you’ve enjoyed this closer look into the Continuous Crochet Motifs method and will come back again soon.

Happy crocheting,

Susan
Continuous Crochet Motifs

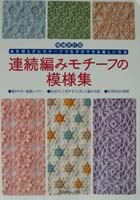
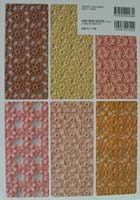
I bought a crochet book last year called “Continuous Crochet Motifs” from a Japanese seller on EBay. I paid $40.00 for this book, which is a lot to spend on a crochet book, but it is very much worth the money! It is a Japanese book with only Japanese writing inside, but it has crochet symbol charts throughout the book, which I can easily read. I quickly digested the book and learned this technique, in which motifs are made continuously, meaning there are less ends to weave in at the end (hooray!!!). You have to follow the symbol charts very carefully, but the book also includes a front section where there are both symbol charts and step-by-step photos of the motif being worked. It’s a great book and if you’re at all intrigued by this crochet technique/method, you might want to buy one of these books someday. Kristin Omdahl has a book with this technique called “Seamless Crochet”. I don’t have her book, yet, but I plan to get it soon. Here is what the Japanese Continuous Crochet Motifs book looks like on the front and back covers:
front cover of book
back cover of book

Keep in mind that when you’re using only one color, there are only 2 ends to weave in “total” because you work the motifs continuously, no matter how many motifs you make, and only fasten off at the end! That’s a huge improvement on weaving in 2 ends for every motif made!


A few weeks ago, I decided to use this technique to design something for the CGOA Design Contest, which will be held at the CGOA Conference next month in Manchester, NH. The deadline to enter something into the contest is June 6. I need to get it done within the next few weeks so there will be time for my entry to travel to the destination where it needs to be by June 6!

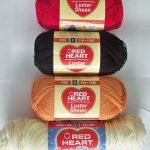
Luster Sheen colors

I can’t tell you what I’m designing, but I can tell you that I’m using some Red Heart Luster Sheen yarn to make it. I love this yarn! It is a size 2 (fine weight) yarn and is 100% acrylic. It provides beautiful drape and the colors are really nice. Here’s a photo of the yarn I’m using:

You can see that the bottom skein is different from the rest. That’s because Coats & Clark is repackaging this yarn into 3.5oz/100g skeins (they used to be 4oz/125g). There are 307 yards/281 meters in the new skeins, so it still goes a long way! The bottom color is from my stash and the top 3 colors are new. I’m using their cherry red, black, orange and vanilla colors. Since I’m using so many colors in this design, there will be plenty of ends to weave in. But I will only have 2 ends to weave in of the color that I’m using continuously around the other motifs to join them all together. That will almost CUT IN HALF the number of ends to weave in! Now that’s a big improvement in my book!!!

I used Luster Sheen yarn in my Two-Way Rose Pin design (you can see it on Ravelry here: http://www.ravelry.com/patterns/library/two-way-rose-pin). I also used Luster Sheen yarn when I crocheted a filet afghan to be photographed in the book “Afghans for All Reasons & All Seasons”, which Jean Leinhauser and Rita Weiss produced for Leisure Arts. Here’s a link to a photo of that afghan on Amazon (it’s on the front cover in the top right-hand corner): http://www.amazon.com/Afghans-Reasons-Seasons-Leisure-Arts/dp/160140672X#reader_160140672X.

wrong and right motif

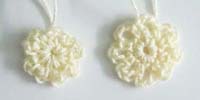
I noticed last week that I made one of the motifs wrong for this project, so I had to rip out a whole row of work! Ugh!!! I had only worked the second round and left out the first round in each of the motifs (that’s what happens when I’m preoccupied and don’t look at the symbol chart I made!). Here’s how the motif looks (the left motif is missing round 1, but the right motif has both rounds worked):


joined and unjoined round 1

I took a few minutes to decide if it was going to make a difference before ripping it out, though. I decided it would look better if I made the motifs the right way (the chain spaces are more pronounced in the correct motif on the right), so the extra time would make a difference in the look of the project. When I ripped it out, I decided to engineer the motif a little differently. Originally, I had designed it with 2 rounds and both rounds were joined at the end. However, I tried it with not joining the first round and only joining the second round. Here is a photo of the difference between the two joinings:

The motif on the left is joined at the end of both rounds. The motif on the right is joined at the end of the second round only. I see less bulk in the joining area, so that’s what I’m going to do for these motifs. The new motif goes straight from the last sc in the first round to the first sc in the second round without the usual “sl st” at the end of the round and “ch 1” before the first sc of the next round. What do you think? Do you like the newer motif better or do you not see any difference between them? I know, it’s very minimal, but if I had to rip them out anyway, I might as well make the change!

Let’s hope I stay on schedule and get this done in time for the contest (if I don’t get distracted with something else along the way)!

Happy crocheting,

Susan