Crochet Toys for Babies and Toddlers

I hope everyone is having a wonderful summer and enjoying lots of sun, relaxation and a vacation or two! A few weeks ago, my husband, middle son, daughter-in-law, granddaughter and I went up to Idaho to visit my dad and step-mom. We stayed at Zion National Park on the way up and at Yellowstone National Park on the way back. It was lots of fun, we saw some beautiful animals and we made some great memories! One of the memories was more scary than fun, though! The 2 propane tanks came off our travel trailer while driving to Yellowstone! One of the tanks disappeared completely and the other was hanging on, scraping on the road and sparking! We feel very blessed that God had His angels keeping us safe. This could have had disastrous results, since propane can explode!


Now that I’m back from vacation, I’m busy getting ready for the CGOA Conference, where I’ll be teaching 5 (or 6) crochet classes next week! Since one of the teachers can’t make it to the conference, several of the teachers with sold out classes were asked if they could teach another class to fill in for her classes, which were cancelled. I said I’d be happy to teach my sold out Invisible Repairs class a 2nd time, so I’m scheduled to teach it both Friday morning and Friday afternoon at the conference! If you weren’t able to get into the Friday morning class, you are in luck! Now you can sign up at the conference for the Friday afternoon class (a repeat of the morning class) and pay the pre-registration price there! If you’re planning to take my new Friday afternoon class, please check out the homework for the class and get it done before the afternoon class. You can find the homework here. I hope to see you at the conference!!!


I thought I’d take a little break from printing class handouts today and share some fun baby toys to crochet with you! I crocheted 3 baby toys in the past few months for my granddaughter, Rubekah (Ruru for short)! They were all lots of fun to make.
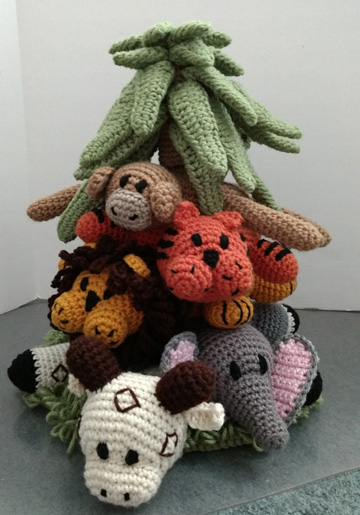
 

Into the Jungle


First is the “Into the Jungle” stacking animal rings designed by Cindy Cseh. The pattern was available in the April, June and August 2013 issues of Crochet World magazine. I knew when I saw the pattern that I wanted to make it for a grandchild some day! So earlier this year, I set out to make it. It’s not for the faint of heart, but it’s a lot of fun to see my granddaughter play with it! You can see more photos of this fun project on my Ravelry project page here.


Amish Puzzle Ball and my granddaughter


The 2nd is the Amish Puzzle Ball by Dedri Uys. This pattern is so much fun to make and put together! This is a FREE pattern that you can find here. I LOVE this pattern and I’ll probably make several more, just for fun!
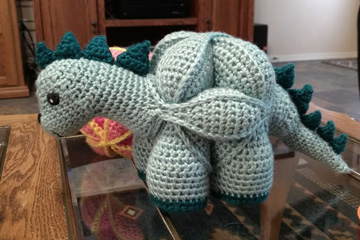
 

Crochet Dinosaur Puzzle Ball


The 3rd project that I crocheted for my granddaughter is also by Dedri Uys. It is the Crochet Dinosaur Puzzle that is in Dedri’s book, Amamani Puzzle Balls, by Annie’s. This project was somewhere between the complexity of the Amish Puzzle Ball and the Into the Jungle stacking animals! The pattern was great and easy to follow! You can see all of the patterns in this book here.


I hope you’ve enjoyed seeing these 3 crochet baby toy projects and are inspired to crochet some toys for your favorite baby very soon!


Happy crocheting,

Susan


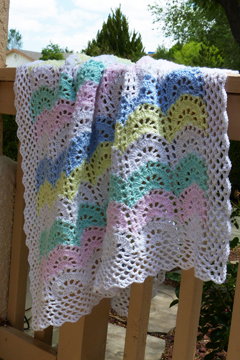
Mom’s Favorite Baby Blanket Pattern Available

crochet baby blanket
Mom’s Favorite Baby Blanket


For the past 2-3 months, I’ve been working very hard to fine-tune the pattern for my newest crochet pattern, “Mom’s Favorite Baby Blanket”! I enlisted the help of 4 pattern testers on Ravelry and their input was “invaluable”!!! They made great suggestions for improving the pattern and making it easier to understand, since the construction for this blanket is not your “typical” crochet construction!


If you’ve read anything about this pattern, you’ll know that I designed this pattern last year after my mom passed away. She had a favorite baby blanket pattern that she liked to make for new babies in the family. It was from a kit and was worked in 7 strips with 19 motifs in each strip. That made for a lot of seaming and tons of ends to weave in (7 x 19 x 2 = 266 + 2 ends for the edging = 268 ends)! Who wants to weave in that many ends, let alone sew strips together with 19 separate ends (so the colors would match)? Not me!


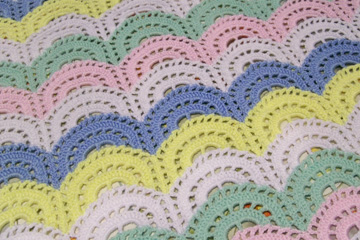
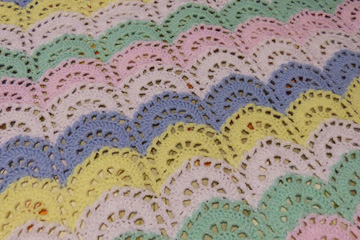
Last year, the month before my mom passed away, she started one of her favorite baby blankets for my granddaughter. The month after my mom passed away, I finished it for my mom and gave it to my son and daughter-in-law in May, right before my granddaughter was born in June! They know how special this baby blanket is to me and they cherish it (at least I hope they do!). I certainly didn’t enjoy all the time spent sewing the strips together and weaving in the ends! And I know a lot of other crocheters don’t like either of these things, either! So I set out to design a baby blanket that looked like my mom’s favorite baby blanket, but without all the seaming and weaving in ends. And I think I hit the nail on the head! Here are close up photos of my mom’s baby blanket and mine:


Mom’s Original Baby Blanket


My Redesigned Baby Blanket


My redesigned baby blanket still contains 7 motifs in each section and 19 sections of motifs. However, there are NO strips to crochet and NO seaming to be done in this new baby blanket design! There are only 38 ends + 2 ends for the edging (= 40 ends total) to weave in on the whole baby blanket! This is a HUGE improvement from 268 ends, don’t you think? That’s an 85% savings on ends, which translates to lots of time saved and leaves more time for crocheting! Yea!!!


I used DK/light worsted weight yarn for my baby blanket, which came out to be 34” wide x 48” high. Yours can be made wider and/or higher, if desired, by following the instructions for resizing the blanket. The blanket is made with basic crochet stitches: chains, double crochets, single crochets and slip stitches.


The pattern includes 2 symbol crochet charts: one for right-handed and one for left-handed crocheters. The instructions include the appropriate differences for right-handed and left-handed crocheters, as well.


With the help and suggestions from my pattern testers, I decided to take lots of step-by-step photos for this pattern, to help YOU be successful! I think we all know how time-consuming photos can be, but I really think they were needed in this pattern, since the construction is different than most other crochet patterns!


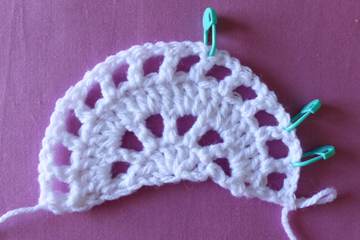
In the pattern, there are 43 step-by-step photos for the main part of the blanket, 46 step-by-step photos for the edging and 10 more photos showing how many chain spaces you should have in various places in the pattern (so you’ll know if you’ve made a mistake and you can fix it before it gets worse)! That’s a total of 99 photos to help teach various aspects of the pattern in a visual manner and to be able to know if you’re working it correctly or not! Here’s a sample of one of the photos in the pattern:


Sample of a Step-by-Step photo in the pattern


With all of the additional photos, the pattern is now 30 pages long! I know what you’re thinking! That’s too many pages to print out without using a ton of ink/toner! But have no fear! Included in every purchase is a shorter 14-page pattern with a few photos, the full written pattern and the symbol crochet charts, but without the additional step-by-step photos for printing. Both pdfs (the 30-page version and the 14-page version) are available for download with purchase of the pattern.


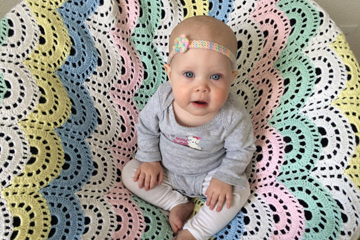
I’m releasing this pattern on a special day to me. Today, April 20, would have been the 29th birthday of my daughter in heaven. Her name was Rebecca. She was born with a closed pulmonary valve in her heart and lived a little less than 6 months. My granddaughter, who my mom starting crocheting her favorite baby blanket for last year before she joined my daughter in heaven, is named Rubekah, in honor of my daughter in heaven. Here’s a photo of my granddaughter and the blanket my mom started, in case you haven’t seen the dozens of photos of her that I’ve shared on social media already:


Rubekah on the Baby Blanket that my Mom started and I finished


Because of the extensive step-by-step tutorial photos in this pattern, I’m charging a little bit more than my usual patterns. I think you’ll find this small increase is well worth it in terms of you being successful in crocheting this baby blanket for your favorite little one! This pattern would also work equally as well for a full-size afghan! Just follow the instructions for changing the size of the blanket and use whatever weight yarn and an appropriate size crochet hook you desire!


The pattern with the 2 pdfs, including 2 symbol crochet charts, complete written instructions and over 90 step-by-step photos, is available for purchase for just $6.95 here.


If you’re ever stuck on something in the pattern for any reason, please send me a message on my website, on Ravelry (I’m “crochetarchitect” on Ravelry) or through Facebook and ask for help. I’m happy to help anyone with questions about my patterns!


If you purchase this pattern and make the baby blanket, I’d love to know what you think about the additional photos! And I’d love to see photos of your finished baby blankets from this pattern, as well!


I hope you’ve enjoyed this look at my “Mom’s Favorite Baby Blanket” pattern.


Happy crocheting,

Susan


Adorable Baby Sun Hat

baby sun hats

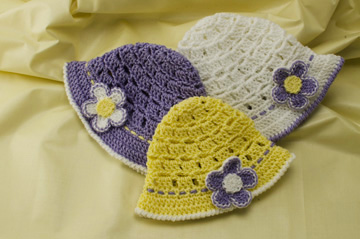
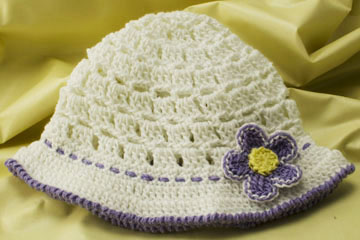
Do you have an adorable baby in your life who gets the sun in her/his eyes outside? Then I have the perfect solution for you! Our Baby Sun Hat crochet pattern is perfect for keeping the sun off baby’s face and head, while looking great at the same time!

Baby Sun Hat
Newborn, Baby and Toddlers sizes

This pattern comes in 3 sizes for newborns, babies and toddlers. The circumference of the hat (made with the same gauge as the pattern) is 12” for newborns, 14” for babies and 16” for toddlers. Our hats were made with Red Heart Baby Sheen, which is a fine/sport weight acrylic yarn, but you can make your sun hats with any comparable yarn you choose.

Small Size of Baby Sun Hat
Newborn size


Medium Size of Baby Sun Hat
Baby sizeLarge Size of Baby Sun HatToddler size

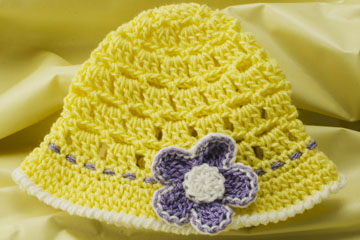
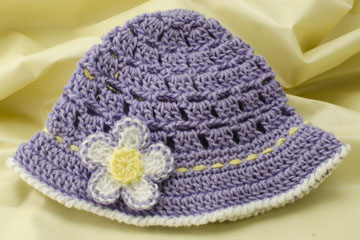
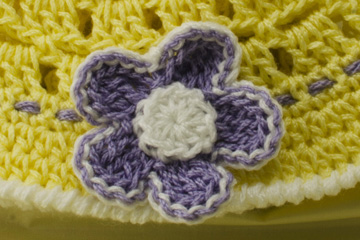
The instructions for each size of this sun hat are written separately, making it easier to follow the instructions for the size you’re going to make. The hat includes an optional crocheted flower and a contrasting bottom edging (worked in reverse single crochet).

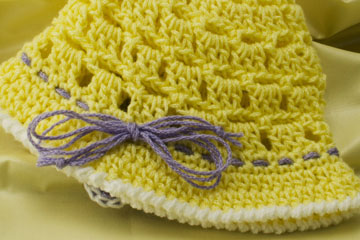
The woven strands of yarn at the top of the brim make the hat slightly adjustable. Just untie the bow. Loosen or tighten the strands a little and tie the bow again to give your baby a custom hat fit! So as your baby grows so will the hat.

Flower on Baby Sun Hat


Trim on Baby Sun Hat

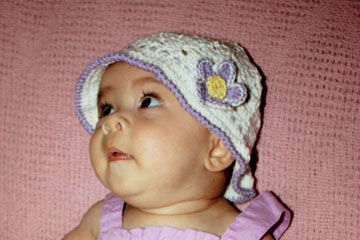
Here’s a photo of the sun hat on Ivy, my sister-in-law’s granddaughter last year:

Baby Sun Hat on Ivy
Baby Sun Hat on Ivy

Doesn’t Ivy look adorable in this sun hat? I think so!

The pattern is available for purchase on our “Patterns” page for just $4.95.

I hope you thoroughly enjoy this new crochet pattern. If you have any questions about it, please don’t hesitate to ask. I’m happy to help!

Happy crocheting,

Susan