Teaching at the 2018 CGOA Conference

CGOA Conference

Now that I’m back from teaching at the Interweave YarnFest in Loveland, CO last week, I thought I’d write a blog post about my next teaching engagement this year.


I’ll be teaching at the CGOA (Crochet Guild of America) Conference in Portland, Oregon from July 25-28, 2018! I always LOVE teaching at the CGOA Conference! There are so many lovely, friendly crocheters at the conference, both professionals and hobbyists! It’s great to meet new crocheters there and spend time with so many of the crocheters who attend every year (or almost every year)! I’ve been attending the CGOA Conference since 2003 and teaching there since 2009. It’s so much fun! If you’ve never attended, I hope this will be the year you make the decision to go and meet like-minded crocheters who all speak the same language of crochet!


To read all about the conference, check out the CGOA website here. To register for the conference, go to this page.


Here are the classes I’ll be teaching in July:


Wed, July 25, 6 – 9 pm:

SIMPLIFYING SYMBOL CROCHET

About the class:

Symbol crochet diagrams are much easier to read and follow than written crochet patterns. Once you learn symbol crochet, you’ll wonder what you ever did without it! You’ll learn what each symbol means, thus enabling you to read and understand symbol crochet diagrams from any pattern, even foreign crochet patterns with international crochet symbols! You’ll even try out your symbol crochet knowledge by making 2 small projects from symbol crochet charts in class. This class includes instructions on starting/working in the round and making motifs, both techniques found in the CGOA Masters of Advanced Crochet Stitches and Techniques program.
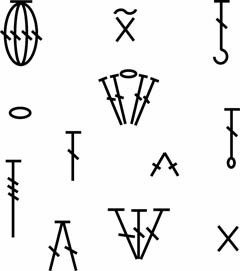
 

Simplifying Symbol Crochet class


Thur, July 26, 9 am – 12 pm:

MULTIPLE MOTIFS

About the class:

Do you love the look of projects made with crochet motifs, but don’t enjoy weaving in all the ends? Then this is the perfect technique for you! With this method of crocheting motifs continuously, instead of separately, the number of ends is decreased dramatically, saving you time and energy! In this class, we’ll make continuous crochet motifs worked in joined rows. You’ll learn how to follow the necessary symbol crochet charts with this motif method. Once you’ve learned how to make many motifs using one continuous strand of yarn or thread, you’ll feel confident tackling any continuous crochet motif pattern.
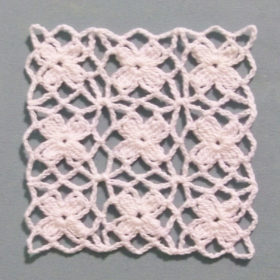
 

Multiple Motifs class


Fri, July 27, 9 am – 12 pm:

INVISIBLE REPAIRS

About the class:

Do you have a crochet project that’s gotten cut, torn, chewed, etc? Do you want to learn how to professionally repair it? Then this is the class for you! In this class, you’ll learn how to repair all sorts of crochet projects, replacing the “bad” stitches and making your repairs “invisible”! You’ll learn how to replace stitches and chain spaces in the middle of a row, locking the top of the new stitches to the bottom strands of the stitches in the row above. Your work will look as good as new! Learn how to bring your damaged crochet projects back to life again! This technique also works great to “invisibly” seam the first and last rows in a crochet cowl!
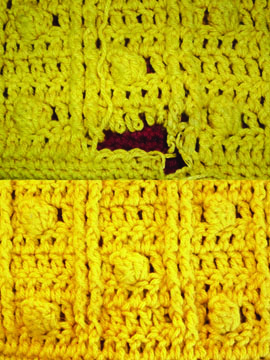
 

Invisible Repairs class


Fri, July 27, 2 – 5 pm:

BEGINNING BRUGES LACE CROCHET

About the class:

Bruges Lace Crochet mimics the decorative Bruges Lace made with bobbins in Bruges, Belgium. Bruges Lace Crochet is a fabulous technique and is easy to learn. In this beginning class, we’ll make several different styles of Bruges Lace, as well as curve the lace and join it to make circles, squares and triangles. Once you’ve learned the basics of Bruges Lace Crochet, you’ll be ready to tackle more complex Bruges Lace patterns. If you’re not a “threadie”, don’t fret! Bruges Lace isn’t just for thread crochet. It can be done with yarn, as well. Come and learn to make basic Bruges Lace in crochet.
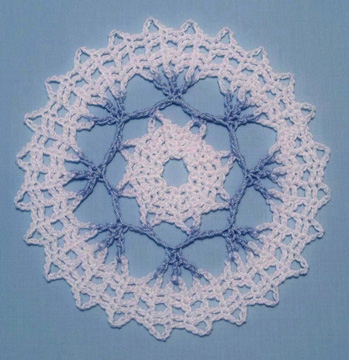
 

Beginning Bruges Lace Crochet class


Sat, July 28, 2 – 5 pm:

Intermediate Bruges Lace Crochet

We’ll take Bruges Lace Crochet to the next level in this intermediate class. You’ll learn many more variations of the lace itself, more joining techniques, and how to curve the lace over itself for more variety. We’ll explore more intricate Bruges Lace designs and you’ll learn how to achieve them in this class. Prerequisite: Beginning Bruges Lace Crochet class should be taken before taking this intermediate class (or have knowledge of the Bruges Lace technique).
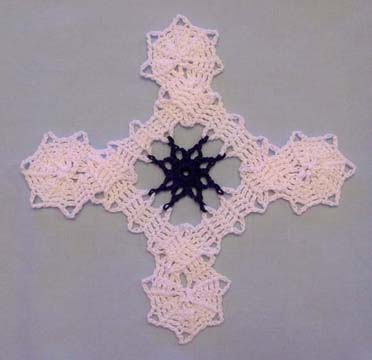
 

Intermediate Bruges Lace Crochet class


I’m excited to be teaching these classes. Last year, my Invisible Repairs class sold out and I was able to add a 2nd class for this “technique” of repairing crochet projects invisibly. This year, I’m teaching Multiple Motifs for the first time (this is also called Continuous Crochet Motifs, which I’ve blogged about before)! I always enjoy teaching Bruges Lace Crochet and Symbol Crochet!


I hope you’ll consider attending the conference. If you attend for the first time because of reading my blog, please stop me at the conference and let me know (or leave a comment below)!


If you’ve attended the CGOA Conference before, what do you enjoy most about the conference?


See you in Portland in July!


Happy crocheting,

Susan


Continuous Crochet Motifs (Part 2) and New Crochet Pattern

In May of last year, I blogged about the Continuous Crochet Motifs method of making and joining motifs so there are less ends to weave in at the end of the project. This is a really cool crochet technique/method. You can read that blog post here and see photos of the Japanese crochet book that I bought to learn this crochet technique. Since then, I purchased Kristin Omdahl’s book called “Seamless Crochet”. I haven’t had the time to make anything from that book, but it’s definitely the same method of joining motifs as in the Japanese book I bought.

At the time I wrote that blog post, I was designing a shawl to enter in the CGOA Design Contest, made in the Continuous Crochet Motifs method. Well, I got the shawl finished and entered it in the contest. Unfortunately, I didn’t win anything for this shawl and I think the reason was that I didn’t have an edging on it (I couldn’t think of an edging that would work at that time). A few months ago, I added an edging to the shawl and it really finishes off the shawl nicely. I tried many different color combinations for the edging, but in the end, I decided to make the edging all black so it wouldn’t take away from the beauty and design of the shawl itself. I’ll be publishing this shawl design when the pattern is ready (it still needs a little tweaking first!). Here’s a photo of the shawl before I added the edging:

Byzantine Shawl in 2012 CGOA Design Contest

I still need to take some new photos of this shawl with the edging added before I can publish this pattern. But I promise to get to it sometime soon! I’ve veered from my original topic of the Continuous Crochet Motifs method a little, so I’ll get back to that topic now.

After designing the shawl, I designed a scarf using the same Continuous Crochet Motifs method and some of the same motifs as the shawl. It’s called the “Byzantine Scarf”. I just finished up the pattern and added it for sale here yesterday. You can see the pattern here.


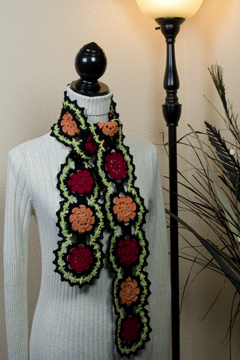
Here’s a photo of the Byzantine Scarf:

Byzantine Scarf
Byzantine Scarf

What I love about this scarf (besides the colors) is the Continuous Crochet Motifs method I used for the 2 rounds of black, which are joining the red and orange motifs together (not the final round of black, but the black rounds inside the lime green rounds). With this method of crocheting, I was able to work these 2 rounds of black edging around each of the 15 motifs in the scarf in one long pass! And that means I only had 2 tails of black yarn to weave in on these 2 rounds.

Okay, I realize that the rest of this scarf has plenty of tails to weave in. But by using the Continuous Crochet Motifs method of joining the motifs, I saved myself 28 whole tails to weave in (30 – 2 = 28). I don’t know anyone who enjoys weaving in the tails/ends on their crochet work and I don’t, either. But it’s a necessary evil and has to be done! I love using color in my crochet designs, so I’ve been known to weave in hundreds of tails on larger projects with multiple colors. I just bite the bullet and do it!

I realize that not everyone wants to learn a new crochet technique, so I included the instructions for joining the motifs in the traditional motif joining method (joining with a sl st to the adjacent motif). But when you join the motifs this way (in the traditional method), you’ll have 30 tails of black to weave in on these 2 rounds of motif edging (2 tails for each of the 15 motifs in the scarf). So to me, it’s a “no brainer” to use the Continuous Crochet Motifs method to join the motifs together! But I’m an adventurous crocheter and I love to learn new techniques. I’m sure that not everyone is as adventurous as me, so that’s why I included the instructions for joining the motifs the other way.

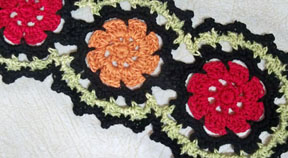
Here’s a close up photo of the scarf:

Byzantine Scarf close up

Now you can see the 2 rounds of black around the red and orange motifs better. I also made a symbol crochet chart for each method of joining the motifs (these charts are included in the pattern). So if you like symbol crochet charts and learning new crochet techniques, you might want to give this scarf pattern a try!

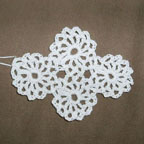
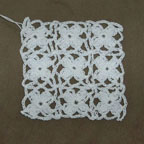
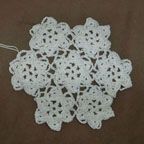
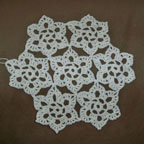
Here are photos of 4 swatches of motifs that I made from the Japanese Continuous Crochet Motifs book a few years ago (right after I got the book in the mail!):

Motif swatch #2
Motif swatch #2
Motif swatch #6
Motif swatch #6


Motif swatch #36
Motif swatch #36
Motif swatch #43
Motif swatch #43

These swatches haven’t been blocked, so they don’t look as good as they could. What I want you to notice is the number of tails and the number of motifs in each of these swatches (I didn’t weave in any tails at all on them). Each swatch has 4, 7 or 9 motifs that are joined. But since I used the Continuous Crochet Motifs method to make these swatches of motifs, there are only 2 tails that would need to be woven in (if I were going to make these into projects). There would normally be 2 tails to weave in “per motif”! This is a HUGE time saver!!! It means I can spend more time crocheting and less time weaving in ends! Of course, it only works when you’re using the same color of yarn/thread for each motif (or to join each motif). But it’s not a bad thing to use 1 color of thread/yarn. It’s a design decision! And the savings in time it takes to weave in the tails is HUGE!

I hope you’ve enjoyed this closer look into the Continuous Crochet Motifs method and will come back again soon.

Happy crocheting,

Susan

Continuous Crochet Motifs

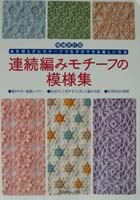
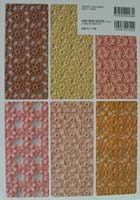
I bought a crochet book last year called “Continuous Crochet Motifs” from a Japanese seller on EBay. I paid $40.00 for this book, which is a lot to spend on a crochet book, but it is very much worth the money! It is a Japanese book with only Japanese writing inside, but it has crochet symbol charts throughout the book, which I can easily read. I quickly digested the book and learned this technique, in which motifs are made continuously, meaning there are less ends to weave in at the end (hooray!!!). You have to follow the symbol charts very carefully, but the book also includes a front section where there are both symbol charts and step-by-step photos of the motif being worked. It’s a great book and if you’re at all intrigued by this crochet technique/method, you might want to buy one of these books someday. Kristin Omdahl has a book with this technique called “Seamless Crochet”. I don’t have her book, yet, but I plan to get it soon. Here is what the Japanese Continuous Crochet Motifs book looks like on the front and back covers:

front cover of book
back cover of book

Keep in mind that when you’re using only one color, there are only 2 ends to weave in “total” because you work the motifs continuously, no matter how many motifs you make, and only fasten off at the end! That’s a huge improvement on weaving in 2 ends for every motif made!


A few weeks ago, I decided to use this technique to design something for the CGOA Design Contest, which will be held at the CGOA Conference next month in Manchester, NH. The deadline to enter something into the contest is June 6. I need to get it done within the next few weeks so there will be time for my entry to travel to the destination where it needs to be by June 6!

Luster Sheen colors

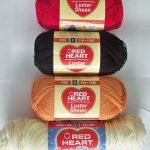
I can’t tell you what I’m designing, but I can tell you that I’m using some Red Heart Luster Sheen yarn to make it. I love this yarn! It is a size 2 (fine weight) yarn and is 100% acrylic. It provides beautiful drape and the colors are really nice. Here’s a photo of the yarn I’m using:

You can see that the bottom skein is different from the rest. That’s because Coats & Clark is repackaging this yarn into 3.5oz/100g skeins (they used to be 4oz/125g). There are 307 yards/281 meters in the new skeins, so it still goes a long way! The bottom color is from my stash and the top 3 colors are new. I’m using their cherry red, black, orange and vanilla colors. Since I’m using so many colors in this design, there will be plenty of ends to weave in. But I will only have 2 ends to weave in of the color that I’m using continuously around the other motifs to join them all together. That will almost CUT IN HALF the number of ends to weave in! Now that’s a big improvement in my book!!!

I used Luster Sheen yarn in my Two-Way Rose Pin design (you can see it on Ravelry here: http://www.ravelry.com/patterns/library/two-way-rose-pin). I also used Luster Sheen yarn when I crocheted a filet afghan to be photographed in the book “Afghans for All Reasons & All Seasons”, which Jean Leinhauser and Rita Weiss produced for Leisure Arts. Here’s a link to a photo of that afghan on Amazon (it’s on the front cover in the top right-hand corner): http://www.amazon.com/Afghans-Reasons-Seasons-Leisure-Arts/dp/160140672X#reader_160140672X.

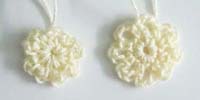
wrong and right motif

I noticed last week that I made one of the motifs wrong for this project, so I had to rip out a whole row of work! Ugh!!! I had only worked the second round and left out the first round in each of the motifs (that’s what happens when I’m preoccupied and don’t look at the symbol chart I made!). Here’s how the motif looks (the left motif is missing round 1, but the right motif has both rounds worked):


joined and unjoined round 1

I took a few minutes to decide if it was going to make a difference before ripping it out, though. I decided it would look better if I made the motifs the right way (the chain spaces are more pronounced in the correct motif on the right), so the extra time would make a difference in the look of the project. When I ripped it out, I decided to engineer the motif a little differently. Originally, I had designed it with 2 rounds and both rounds were joined at the end. However, I tried it with not joining the first round and only joining the second round. Here is a photo of the difference between the two joinings:

The motif on the left is joined at the end of both rounds. The motif on the right is joined at the end of the second round only. I see less bulk in the joining area, so that’s what I’m going to do for these motifs. The new motif goes straight from the last sc in the first round to the first sc in the second round without the usual “sl st” at the end of the round and “ch 1” before the first sc of the next round. What do you think? Do you like the newer motif better or do you not see any difference between them? I know, it’s very minimal, but if I had to rip them out anyway, I might as well make the change!

Let’s hope I stay on schedule and get this done in time for the contest (if I don’t get distracted with something else along the way)!

Happy crocheting,

Susan