Mind Blowing Tapestry Thermal Stitch Technique!

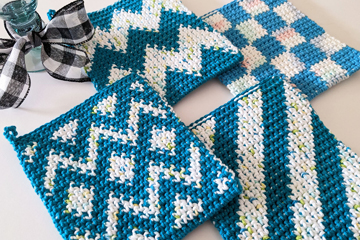
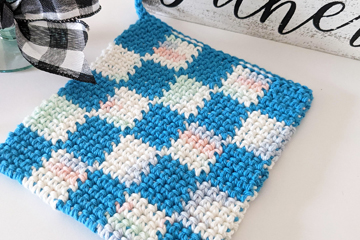
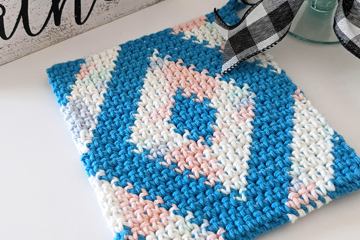
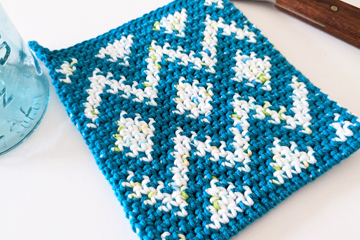
Tapestry Thermal Stitch Potholders

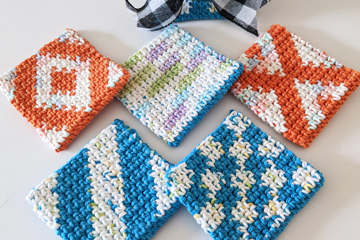
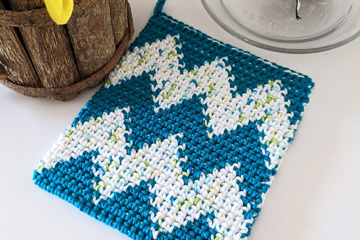
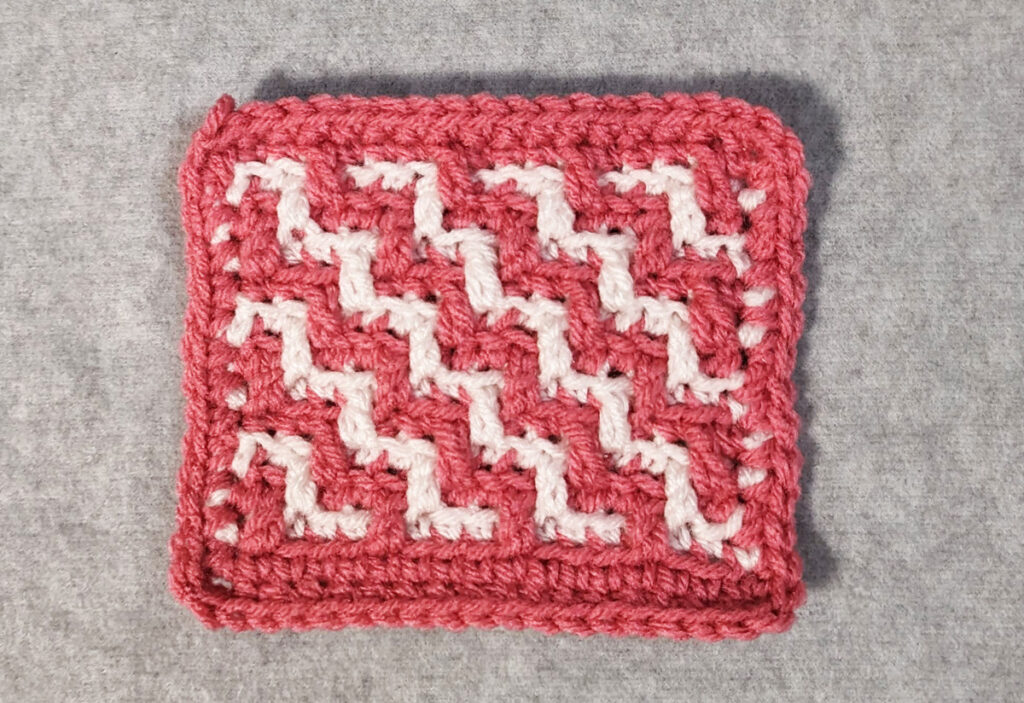
I’ve enjoyed doing the Thermal Stitch for quite a few years now. Last month, Heather (on my YouTube channel) asked if I could make a video showing how to do a potholder in Thermal Stitch with 2 different colored sides. I thought about it and I’ve been playing around with it for a few weeks now. However, I took it to another level! I’m happy to introduce the marriage of Tapestry Crochet with the Thermal Stitch in my new YouTube video and my new Tapestry Thermal Stitch Potholders and Coasters patterns!

Tapestry Thermal Stitch Potholder
Tapestry Thermal Stitch Coasters

If you’ve ever done the Thermal Stitch, you know that you insert your hook in a completely different place than in regular crochet. And if you’ve ever done Tapestry Crochet, you know that you carry the unused yarn under the stitches you’re working and change colors across the row, as needed. So when I thought about doing color changes in Thermal Stitch, I immediately thought about using the Tapestry Crochet technique! And it works!!!

Tapestry Thermal Stitch Potholder

If you’d like to take your Thermal Stitch projects to the next level with designs on one or both sides, watch my YouTube video.

And if you’d like to give Tapestry Thermal Stitch a try, check out my new Tapestry Thermal Stitch Potholders and Coasters patterns on the crochet patterns page.

Happy crocheting to you!

Susan

Changing Colors in Thermal Stitch

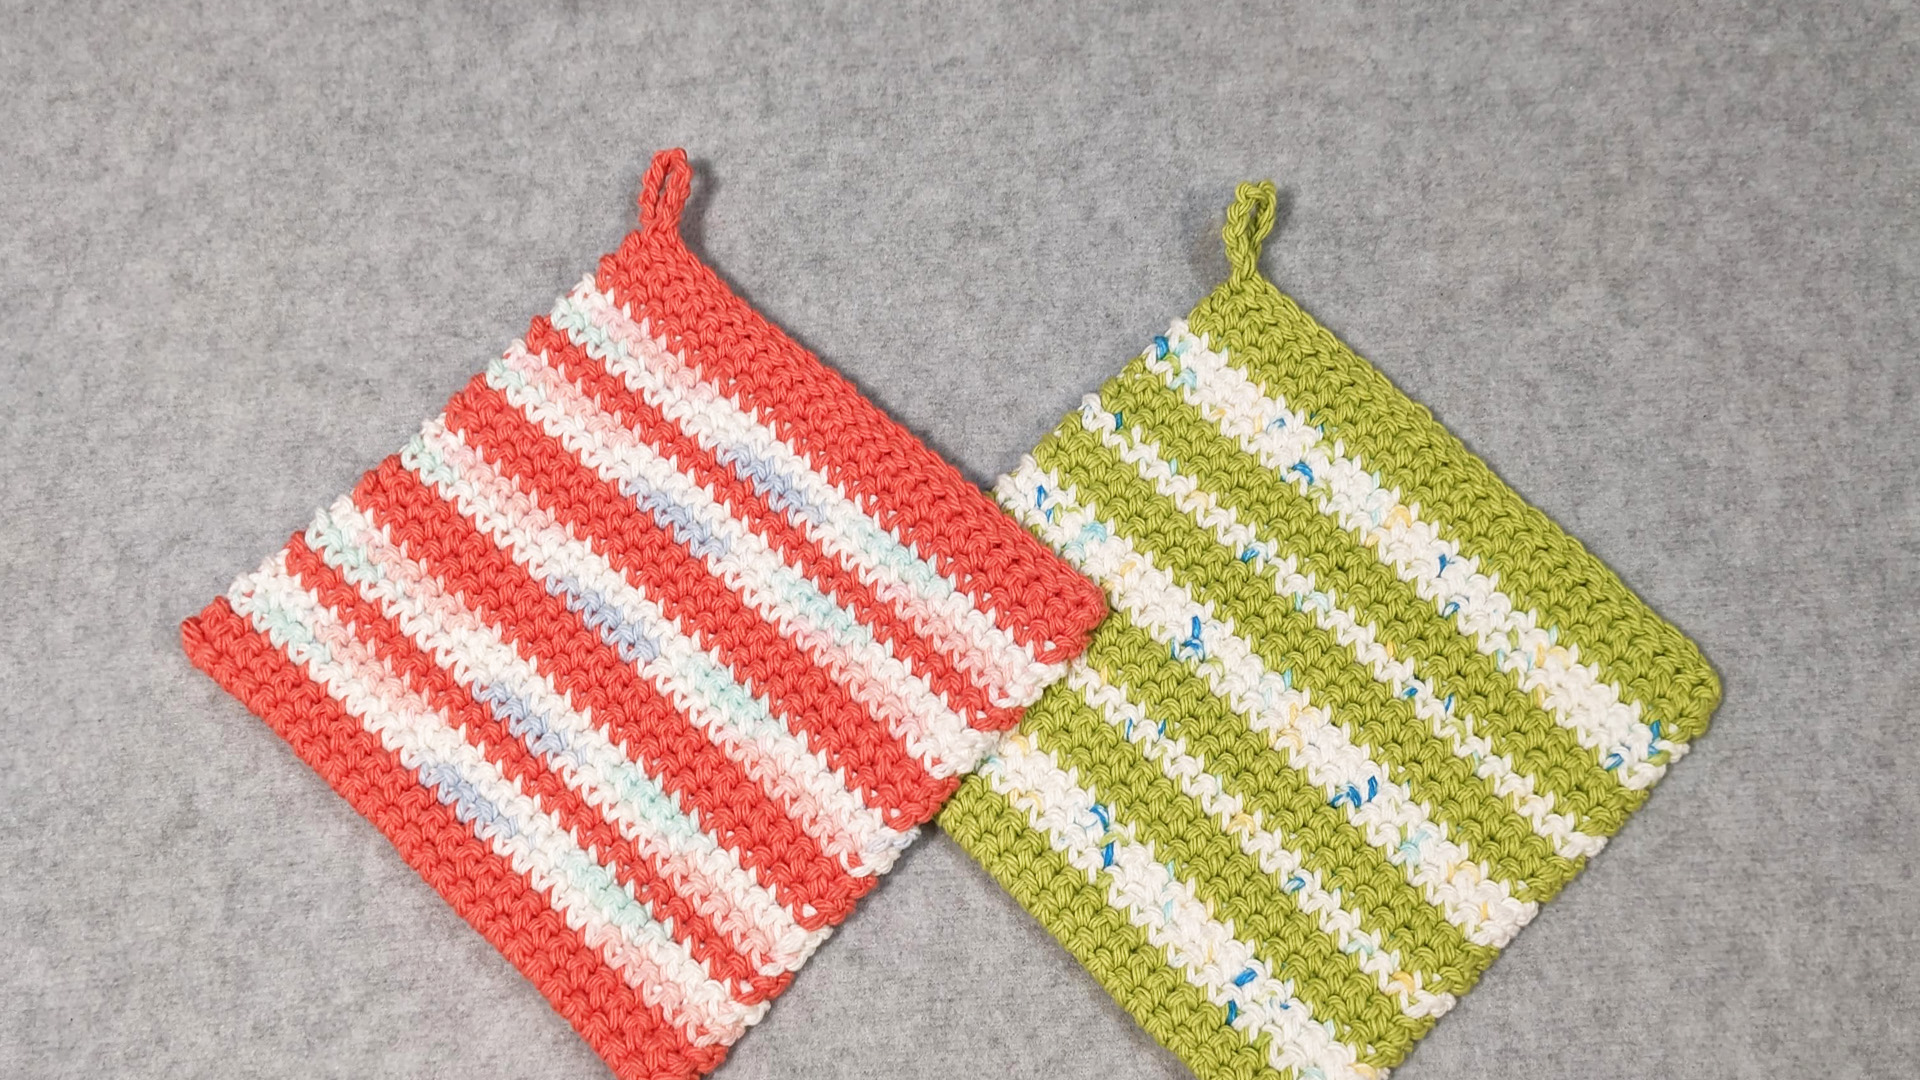
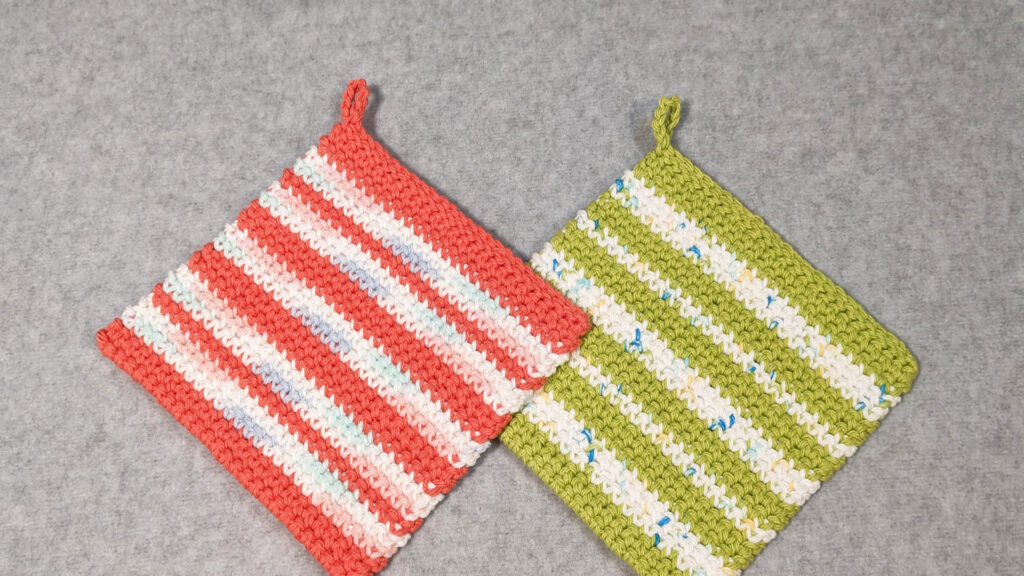
Thermal Stitch color changes

If you enjoy crocheting projects with the Thermal Stitch, but don’t know how to change colors and carry them up the side edge when you use more than one color in your project, check out my new YouTube video demonstrating how to do this. It’s much better to carry the yarn up the edge until you need that color again instead of cutting the yarn each time you change colors and weaving in all of the extra ends (and who likes weaving in ends anyway?).

If you haven’t learned the Thermal Stitch yet, check out my YouTube video to learn this fabulous technique, which is great for making thick potholders.

Happy crocheting to you now and always!

Susan

New Mosaic Crochet Technique!

Back and Forth Overlay Mosaic Crochet

I’ve been playing around with Mosaic Crochet for many years and I have a new technique for Overlay Mosaic Crochet to share with you. I call it “Back and Forth Overlay Mosaic Crochet”! With this technique, you’ll ELIMINATE virtually ALL of the ends that you usually have with traditional Overlay Mosaic Crochet, since you start and stop every row, working all the rows on the right side of the project.

In my new “Back and Forth” technique, you’ll ONLY have a FEW ends to weave in (instead of dozens or hundreds) because you’ll work half of the rows from the wrong side, but you’ll work the stitches “backwards” on these rows, creating ALL “right-side” stitches in your project! If this sounds intriguing to you, check out my new YouTube video where I demonstrate my new “Back and Forth Overlay Mosaic Crochet” technique!

If you watched my video on doing Tapestry Crochet with some backwards rows, this may look familiar to you. But Tapestry Crochet and Mosaic Crochet are done totally different. Tapestry Crochet involves working color changes across the row and carrying the non-working yarn under your stitches. Mosaic Crochet is done with the same color yarn across the whole row (there are no color changes made in Mosaic Crochet).

There are a few other crochet designers who have done something similar to my “Back and Forth Overlay Mosaic Crochet” technique, but they don’t work “backwards” stitches, so you see the “wrong side” of those stitches on the “right side” of the project.

So what are backwards stitches? They involve inserting your hook into the stitch “backwards” and yarning over “backwards” to form your stitches. You also hold the yarn in front of your work instead of behind it. If you’ve never seen this done before, check out my new video demonstrating this backwards technique!

I hope you’ll give crocheting “backwards” a try, and specifically my new technique for “Back and Forth Overlay Mosaic Crochet”! Please let me know what you think about this technique. I know it’s not going to be for everyone (just like my COM technique for Overlay Mosaic Crochet isn’t for everyone). But I know there will be some of you who will say “Wow! Why have I never seen or thought of this before? This is a game-changer!!!”

Happy “Back and Forth Overlay Mosaic Crocheting” to you!

Susan

Hobby Lobby Yarn Haul!

yarn haul clearance

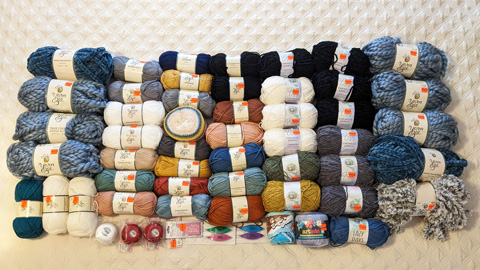
Who doesn’t LOVE a good sale? Have you ever gone to Hobby Lobby when they’re having their annual yarn clearance? This is the first year I’ve gotten a LOT of yarn at Hobby Lobby! You certainly can’t beat the prices! I got 55 items (mostly yarn, with a bit of crochet thread and tatting supplies) for only $97.80 (before tax), $106.78 (with tax)! Wow! That’s a lot of yarn and a HUGE savings! In fact, it was a total of 74.4% off! If I had paid full price for these, I would have spent $381.95 (before sales tax)! That’s a savings of $284.15 (before sales tax)!!! Wow! That’s amazing!!!

2023 Hobby Lobby Yarn Haul!

I went to Hobby Lobby on 2 separate days, 6 days apart. The first day I went, I found some clearance yarn, but not as much as I’d seen on some recent YouTube videos I had watched. The second day I went, I found a LOT more clearance yarns! I’m so glad that I went back the next week to find more yarn on clearance (mostly 75% off)!

Most of the yarn I bought was the Hobby Lobby brand, Yarn Bee. I also got some Lion Brand, Lily and Lizbeth brands (Lizbeth is a crochet/tatting thread). I found some tatting shuttles and a picot gauge (for tatting) also on clearance!

I had so much fun buying this yarn at these great, low prices that I made a YouTube video showing all the yarns and colors that I got. I shared the regular prices and the clearance prices that I paid. I also shared the yarn weights, ounces, yards and fiber content of each yarn. While I have a good idea what I’ll crochet (or knit) with each of these yarns, I’m not quite sure what to make from some of them (I’ve never used some of them before). You can watch the YouTube video here to see all the wonderful yarns I got on clearance!

Have you been to a good yarn sale lately? What did you purchase and how much did you save?

Until next time!

Happy crocheting!

Susan

Crocheting for Easter

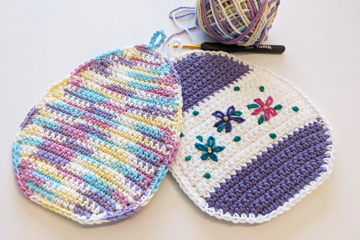
Easter Egg crochet potholder

Do you enjoy crocheting decorations for holidays? I certainly do! I’ve got a brand new crochet pattern for an Easter Egg Potholder for you. This potholder is worked with 2 pieces: a front and a back for double thickness. Using worsted (#4) weight cotton yarn, it’ll keep your hands and fingers protected when removing a hot dish from the oven.

Easter Egg crochet potholder
Easter Egg Potholder

The potholder is worked in rows of single crochet with increases and decreases, as necessary, to form the egg shape. After crocheting 2 egg-shaped pieces, one round of single crochet is added to join the pieces together and to form the hanging loop at the top.

This pattern is easy enough for a beginner crocheter, since basic stitches are used. I’ve done a YouTube video for this pattern, as well, so you can follow along with me in the video and learn to read a crochet pattern while making this cute, useful potholder!

Here’s the pattern page to snag a copy of this pattern at a great price! Then you can crochet some potholders for your Easter celebration (with about 27 days until Easter!) or give one/some to a friend or family member.

I hope you enjoy this pattern and all your crochet projects!


Until next time!

Susan Lowman

The Crochet Architect

New Mosaic Crochet Scarf Pattern and YouTube Video

Mosaic Crochet Scarf

It’s been quite a while since I’ve done a blog post, a new pattern or a new YouTube video. I’ve been quite busy with everyday life, including my oldest son’s wedding in August, my mother-in-law’s funeral, also in August (she was 93, so she lived a long, full life) and the birth of 2 grandsons in November. We were there for both births, in Indiana and California, from our middle and youngest sons (and their wonderful wives, of course!). Whew! I feel like I’m finally getting caught up from lots of travel and lots of fun with the grandkids (we now have 4 of them)!!!

My husband and I have been working on a new YouTube video to teach the Spike SC Mosaic Crochet technique. We’ve had all kinds of hiccups with the camera and microphones! It’s been quite “challenging” to say the least! But we persevered and have a video that demonstrates how to work this Mosaic Crochet technique, using “less yarn” than the Overlay Mosaic Crochet technique and making your project “reversible” (because the Spike SC is worked “around” the stitches, not “in front” of them).

To learn the Spike SC Mosaic Crochet technique, watch the YouTube video here.


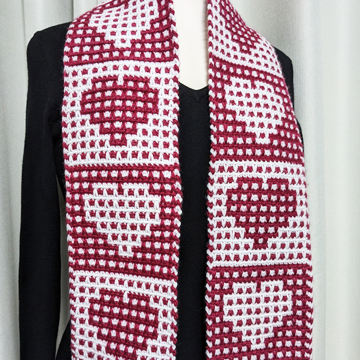
Mosaic Crochet Scarf
Hearts in Love Mosaic Scarf

To help you practice the Spike SC Mosaic Crochet technique, you can download the free swatch chart here and follow along with me in the video, practicing this Mosaic Crochet technique. Once you’ve mastered this fabulous technique, check out my new “Hearts in Love Mosaic Scarf” pattern, which uses the Spike SC Mosaic Crochet technique. This scarf is completely reversible, using 2 contrasting colors of DK or worsted weight yarn. This scarf is nice and dense, making it great for keeping your neck warm outside in the wintertime! And with all the hearts in the scarf, it’s a great project to make for Valentine’s Day for yourself or anyone you love!

If you have any questions about this Spike SC Mosaic Crochet video or this Spike SC Mosaic Crochet pattern, please don’t hesitate to ask. And if you have any comments about this crochet technique, I’d love to hear them.

Happy Mosaic Crocheting to you,

Susan

Crocheting Backwards (on purpose!)

Have you ever wondered if there are more techniques to learn in crochet? Have you ever wished you could work all right-side rows, but you’re not ambidextrous? I’m not, either. But I learned to crochet backwards so all the rows in my crochet project will be right-side rows.

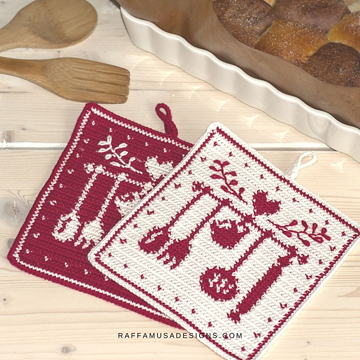
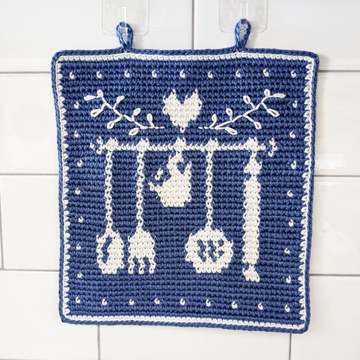
You may ask “Why would you want to do that?” Well, I found a fabulous Tapestry Crochet potholder pattern by Raffamusa that I wanted to crochet, but I didn’t want the jagged edges of the design on the potholder. I wanted more smooth design edges. So I decided to give backwards crocheting a try! And I’m so glad I did! Here’s a look at this fabulous potholder pattern:

Nana’s Kitchen Potholder pattern by Raffamusa Designs

Here’s the potholder I crocheted with this fabulous pattern:

My Nana’s Kitchen Potholder

What do you think? Isn’t this a wonderful crochet pattern? You can find this pattern on her website here or in her Ravelry store here.

Anyway, I decided to do a YouTube video demonstrating how to crochet backwards. You can watch that video here.

I think this is a great technique to have in our crochet tool boxes! I wasn’t great at crocheting backwards when I started. But I improved with practice! And boy, did I ever get lots of practice! The first time I crocheted this potholder, I ran out of the blue yarn just 11 stitches before the end of the edging! I wasn’t that happy with my tension in the project because it got tighter towards the top and was loose at the bottom. Since I had this yarn in my stash for probably 10 years or so and couldn’t find the same dye lot, let alone the same color, I decided I’d better frog the whole thing and start again. But I decided to use 1 size smaller crochet hook the 2nd time so I wouldn’t run out of yarn. And it worked! I’m very happy with the finished potholder and I think it looks fabulous on the tile in my kitchen!

What are your thoughts on crocheting backwards? Have you seen it done before? Do you regularly crochet backwards because that’s how you learned? Did you know there was a difference in how you can insert your crochet hook (from front to back or from back to front)?


Please leave me a comment and let me know your thoughts on crocheting backwards.

Until next time!

Susan

Crocheted Bridal Hair Comb

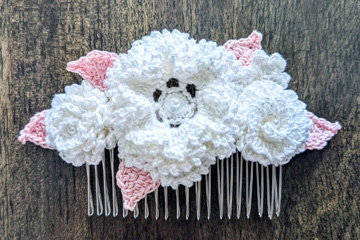
Bridal Hair Comb for DIL-to-be

My oldest son is getting married next month (woohoo!) and I wanted to help out with the wedding somehow. My soon-to-be daughter-in-law said she wants to wear a hair comb for the wedding and she texted me a photo of an expensive one to see. I asked if she’d like to have me crochet one for her and she said “yes”! So I did some online research and found more photos of hair combs that are really pretty for inspiration. She didn’t want one that was too big; just something pretty and functional. So I started looking for good flower patterns to use (instead of taking extra time to design my own flowers).

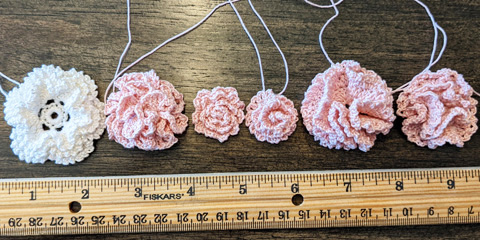
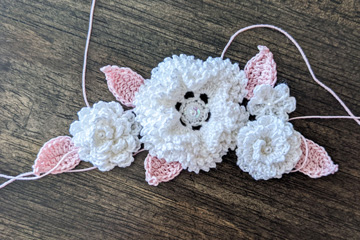
My future DIL picked out the crochet thread colors she’d like me to use from my stash of crochet threads. Since I didn’t have a lot of the iridescent white thread for the flowers, I tried out some of the flower patterns with the pink thread first to see how I liked them. Once she and I picked out which ones we liked best, I crocheted the top 4 flowers in white with size 10 crochet thread and a 1.5mm hook. Then I crocheted some pink leaves to go around the edges.

Possible flowers for hair comb

These are the flower patterns I used:

Large flower in center: 6-petal frilled rose with 3 layers from page 14 in the book, “The Go-To Book for Irish Crochet Motifs” by Kathryn White (book #871388), published by Annie’s. A digital edition of this book is available (as of this blog post) here.

Medium flower on left:

free pattern for Fluffy Carnation Crochet Flower from https://daisycottagedesigns.net/freeflowercrochetpattern/

Medium flower on right:

free pattern for Carnation from Yarnspirations https://www.yarnspirations.com/aunt-lydias-bridal-nosegay/ALC0101-025078M.html

Tiny flower on right:

free pattern from https://persialou.com/make-crochet-flower-hair-combs/ This is a great blog post about how she made a hair comb. She used hot glue to attach her flowers and leaves to the hair comb, but I sewed mine in place. Either way works!

I decided the iridescent flowers could use a little more bling, so I sewed a small iridescent white pearl bead to the center of each one (I don’t know what size I used because I just found some in my stash of beads!). Since the large flower in the center had a somewhat large hole in the middle, I used a little larger bead and added an iridescent sequin behind the bead to keep it in place. I used a package of iridescent sequins from my local Hobby Lobby. They worked out great!

Here is a quick, free pattern for the leaves that I made up off the top of my head:

Ch 8, sc in 2nd ch from hook, *hdc in next ch, 2 dc in next ch, dc in next ch, 2 dc in next ch, hdc in next ch, sc in last ch**, ch 2, sl st in top of last sc made to form a picot; working in free lps on other side of ch, sc in first ch (in same ch as last sc); rep from * to **; join with sl st in first sc. Finish off, leaving a long tail for sewing.


For the hair comb, I bought a package of 5 silver hair combs from Amazon. Here’s a link to the hair combs I purchased. Some of the teeth were a little bent when I got them in the mail, but they straightened out nicely with very little effort! And the metal is a really nice quality! They also come in black or gold, if you’d prefer another color/finish. These hair combs have 20 teeth. They also come in other sizes, with more or less teeth, which would make them narrower or wider. The one I used with 20 teeth is about 3” wide.

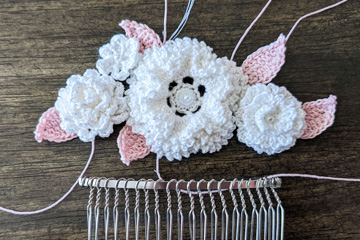
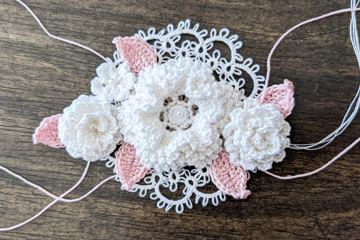
After I crocheted all the flowers and leaves, I arranged them a few times until my future DIL and I liked the arrangement. I also tried an arrangement with a tatted piece that I had made quite a while ago. It’s too frilly for my future DIL, but you might consider something like this for your hair comb.

Trial flower arrangement

Another trial flower arrangement
Trial flower arrangement with tatted lace

Then I had to decide how I wanted to attach the flowers and leaves to the hair comb. I decided to buy an ebook of Irish Crochet patterns by Kathryn White from Annie’s (on sale), since there was a hair comb in that ebook (book #871106E). Here’s a link for that ebook.

While the hair comb in this book is lovely, it wasn’t what the bride wanted (I LOVE the doily in this book, so I’ll be crocheting that in the near future). However, I liked the way Kathryn attached the flowers and leaf sprays to her hair comb in the book, so that’s what I did. Basically, you wrap some extra crochet thread around the top of the hair comb between the teeth of the hair comb and secure the ends of the thread. That gives you a nice base of thread to attach the flowers and leaves to the hair comb. I actually sewed the leaves to the back of the flowers (not to the hair comb) after I sewed the flowers in place on the hair comb.

What do you think? Do you like this hair comb? What would you do differently?

I can’t wait to see my future DIL wearing this hair comb in her upcoming wedding to my son!

Happy crocheting,

Susan

Thermal Stitch Potholder Video

I’ve been wanting to film a video to teach the Thermal Stitch for quite a while and I finally have one for you. But first, a little background on how/where I learned this fabulous stitch.

I first learned the Thermal Stitch from Darla Fanton at the 2008 CGOA Conference in Manchester, NH. Darla is a great teacher and I learned a lot in that class. However, life got in the way and I never pursued doing anything with the Thermal Stitch.

Fast forward to around 2015 when a good crochet friend named Jackie showed me the thick potholder she had made from a free pattern on the internet. She shared the link to the free pattern (by Heather Tucker of Stitchery Project) and taught me the stitch (which I had somehow forgotten from Darla’s class). I was immediately hooked! I’ve been making Thermal Stitch Potholders ever since! They’re so easy to make once you learn where to insert your hook! It’s just simple rows of single crochet, which is pretty mindless (sometimes I need a mindless project!).

potholder
Thermal Stitch Potholder

One thing I changed in Heather’s pattern was the placement of the hanging loop. Heather makes her hanging loop at the bottom of the potholder. I decided I wanted to make my hanging loop at the top of the potholder. The reason for this is sometimes I want to make a hot pad without a hanging loop instead of a potholder. So I just don’t work the hanging loop at all. Since I changed Heather’s free pattern, I decided to type up my version of this potholder as a free pattern. You can download my free pattern here.

You can find Heather’s free potholder pattern (named “The Best Crocheted Potholder”) here.

The potholders are economical to make. When I see a sale on worsted weight cotton yarn, I stock up on it. This makes the potholders about $1 each, which I love!

These potholders make great gifts! I’ve given them to friends and family for Christmas and/or birthdays, as “thank you” gifts, and as wedding (or bridal shower) gifts, as well.

To learn the Thermal Stitch, watch my new YouTube video here.

I hope you enjoy crocheting these potholders as much as I do!

Happy Thermal Stitch crocheting,

Susan

Crochet Sightings and Vacation Highlights

crochet bedspread

Last month, my husband and I took a 3 ½ week trip in our motorhome from Arizona to Texas and back. We met up with some good friends, Dan and Janine, for the first part of the trip and had a great time! We did lots of sightseeing, ate delicious food, did some walking and hiking, met up with an old friend, Kathy, and her husband, Randy, did lots of driving (my husband drives the motorhome while I crochet) and all around had a great experience! I even saw some crochet and other crafts on our trip!

Since we moved into our new home 7 months ago, we’ve been doing a lot of renovations (painting, decorating, etc). It was nice to get away from all the work, relax and see God’s creation!

Here are the places we went and things we saw on our trip:

Benson, AZ – saw/toured Kartchner Caverns

Tombstone, AZ and Bisbee, AZ – walked around and saw the sights

Kerrville & Fredericksburg, TX – did some sightseeing and shopping

San Antonio, TX – did some sightseeing, went on a riverboat/gondola ride, toured the Alamo, ate dinner at the Chart House restaurant that revolves at the top of Tower of the Americas (a tower that was built for the 1968 World’s Fair)

Houston, TX – went to the Space Center Houston and Houston Center for Contemporary Craft

Galveston, TX – toured the Bishop’s Palace (the 1892 Josephine and Walter Gresham house)

McDade, TX – stayed at Hummers Homestead Alpacas (a Harvest Host)

Austin, TX and Moody, TX – stayed and hiked at 2 Texas State Parks

Waco, TX – went to Mammoth National Monument and Magnolia Farms (Chip & Joanna Gaines from Fixer Upper HGTV show fame have a very nice area in Waco for shopping, relaxing, eating and playing outdoor games)

Here are the crochet/crafting highlights of the trip:

These are some cute crochet baskets that were at Magnolia Farms in Waco, TX. I think the same baskets that are on display on shelves are hung on the walls. Basically, from what I can see, the baskets are crocheted with rope and include a handle. I think they’re very cute (and stylish)! I’ve got some yarn that might work really well to crochet some of these beauties for my new home!!!

Crocheted rope baskets at Magnolia Farms in Waco, TX
More crocheted rope baskets at Magnolia Farms
Crochet rope baskets on wall at Magnolia Farms


This was a display at the Houston Center for Contemporary Craft. This was a free museum filled with crafts that are made from reclaimed/recycled materials. The display was called “Nothing Goes to Waste”. I thought this display, made with film slides, was absolutely awesome! So creative!!!

Art made from film slides!
Close up of slides used in artistic piece at museum
Close up of mannequin covered in film slides at museum

Here’s a hyperbolic crochet piece on display at that museum. I’ve never done hyperbolic crochet before, but this is what it says online about it: “To crochet a hyperbolic structure you simply increase stitches at a regular rate in every row. The more often you increase, the more quickly the model will ruffle up.”

Hyperbolic crochet piece at museum

This piece of art was crocheted with 8mm film strips! Wow!

Art piece crocheted from 8mm film strips

Close up of film strips used to crochet piece at museum

Here are a crochet popcorn bedspread and a quilted bedspread that I saw in the Bishop’s Palace in Galveston, TX, along with the beds that these bedspreads were on.

Crocheted bedspread at Bishop’s Palace in Galveston, TX

Bed with crocheted bedspread

Quilted bedspread at Bishop’s Palace

Bed with quilted bedspread

Here is a crochet piece that was on the ornate dresser at the Bishop’s Palace, along with the dresser that it was on.

Crochet piece at Bishop’s Palace
Ornate dresser with crochet piece

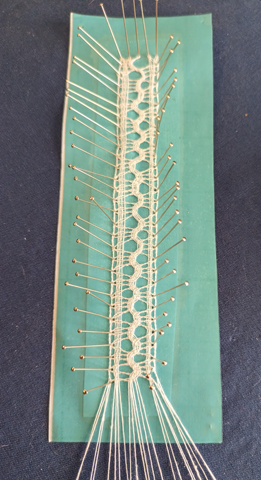
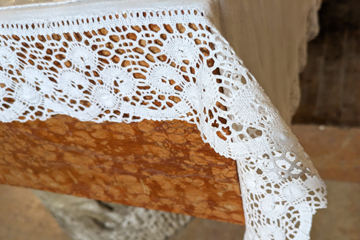
This is an embroidered piece with a bobbin lace edging that I saw at the Bishop’s Palace.

Embroidery and bobbin lace piece
Close up of bobbin lace edging

And this is the front of the Bishop’s Palace. It was an awesome place with lots of wood in the interior and lots of history!

Bishop’s Palace in Galveston, TX

These are some of the alpacas that we saw at Hummers Homestead Alpacas in McDade, TX.

Alpacas at Hummers Homestead Alpacas in McDade, TX

And this was the inside of their alpaca products store. They’re part of Harvest Hosts, which is a membership group where you reserve a spot at a participating host to stay in your RV for a night or two. In exchange for a spot to stay, you patronize their establishment. I bought 5 ounces of alpaca roving to spin on my Electric Eel Wheel spinning wheel (once I work up the courage to spin alpaca fiber)!

Hummers Homestead Alpacas store

Alpaca roving from Hummers Homestead Alpacas
to spin into yarn

Here are a few other highlights (not craft-related):

While we were in Texas, we saw lots of bluebonnets blooming. They were everywhere and we loved them! In case you didn’t know, they’re the Texas state flower (and snakes like to hide in them).

Bluebonnets in field in Texas

This forest photo was taken at McKinney Falls State Park. This was our favorite place where we stayed during the whole trip!

Hiking at McKinney Falls State Park in Austin, TX

It was really nice to get away, but it’s nice to be back home, too!

I hope you enjoyed this look at our trip and all the crafts I saw while on our trip.

Happy crocheting, crafting and traveling,

Susan