© 2014 Susan Lowman (http://www.TheCrochetArchitect.com)
Before I explain how to work in the back bump of the foundation chain, I’d like to identify the parts of the foundation chain. There are 3 parts of the foundation chain: the top (or back) loop, the bottom (or front) loop and the back bump (or back bar or back hump). The top and bottom loops are located on the front of the foundation chain and the back bump is located on the back of the foundation chain. Here they are identified for you:


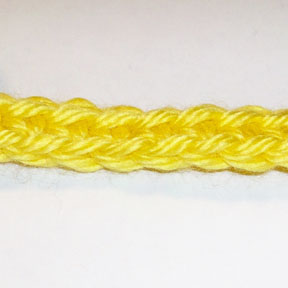
You probably work into the top loop only or in the top loop and the back bump on most of your projects. But have you ever thought about working into the back bump only? The biggest reason to work into the back bump only is to have a nice bottom edge to your crochet project. This nice bottom edge looks like the top edge of typical crochet stitches. This is how the bottom edge looks when you work into the back bump:
Isn’t that nice and neat? I think so. Another reason to work into the back bump is to add a little strength to the bottom edge of the project. Working into the back bump naturally draws in the foundation chain a little more than traditional methods of working into the foundation chain (such as working in the top loop only or working in the top loop and back bump). If you don’t want the bottom edge to get too tight when working in the back bump, simply work the foundation chain a little looser or with a larger crochet hook than the rest of the project.
Let me show you how to work into the back bump of the foundation chain. First, you’ll need to turn the foundation chain to the back, or wrong side. You’ll see a bunch of dashed lines running down the middle of the chain. These are the back bumps. Depending on which crochet stitch you’re working, you’ll need to skip one or more chains to work your first stitch. So for the sake of simplicity, I’ll work single crochet stitches here.
Insert your crochet hook from bottom to top under the back bump of the 2nd chain from the hook (see photo above) and draw up a loop. Yarn over and draw through both loops on the hook. This completes the first single crochet in the back bump (the single crochet is worked the same as always; it’s just worked in a different place in the foundation chain). Here’s a photo of the first single crochet worked in the back bump:
To finish the first row, *insert your crochet hook from bottom to top under the back bump of the next chain and draw up a loop. Yarn over and draw through both loops on the hook*. Repeat from * to * in each chain to work a single crochet in the back bump of each chain across. You should have one less single crochet than the number of foundation chains you made.
So there you have it! Wasn’t that easy? Working in the back bump of the foundation chains is something that is done in several of my crochet patterns here on The Crochet Architect website (for instance, in my “Easy Rainbow Scarf”, “Stained Glass Snowflake Scarf” and “Bear Mitts” patterns). And it’s done in lots of other crochet patterns, too.
I hope you’ve enjoyed this tutorial and learning how to work in the back bump of foundation chains!
Happy crocheting,
Susan
Submit your review | |


